An exciting new program!

Sponsor a book for a child or a classroom!

We have an exciting new program to announce! You now have the option to sponsor a book (or 2 books… or more!) for a child or a teacher who is stocking their classroom library!

How it started

This all started when I received an email from a new fan. Her teacher had won The Spyders: Slither Me Timbers as a prize and this girl, who is in grade 4, loved it. Her favourite character was Thaddeus because he’s brave and she had really good questions about the story and where my ideas came from. She said her teacher was going to buy the second book so she could read it. This was really the most awesome thing – I love connecting with readers, and I remember when I was that same age and attended the Young Author’s Conference in Kamloops (I think it was the first one they offered). I wrote to a poet and she wrote back to me and I was completely hooked.

I told a friend about this and she was so blown away that she offered to sponsor the book so the teacher didn’t have to pay out of her own pocket. Teachers pay for a lot of things out of their own pockets, and many build their own library collections or classroom sets of books for their kids to read – all with their own money. And many kids can’t afford books of their own.

This started the ball rolling and my brain has been buzzing with this ever since!

Edited:

I later connected with the teacher through Twitter and she told me more of the story. This student is a bit of a reluctant reader and the teacher was trying to connect her to a book that would capture her interest. The teacher had won a copy of The Spyders: Slither Me Timbers I had given to CBC Radio and was going to read it to her class. But when this little girl said she liked spiders, the teacher took a chance this might be the book. That young reader persevered with the help of her teacher. She was so proud of herself when she finished it.

When I heard this I was pretty much sobbing on the floor. Teachers, librarians, and parents often struggle with finding that right book to light up a child’s interest in reading. I can’t express how honoured I am that my book was that book for one child. That is the ultimate praise and I will treasure this interaction always.

Friends… with no kids!

I have had many friends who are thrilled about my author journey and tell me how proud they are of what I’ve done. They always say they wish they could support me more, but they don’t have any kids in their lives who are the right ages. Well, here is an easy way people can support literacy, teachers, readers, and authors even if they don’t have kids who are the right age.

How it works

I’m so pleased to be starting the Book Sponsorship program. I’m hoping to eventually include other independent authors and expand the program, but for now, it will be about getting books about spiders into the hands of readers and teachers.

If you want to sponsor a book (or two books) to go to a child or a teacher, you just need to click on the sponsorship links in my store. These funds will be held in a reserve and when I have teachers or children who are nominated or sign up for this program, I will deliver the book(s) you paid for directly to them. Each book will have a sticker on the inside cover indicating that it was part of the sponsorship program, and I will sign the copies. With their permission, I’ll share their stories in a special newsletter.

For children, I am being very careful that lower income children aren’t singled out or identified in any way and their privacy will be protected. But the books aren’t just for lower income children, they are also for avid readers, and kids who really like to write stories. Putting a book in the hands of a child opens a world of possibility for them and sometimes connecting with an author can be a life changing event like it was for me.

This program isn’t a charitable program and no tax receipt will be issued as I’m not a non-profit organization. But you will enjoy the knowledge that because of you, more children have access to books. And really, isn’t that just the best thing ever!

Let’s get books in the hands of kids and teachers!

How to help:

If you would like to sponsor a book (or 2), the link is here.

If you want to send a copy to a teacher or book outside of the Kamloops area please send an email to Vandelsopress@gmail.com first!

If you know an elementary school teacher or student you would like to nominate for this program please fill out the form here!

A book nook nerd in the making

What is a book nook?

A book nook is a piece of miniature art, designed as a scene, that sits on a bookshelf between books.

My first booknook.

How did I start?

When COVID hit and I was at home I became restless and decided I needed to completely redo my office and it had to happen NOW! I’m calling the projects I completed between April and August COVID projects. Surfing Youtube and Pinterest I started to see book nooks appear. Most of the early ones were Harry Potter themed but there were others and I was fascinated. Over the summer book nooks have shown up all over the place.

I went from loving book nooks but not knowing where to start, to being determined to create one after I saw a Youtube video by Rachel Maksy. She normally does amazing cosplay videos but she made a book nook in one video this spring and her easy way of making the structure convinced me I could do it. You can watch her video here.

I started watching other videos from people like Ara at Bently House Minis and Black Magic Crafts (I’m not a DnD player or gamer but this guy’s techniques and enthusiasm are awesome!) and fell back in love with miniatures, something I was interested in when I was a kid. I’m now completely obsessed.

Maybe it’s the filmmaker in me who loves models, or the little girl that read The Borrowers and the Littles when I was growing up that made miniatures so interesting. I’m not interested in doll houses because of the dolls – it’s about the stories.

The thing I like about this kind of activity is that it lets me give parts of my brain a rest. When I’m writing I often run into stumbling blocks and problems I can’t see easy solutions for. I need to have activities like knitting, or making crafts, or cooking risotto, or even long solo cross country ski days that put the problem on the back burner in my brain. It’s hard to describe but by taking the pressure off solving the problem the problem often solves itself. This has been a very good project for me during COVID when I was trying to do a lot of writing.

Materials

Keepsake box from Michaels
  • Keepsake Box (make sure it isn’t too tall to fit on your shelf. It will be sitting on it’s back edge with the opening flap on the top)
  • popsicle sticks
  • stain (I used Unicorn Spit because I had a lot available)
  • white glue
  • super glue
  • mod podge
  • craft paint (I used acrylics and basic craft paints from Michaels)
  • watercolour paper and paints
  • Tim Holtz Distress Ink pads
  • sharpie markers
  • clear vinyl (this is the type that they make table coverings out of. I had some on hand.)
  • foam core (sheets from Michaels)
  • craft foam (thick and thin – Dollar Store)
  • scrapbook paper
  • polymer clay
  • metal gear-shaped findings
  • steampunk charms
  • wooden skewers
  • Rustoleum clear coat
  • aluminum foil
  • silicone sealant
  • lights from Evan Designs

Construction

Structure

I started by cutting the end off the keepsake box for the opening. I saved the piece of cardboard I cut away as I used it later to make the back wall. This was a great idea from Rachel Maksy’s Youtube video (see link above). I didn’t want to build a box and this suggestion made all the difference. I roughly marked out where things would go on each wall with a sharpie. I ended up changing it pretty drastically by the end but it was good to have a reference to start out with.

Floor

The first thing I worked on was the floor. I used popsicle sticks and since I was already working on a massive bookshelf project using Unicorn Spit stain and I loved the bright colours, I used some for the floorboards. I laid out the bare floorboards first to make sure they fit. I lightly sanded the popsicle sticks and dampened them down first so the stain would penetrate. Once they were dry I varnished them with a Rustoleum clear coat that I also had on hand due to my large bookshelf project.

I laid the floor boards down in a pattern that looked pretty realistic with the colours and seamed spread out. I posted pictures on Instagram and some people thought it was a real floor.

Stairwell

Next I started working on the stairwell. I started with the arch and made it out of foam core. I discovered I hate cutting foam core. I then discovered the softer foam that is 5mm thick and I like that a lot more. The archway didn’t need to be that strong because it would be stuck to the wall and didn’t need to support anything.

For the backing of the archway I used a piece of cardstock and a layer of the thinner dollar store craft foam over top. I cut thin slices to make a ledge and I dug into the surface with a pen to make the stones and the stairs. I used wadded up aluminum foil to make the texture on the foam. I made sure to go really deep with the pen so the ridges between the stones and along the stairs were really deep.

I glued them together and realized I didn’t like the edge of the original foam core so I cut thin strips of foam to make some edging and trim around the arch.

To finish the arch I painted the stone using the stone painting tutorial by Black Magic Craft on Youtube. It’s perfect and I use it all the time now. I used Sharpie markers to colour the wood on the stairs and then I added a bit of watered down black paint as a wash to age them.

Originally I planned to have a wall sconce with a light in the archway but I realized at the end that it wasn’t deep enough and the light would have stuck out too much.

Fireplace

Next I made the fireplace in basically the same way I made the arch, minus the foam core. The fireplace is all thick and thin crafting foam. I didn’t need the top to be really strong because it was going to be glued to the wall. Later I added banners with fabric, wooden skewers, steampunk charms, and some of the gears I included in other places as well that I painted and folded in half to make brackets.

Bookshelves

The bookshelves were made with thick and thin foam as well. The outside panels are made from the thick foam and the shelves and back are made from the thin. I painted them and aged them to look like wood. The books are made from individually cut pieces of the thick foam and coloured on 3 sides using sharpie markers. Then I used a combination of fine gold or black pen to make the lines across the back. I coloured the tops of the books (where the pages would be) with beige or gold marker.

Furniture and Accessories

Most of the furniture, lighting fixtures, and accessories were made from polymer clay and the metal gears I got from Michaels in the jewellery department.

The chair is polymer clay with a metal gear piece in the back and fabric for the seat cover. The logs for the fireplace are polymer clay and the metal piece the are resting on is made from pieces from the gear package. The books that go on the desk and the fireplace mantle are polymer clay and paint. The desk is a combination of wood for the top, with legs made of foam, wood skewer, and metal gears. The crow, typewriter and inkwell are polymer clay.

The light sconces on the wall are polymer clay with translucent polymer clay on the top (with a bit of orange ink added in) and gear parts. The main chandelier on top is made of curved gear pieces.

Stained glass window and view

The back window is made from vinyl from a fabric store. I tried other types of acetate but the colours looked dull on them. I used bright sharpie markers for the stained glass. The back wall is the cardboard I cut from the side of the box that I trimmed down a bit. I covered it with foam so I could have the same stone look as the arch and fireplace and added trim and a chair rail before using the stone painting technique again. Behind the window is a watercolour painting that is just layers of orange and yellow to try and make it look like a sunset.

Ceiling

I wanted the ceiling to look a bit like it was falling apart and boards could be seen where the plaster had fallen. I used the thin foam again and dug really deeply with a pen to make deep wide grooves between the boards and roughed it up a lot with a ball of aluminum foil. I gave it a light wash of watered down brown paint. I then got watercolour paper and added layers of colour by taking distress ink pads and just rubbing the whole pad along the paper. I then dampened the paper and ripped it so it would show the edges. and then aged it. When I showed the picture on Instagram a friend told me she was sorry to see I was having ceiling troubles. Best compliment ever!

Walls

The walls were textured scrapbook paper that I rubbed a yellowish distress inkpad all over. I wanted them to look like old plaster.

Lights

The lights were the best and most frustrating part of this project and I learned a lot from them. The staff at Evan Designs are fantastic and really helpful. I’ll be making a large order soon for future projects. The nightmare with the US Postal Service this summer was very frustrating and it took a long time for the lights to arrive but that wasn’t the shipper’s fault – it was the shut down of the postal service.

The wires on the lights are very fine so the most important thing I learned is to not keep messing with them and connecting and disconnecting them. Just stop!

Now that I’ve had the lights I would do things a little differently. First, if I was going to keep opening the side of the box to work on it after placing the lights I wouldn’t put lights on that wall that moves. I had one wall sconce and the fireplace on that wall and they kept becoming disconnected, which kind of makes sense of you think ahead! If you do put lights on that wall then put them all on one switch.

The flickering lights all need to be on the same switch (or with other flickering lights – they can’t go with steady lights). When you put them all on one switch they will flicker at the same time. I would put them on a few different switches. It will mean a bit more expense and more switches to deal with but the randomness of the flickering would be nice.

I had 3 nano sized lights in the chandelier and they worked well. The fireplace that flickers is awesome and I used a small amount of silicone sealant to make a blob (spread it on a piece of glass and let it dry, then peel off) that wraps around them so they aren’t so bright.

I used a white nano sized light and an orange pico sized light in the back to light the sunset. I will be replacing the orange with a bigger one as it wasn’t big enough.

I started with only 2 switches in the back. One for the flickering lights and one for the steady lights. Doing it again I would use more switches based on the location of the light in the scene so I wasn’t stretching wires all over the place. The wires are glued in beneath the ceiling and behind the wallpaper and I’ll be removing them soon to redo my lighting.

The finished project

I love my book nook! There are definitely things I would do differently, like plan the lighting better and alter the layout a bit so it was easier to see things at the back, but overall I love it! I painted the outside black with acrylic paint that is already scratching off so I would definitely use some sort of scrapbook paper or something to cover the pattern on the box.

I made a front piece to glue on so the edges would be really clean and I would probably plan that better on the next one as well. I would also put some thought into scale early on. I realized I hadn’t done that and needed to know how big to make things so I created a little stick person who was the right size for this room, but it’s definitely not a standard scale. You can see my little stick person in some of the photos.

Other than that I am really pleased with my first attempt!

Next one(s) – the addiction continues

I have already started my next nook and I have plans for a couple of others as well as a condo building of rooms that pay homage to different murder mystery authors. I’m hoping this isn’t an indication of how long COVID is going to last.

When I’m Dead – the journey

When Im Dead-Vesta-Final-2pages2 (002) cover art sm 2

March 29, 2018

It’s been a little over a year since I was sick at home with bronchitis and decided I had to write a short film script about something that happened with a late friend and her mother. Fast forward through a year of grieving the loss of my friend and trying to get this project off the ground.

It was a year of applying for a huge grant and in the process meeting a great producer who I hope to work with in the future, discovering how to write a grant application and a budget, casting two amazing people to star in my film, and being devastated and then actually relieved that we didn’t get the grant. The timing wasn’t write and it would have been rushed.

At the time I wondered if we would get to make the film at all. I was at the end of something and I didn’t know what direction to take. I didn’t know where the new beginning started. This was September, 2017. I had no idea how, or if, I would be able to make this 10 minute film that meant so much to me.

Then, on a cool fall day I went for a bike ride to the lookout at Stake Lake. This was where I wanted to shoot part of the film. It’s a place with memories, and a place where I can think. After long rolling hills and a steep uphill, the lookout is on a plateau with short winding tree-lined trails that open up to an expansive view of Lac Le Jeune. The winding trail is flat with tight curves that weave through the trees. As I was riding I heard a loud whooshing noise beside me. I looked, and there was a Great Grey Owl flying at my eye level right next to me. I was astounded. It pulled ahead of me and soared along the path, gracefully tilting as it took the curves. Then, still stunned, I heard another noise behind me and there was a second owl. It followed the path of the first ahead of me and then both rose up to the tree tops and disappeared. Right then I arrived at the lookout and the view hit me. Owls have always been special to me. I don’t see them very often, but when I do I pay attention. To me they always seem to indicate big moments that make me pay attention to where I am. Standing at the lookout I knew I would make this project happen. I had no idea how, but I knew I had to do it.

In October I went to the Vancouver International Film Festival’s Totally Indie Day and heard Jonas Woost, (Executive Producer, Telus Original Content & STORYHIVE), talk about the Storyhive granting program and I suddenly realized I might qualify for a Storyhive grant. They are a lot of work, (making pitch videos, etc.) and the grant amount of $10,000 wouldn’t be enough to completely make the film, but it would go a long way.

20180311_144301

Nolan McAllister and Amanda Cowell helping me with the pitch video.

After that I talked to local people who might be interested in helping me make the film. Suddenly I have a talented cast and crew and a huge cheering squad.

So, here we are. Our pitch is in for the Storyhive Digital Shorts edition and voting will be happening between April 3 – 6. Either way we are shooting in early May. We have a small window of opportunity when our dream cast and most of our dream crew are available to shoot for 3 days. We have to make it work. We will need to do some crowdfunding to cover things like equipment rental (if we don’t get the Storyhive grant), and making sure people get paid and fed if we do get it. I’ve decided to document the process here. I’ll keep a bit of a journal about the entire production process. We are shooting in a little over a month and there is so much to do!

Wish us luck!

Daughter for Sale – available for viewing

20160614_114917_001

On set – Daughter for Sale (Justice Unleashed)

Update – the link is no longer available 

OK this is pretty cool. My first movie of the week, Daughter for Sale (Lifetime, US) is now available for Canadians to view via Youtube. Not sure who has uploaded it, or if it will last, but finally my friends and family can watch it. Now, remember, they can do (and did do) whatever they wanted after I handed in the script and it is a low budget Movie of the Week. Still, it’s pretty cool to see my name in the credits.

Dangerous Designs is the next Movie of the Week – I have no idea when that will be filmed. There are other irons in the fire as well but I won’t report on them till they actually become something.


5K Foamfest – Getting muddy again

Or … how to not take care of skinned knees


20160612_074833

I am known for my outstanding coordination and grace… Not!

Trail running 101… don’t tempt fate!

In early June of last year I did the unthinkable and inexcusable… I had a really bad fall while trail running in the Lac Du Bois grasslands. Why inexcusable? I had an event (Foam Fest at Sun Peaks) a week away so I should have been wrapped in psychic bubble wrap to prevent getting injured. I also tempted fate by saying to my friend Jody right before I fell, “I love this trail because I don’t feel like I’m about to fall!”…. BOOM!

We think I tripped over a rock although it happened so fast nobody is sure what happened. I went down so hard and so fast my hands didn’t even have time to react and brace my fall – they never touched the dirt. All the force went directly onto my knees… and my left knee in particular. Why is this unthinkable? It was an easy trail and I hadn’t fallen for a few months so …. back to tempting fate. I actually do fall a fair amount when I run. Oddly I don’t fall when I cross country ski, but running is a different ball game.

So, there I was rolling around on the trail screaming in pain and bleeding. I was screaming so loud Gerry, who runs ahead of us with headphones on and doubles back to check on us, heard me and immediately sprinted back. I decided I could walk back – not many options anyway. By the time I got home I could feel the swelling. I went to my chiropractor / sports guy and he confirmed that he thought it was a sprain and the standard rest / ice / elevation combo would do the trick. Hmmm… Ice was no problem. Rest? Hmmmm…. I had Foam Fest the next weekend and then I was doing a solo backpack to Egypt Lake a few weeks later. Hmmm…. The nightly swelling my left knee actually lasted for months.


I had also been invited to visit the set of the Movie if the Week I wrote. Trying to make a good professional impression wearing shorts because fabric touching the scab was seriously unpleasant. The timing for this injury was seriously unpleasant.

The biggest thing I was worried about was Foam Fest at Sun Peaks. It was our second time doing Foam Fest. We have a huge team and I was really looking forward to it. I knew my knees would get trashed in the mud, water, and on the obstacles so I was looking for a solution to keep the sores dry and protect them. I knew the sprain would probably get worse (bad me) but I thought I’d just rest and ice more later to make up for it (very bad me).

My solution!

Ok, this is not a blog post about what worked or what one should try in a similar situation, this is purely for entertainment purposes and to teach the lesson… DON’T DO AS I DO!!!!

20160618_073326

Supplies for high performance athletes (not!)… note the diapers (cue foreshadowing music)


Honestly, I thought these ingredients would work to protect my knee. I had high hopes for the infant diapers. Sliding my leg in sideways and taping it all up should work… right?

Remember that saying that Duct Tape is good for everything but ducts? Wrong!

20160618_074127.jpg

Foam Fest – Race Day!

So, since I really am that graceful, I fell on my knee and ripped the diaper before the race even started. Yup, that felt good! (not!)

Our team – Revenge of the MudMonsters, was awesome as usual. We had a blast and can’t wait for this year. My knee? It got thrashed. My ingenious solution to my knee issue didn’t even last through the first obstacle. Bending it in weird angles to crawl over fences or rope ladders was excruciating. I survived.

20160618_084925

Mudmonsters… all clean and pretty!


2016-06-18 | 2016 5k Foam Fest Sun Peaks

20160617_181017

So, the moral of this story is Foam Fest is awesome and diapers and duct tape won’t protect injured knees. See you in June of 2017… must remember to put bubble wrap on my calender!


Twin Falls, Yoho National Park – A Backpacking Weekend

IMG_8077 ed

Playing with slow shutter speeds – so glad I hauled my tripod in my backpack!

My friend Jody loves hiking but had never backpacked before so I picked an easier weekend route so she could try it out without me breaking her. This last part was particularly important. If I broke her she probably wouldn’t want to go again. We also needed a route where we could do the whole thing in two nights because she couldn’t take time off work. After looking at routes in the Monashees, Manning Park, and other areas close by I discovered Twin Falls in Yoho National Park and realized it would be perfect, and it was. 20160812_134625

I reserved for one night at the Twin Falls backcountry campground but the Takakaw Falls campground, a ‘sort of’ front country campground, can’t be reserved. When I talked to Parks Canada staff ahead of time they thought on a hot Friday in August it might be full by 2:00 pm or so. As a result, Jody and I were out the door by 6:00 am to make sure we got a spot.

We got there by about 11:30 and proceeded to get

IMG_7717

Takakaw Falls

a bit lost. Parks Canada isn’t known for their excellent signage. We got to the falls and drove through a maze of small roads crowded with cars and tour buses. Then we went through a parking lot that indicated it was for overnight parking but we couldn’t find the entrance to the campsite. We continued driving, thinking it would be further ahead, but ended up accidentally driving 10K back to two incredibly tight switchbacks on the main road before we turned around and tried again. It was only when we saw two people with big black wheelbarrows that we asked about the campsite. It turns out it’s not like most front country campsites in that you don’t park at your site. The campsites are about 500m from the parking lot. Now it made sense. We walked in and grabbed a site, leaving my jacket there to mark it. There is no attendant there, it’s all self registration. Now that we had that cleared up we set up camp and went for a walk to Takakaw Falls. There were tonnes of people visiting the falls but it was nice to get out and stretch and the falls and the river were spectacular.

The Takakaw Falls campsite has no map so it’s hard to see where there are empty spots and a lot of people were wandering around looking for space when we got back. We were very glad we got there when we did. The campsite is a good spot to stay for a few days and enjoy day hikes to Twin Falls, Laughing Falls, Yoho Valley, and the Whaleback. The campsite has running water that is drinkable and bear lockers, which were a nice feature.

Since it was hot that weekend we got up early the next day and set out for the Twin Falls campsite. It was only a little under 7Km so we took our time and enjoyed the amazing views. Basically any time I’m near water I’m a happy camper and the gorgeous white rapids we were following made my heart sing.

One of the small side trails led to the Angel’s Staircase. The trail was a bit muddy and we had to crawl over some logs so we decided not to continue with it. If we felt like it we could try on the way back. We got back on the trail and made our way up the steepest part to Laughing Falls. This part of the trail was a long uphill that looked like it was never going to end but I think it was only two kilometers or so. We saw lots of day hikers along that part of the route.

When we got to Laughing Falls, about 4 Km in, we were delighted. There is a lovely campsite there so we took off our packs, had lunch, met the Parks Canada warden who checked our trail passes, and enjoyed what is to me one of the most perfectly designed waterfalls ever. Good job mother nature! The falls are wonderful and it would be very well worth a day hike from Takakaw Falls. We pumped some water – Jody’s first time doing it, and kept going.

The trail is a bit steep but in no time we were making a short descent into the Twin Falls campground.

I think the Twin Falls campground is one of my favourite campgrounds ever. There are only maybe 10 sites and they are tucked in the trees so they feel very private even though they are close together. They are also right next to the river and the cooking / eating area. Nothing like Egypt Lake that required a hike to get to anything. The river itself is spectacular, a cascading series of rapids in a picturesque location. The sound of the water created a soothing backdrop that made everyone at the site, all friendly and relaxed, want to sit out at the picnic tables and just stare at the view. People talked, played cards, read, wrote, and enjoyed the good company and the beautiful scenery. I loved it. I could easily make the short(ish) hike to that site and stay for a few days just reading and writing.

The only problem I have with the campsite is the outhouse. It was pitch black, even in the middle of the day. We noticed the same thing at Laughing Falls. It’s not rocket science Parks Canada! Just poke some small holes in the top along the sides! I shouldn’t need a head lamp to go to the washroom on a bright sunny day!

Once we set up camp we made the 1.1 km hike on the steep uphill trail to Twin Falls. We had thoughts about doing the Whaleback trail, which would have been a few hours on extremely steep trails, and decided to save it for another time. It was hot and remember, I was trying not to break Jody. The hike up to the falls was enough. When we got there we decided to treat ourselves to tea at the Twin Falls Chalet.

The Twin Falls Chalet is a delightful oasis in the middle of the back country. It’s a historical gem and it’s perfect that you have to put in a bit of work to get there. The only way you can enjoy its wonders is to hike in. Originally built by the CPR as a tea house in the early 1900’s, the chalet has been operated by Fran Drummond since 1962. She and her staff treat guests to what I would call ‘rustic hospitality’ and it was one of the most memorable places I’ve ever been to. While we didn’t stay there, we did go in and enjoy the best butter tarts I’ve ever had – cooked on a wood stove. I had lemonade and Jody had tea. It was perfect. Then we explored the falls for a while before heading back down to our campsite. If you go, make the effort to go in and enjoy the atmosphere. It’s a bit pricey but since they backpack most supplies in, with some brought in by helicopter as well, it’s completely worth it.

The falls themselves are enormous and beautiful. I was really glad I had hauled my tripod on this trip. I took over 500 photos over the 2 days.

When we got back down to the campsite we soaked our feet in the icy water for awhile. I got foot freeze after about two seconds. This is similar to brain freeze but it happens in my feet. Jody has more tolerance for foot freeze than I do because she stayed in a lot longer. I just kept dipping my feet. We pumped more water and she read while I wrote and took pictures. The afternoon was hot and sunny and it was perfect. We had a nice hot supper and enjoyed the evening on the rocky beach before going to bed early.

It rained overnight but the weather was nice going out. It seemed to take us no time to get back to the car and we even stopped at Laughing Falls again for a snack and more pictures (just in case the first 100 didn’t turn out… right???).

We were back to the Takakaw Falls campsite by about 10:00 am and back in Kamloops by 3:00 pm. It was a great weekend getaway and Jody is already planning more trips for next summer.

Edited: I forgot to mention our outstanding wildlife sightings – 2 squirrels, 2 chipmunks. Good thing we were carrying bear bells, bear spray, bear bangers, bear bags for food, etc.!


Egypt Lake (Banff) – solo backpacking is now an annual crazy thing

IMG_7050Last year I did my first ever solo backpacking trip – actually, it was my first ever backpacking trip. I did the 44 Km return trip to Berg Lake in Mt. Robson Provincial Park. It was amazing, life changing, and hard. After I got home, I decided that I needed to do at least one solo trip like this every year. I thought I’d do Berg Lake again this summer, but I couldn’t confirm my dates and then by the time I could the campsites were all booked up. So I decided to explore other areas and in my research I came across Egypt Lake in Banff National Park. It was about 28 Km round trip and it seemed like a good place to explore on my own. I’m back now and I’m extremely glad I did it, but I have to admit it was a lot harder than I expected.

If last year’s Berg Lake trip had a theme of escaping and trying to lighten a heavy heart, this year was about chasing the unknown.

Growing up we always drove by Banff on our way to Calgary or Saskatchewan but we never stopped. Everything on this journey was new.

When I was researching the trip, I found very little information on Egypt Lake. Some descriptions called the hike very strenuous, some said it was moderate. For future reference I would definitely call it strenuous.

From the start I felt less organized than usual – where to go, where to get my park pass, what the trail would be like. Normally I’m the person who has all my information colour coded on a spreadsheet and cross referenced for extra measure. This time I was oddly free-flowing. About a month before I fell while trail running and had a sprained knee that was swelling and stiff at the end of every normal day. Because of that I realized when I got there that I hadn’t actually put my hiking boots on since last fall – this is very unusual for me.

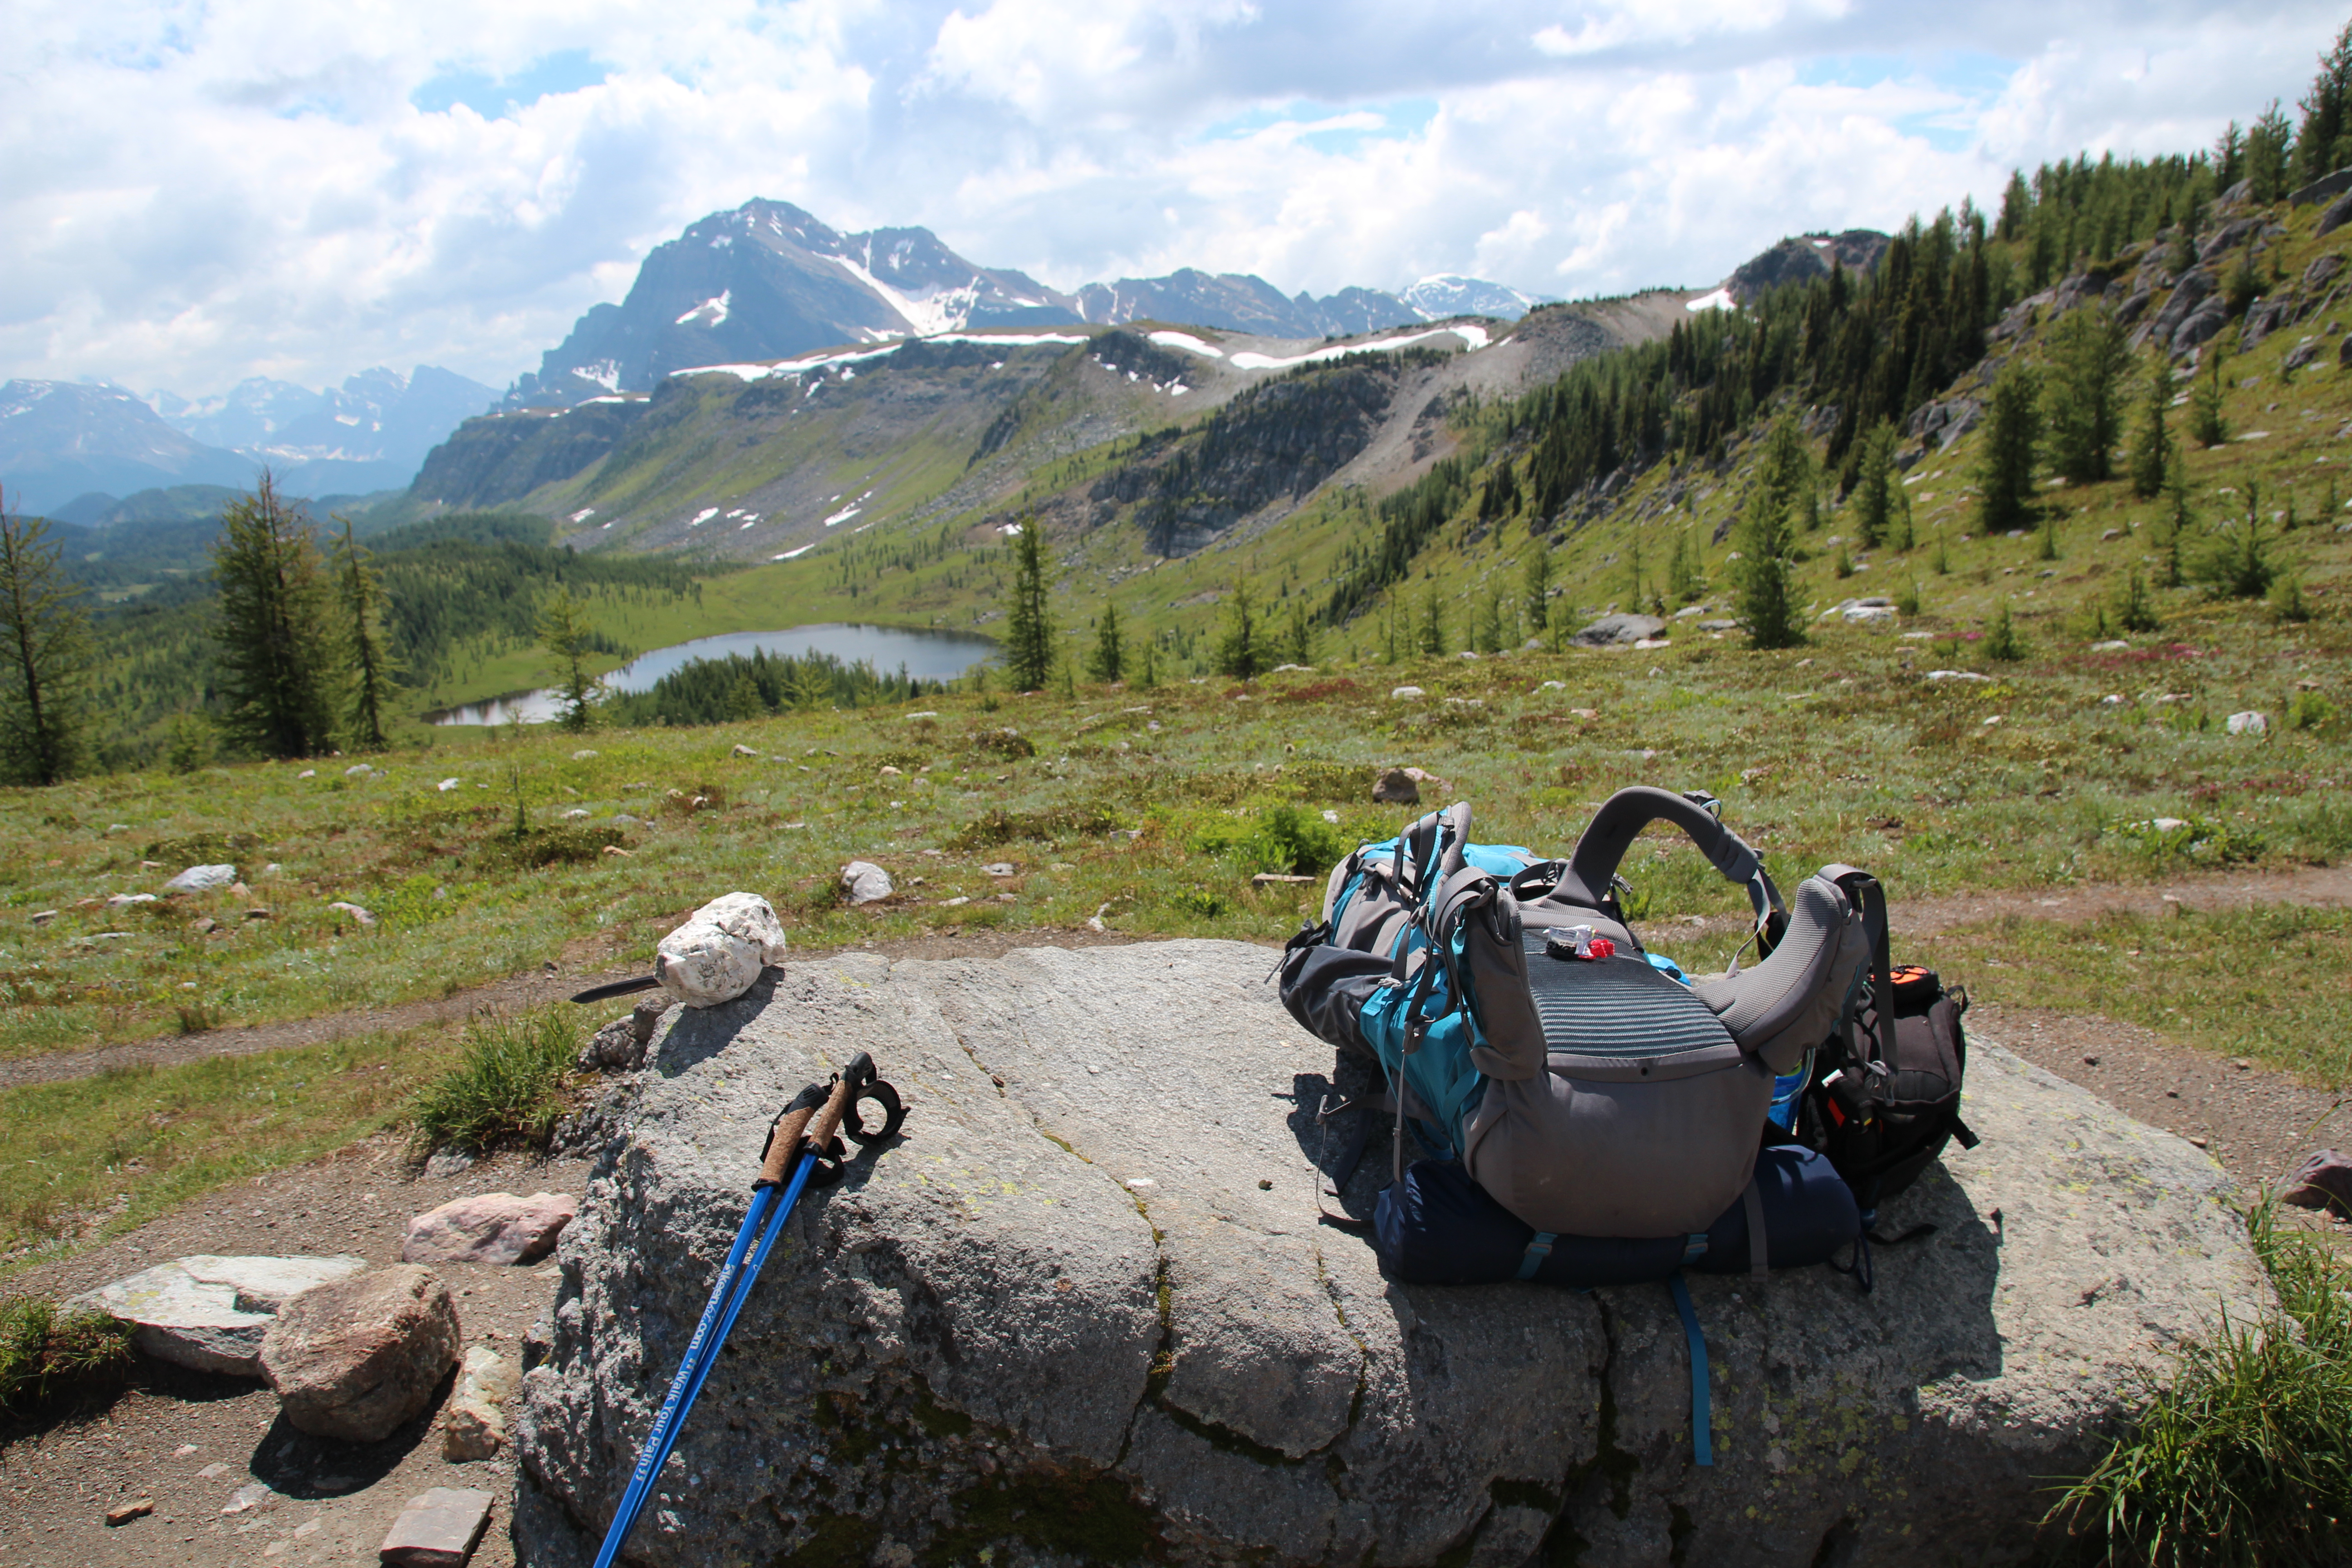
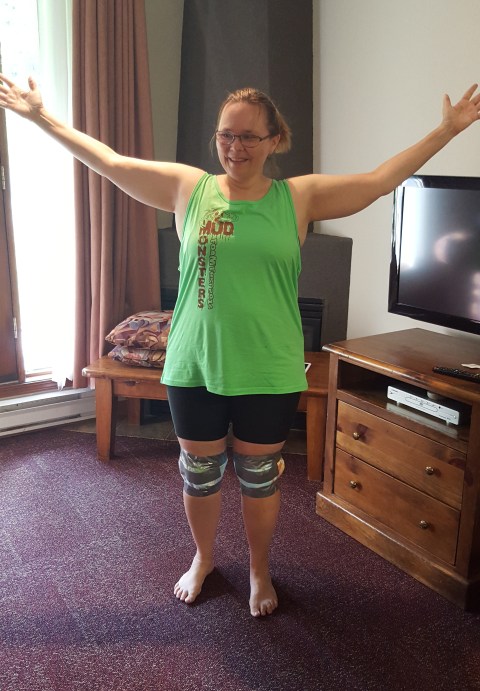
I treated myself to new equipment this year. I now have a super cool Marmot Limelight 2 person tent, a Northface Furnace sleeping bag, and an Osprey 65L backpack that I had fitted by my go to person, Lisa Palechuk, at Atmosphere. It turns out my back is shorter than I realized and I’m actually an EXTRA SMALL in back length. I put that in all caps because I’ve never ever been called extra small in anything. This is possibly not where I wanted to start. I also invested in a Gem Trek Map of Banff and other areas.

Thanks to Lisa, I also had her modify my sleeping bag and sleep sack. She owns Osprey Custom Sewing and used some great creative sewing talent to devise a system for attaching my sleepsack to my sleeping bag so I wouldn’t be spinning like a tornado inside my sleeping bag, unable to move and trussed up like a mummy. It’s a brilliant system with velcro and hooks and worked great. More on that in another post.

I prepped all my food, enjoying dehydrated beef chili, dehydrated spaghetti and meat sauce, marinara sauce, and a yummy breakfast of dehydrated mashed potatoes, cheese, and bacon. I even made a dehydrated version of pineapple upside down cake. More on these in another post too.

Day 1 – Kamloops to Banff

It poured rain the whole way to Banff and trying to find parking in town to get my park pass at the visitor centre nearly made me want to turn around and come home. After missing the turnoff to the campsite I was truly frustrated and this is not my normal state. I stayed at the Village 1 front country campsite just outside of Banff the night before I set out on the trail.

Day 2 – Banff to Egypt Lake

It had rained for days and when I set out the next morning to drive to the Sunshine Ski Resort gondola parking area it was coming down in buckets. I was not enthused. By the time I parked, however, the rain had cleared and I had a lovely day for hiking on a very muddy trail.

Leaving from the gondola area, the hike to Egypt Lake is about 12.5 Km. The first 9 Km is  uphill. The trail itself was well maintained with good bridges for stream crossings and really good footing. It’s also really, extremely, boring. It’s just a long tree-lined trail with tall trees that block any view of the mountains. Nothing changes, there are no landmarks except for the Healy Creek campsite about 6 Km in. You just keep walking uphill (with a heavy pack). After about 5 hours, however, the trail opened up and suddenly I was very, very aware I was in the Rocky Mountains. I could see peaks all around me and the wildflowers were in an explosive bloom – it was almost too much to take in.
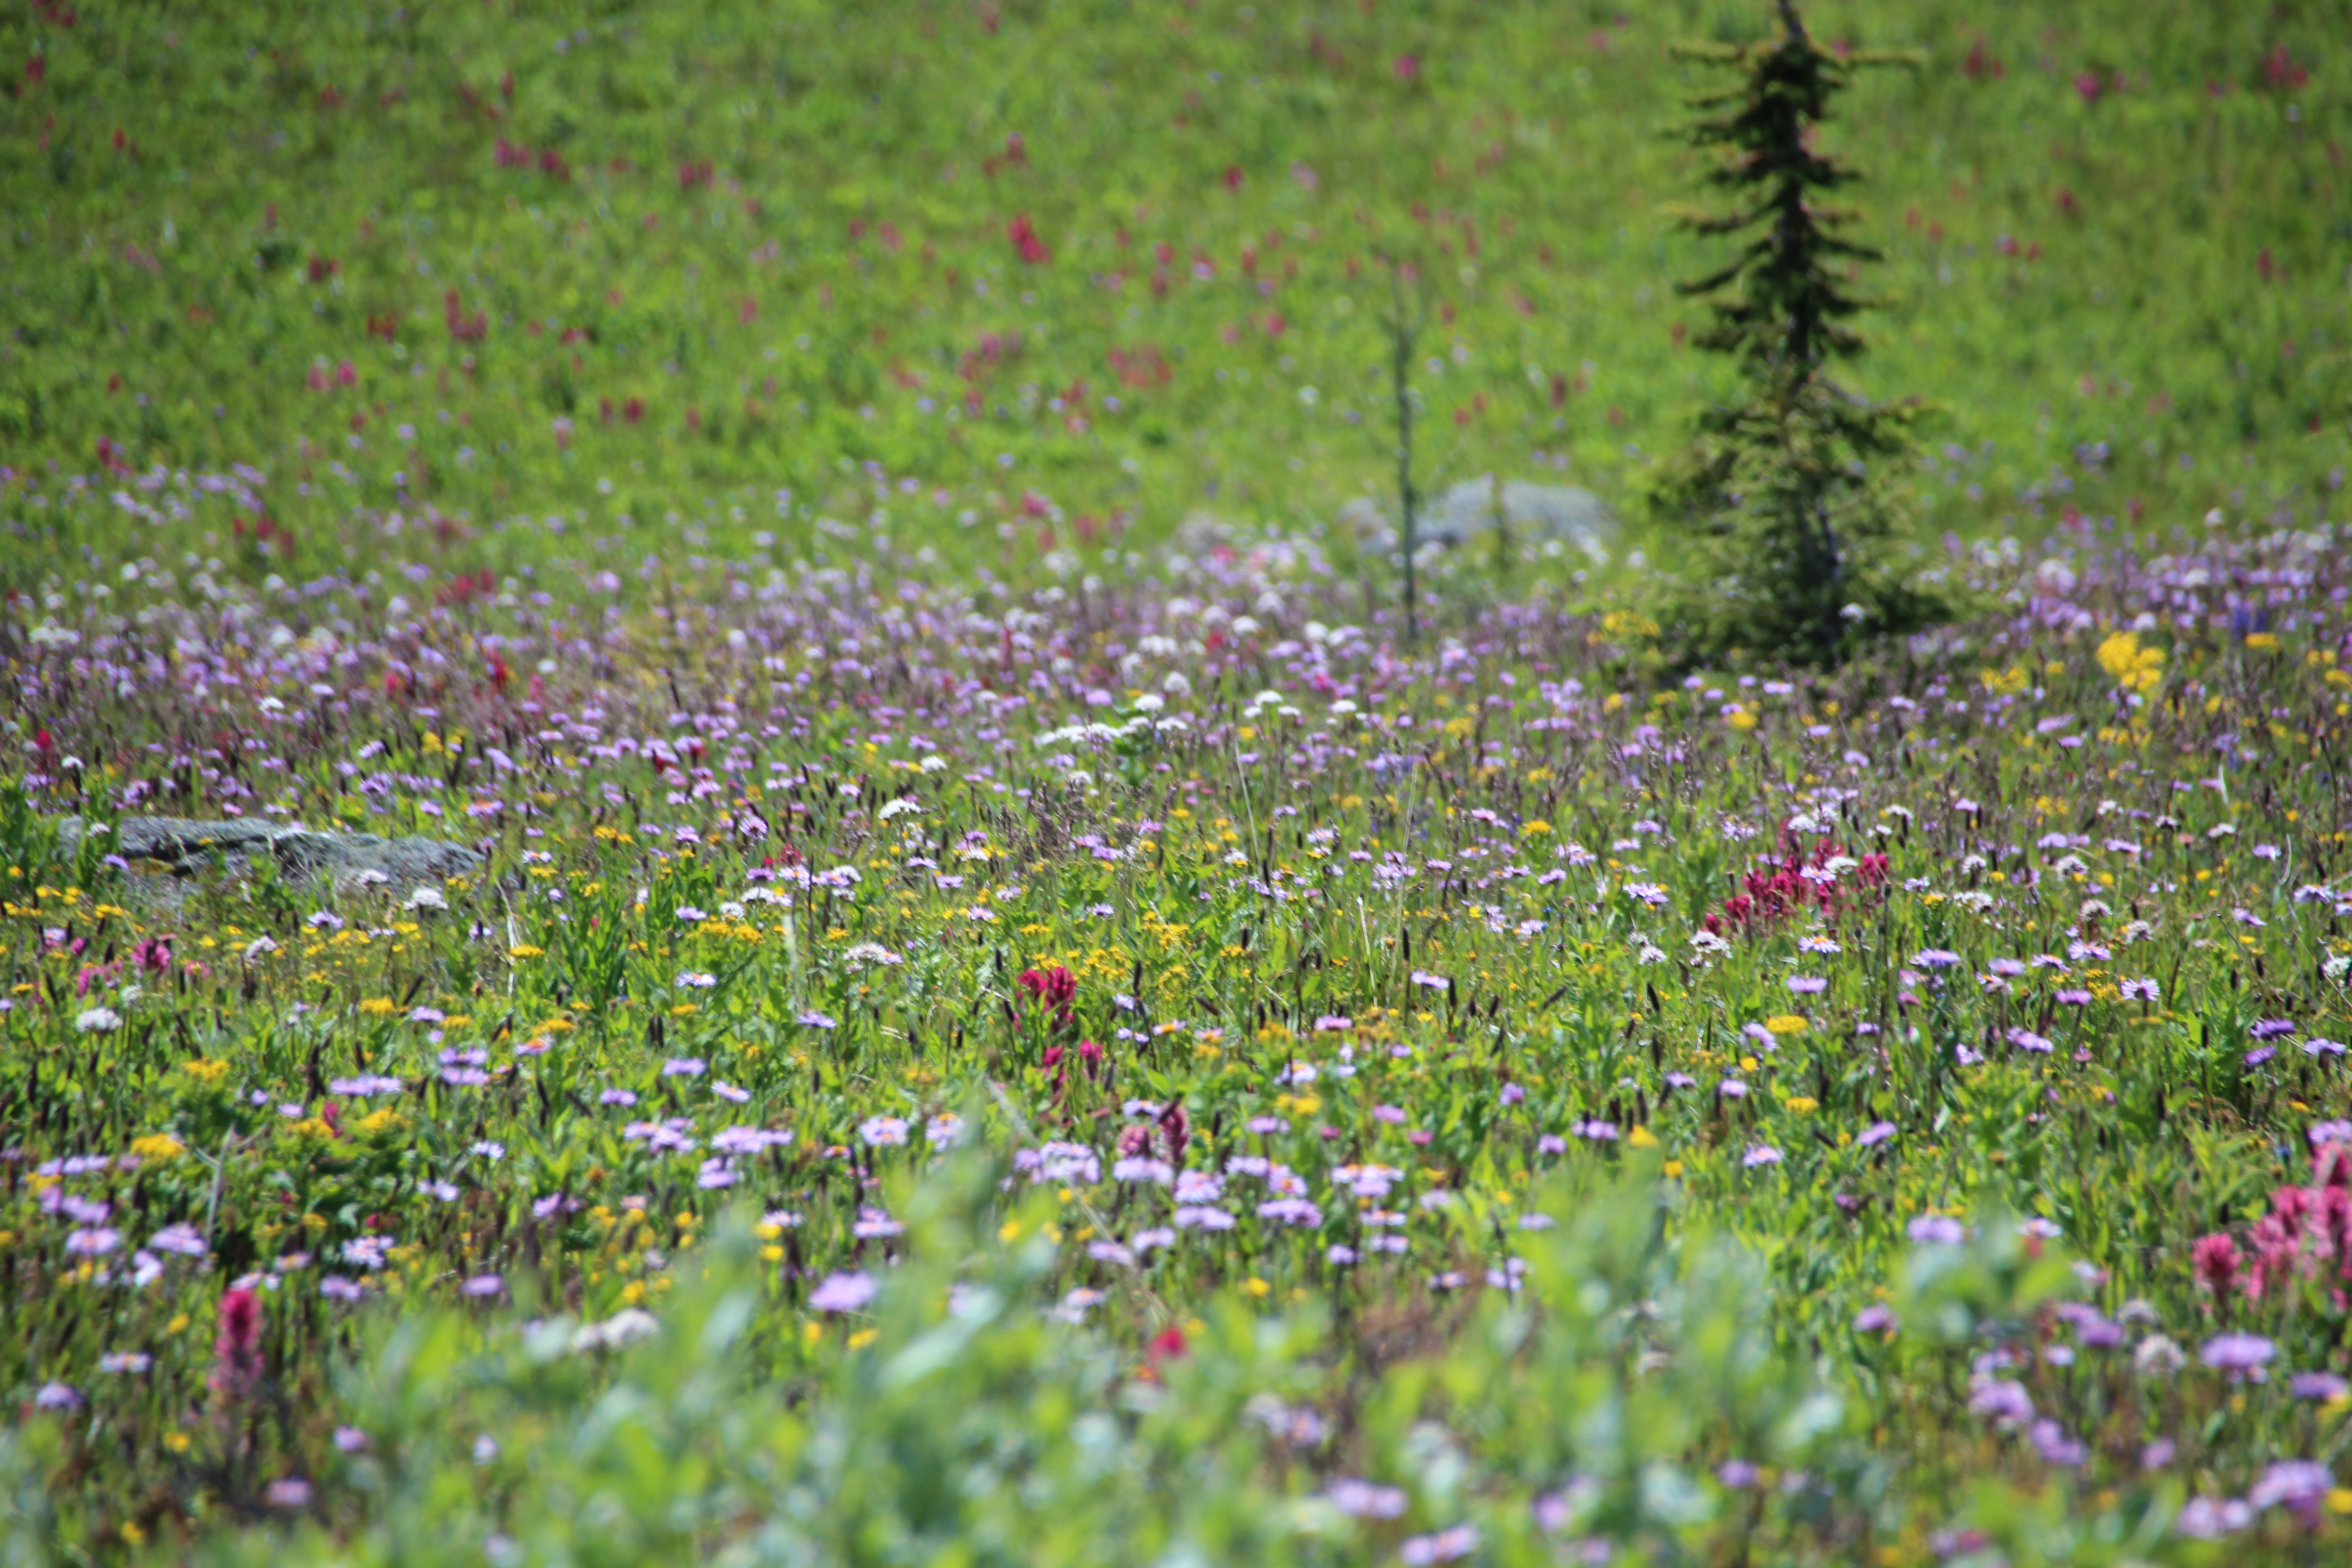
IMG_7016


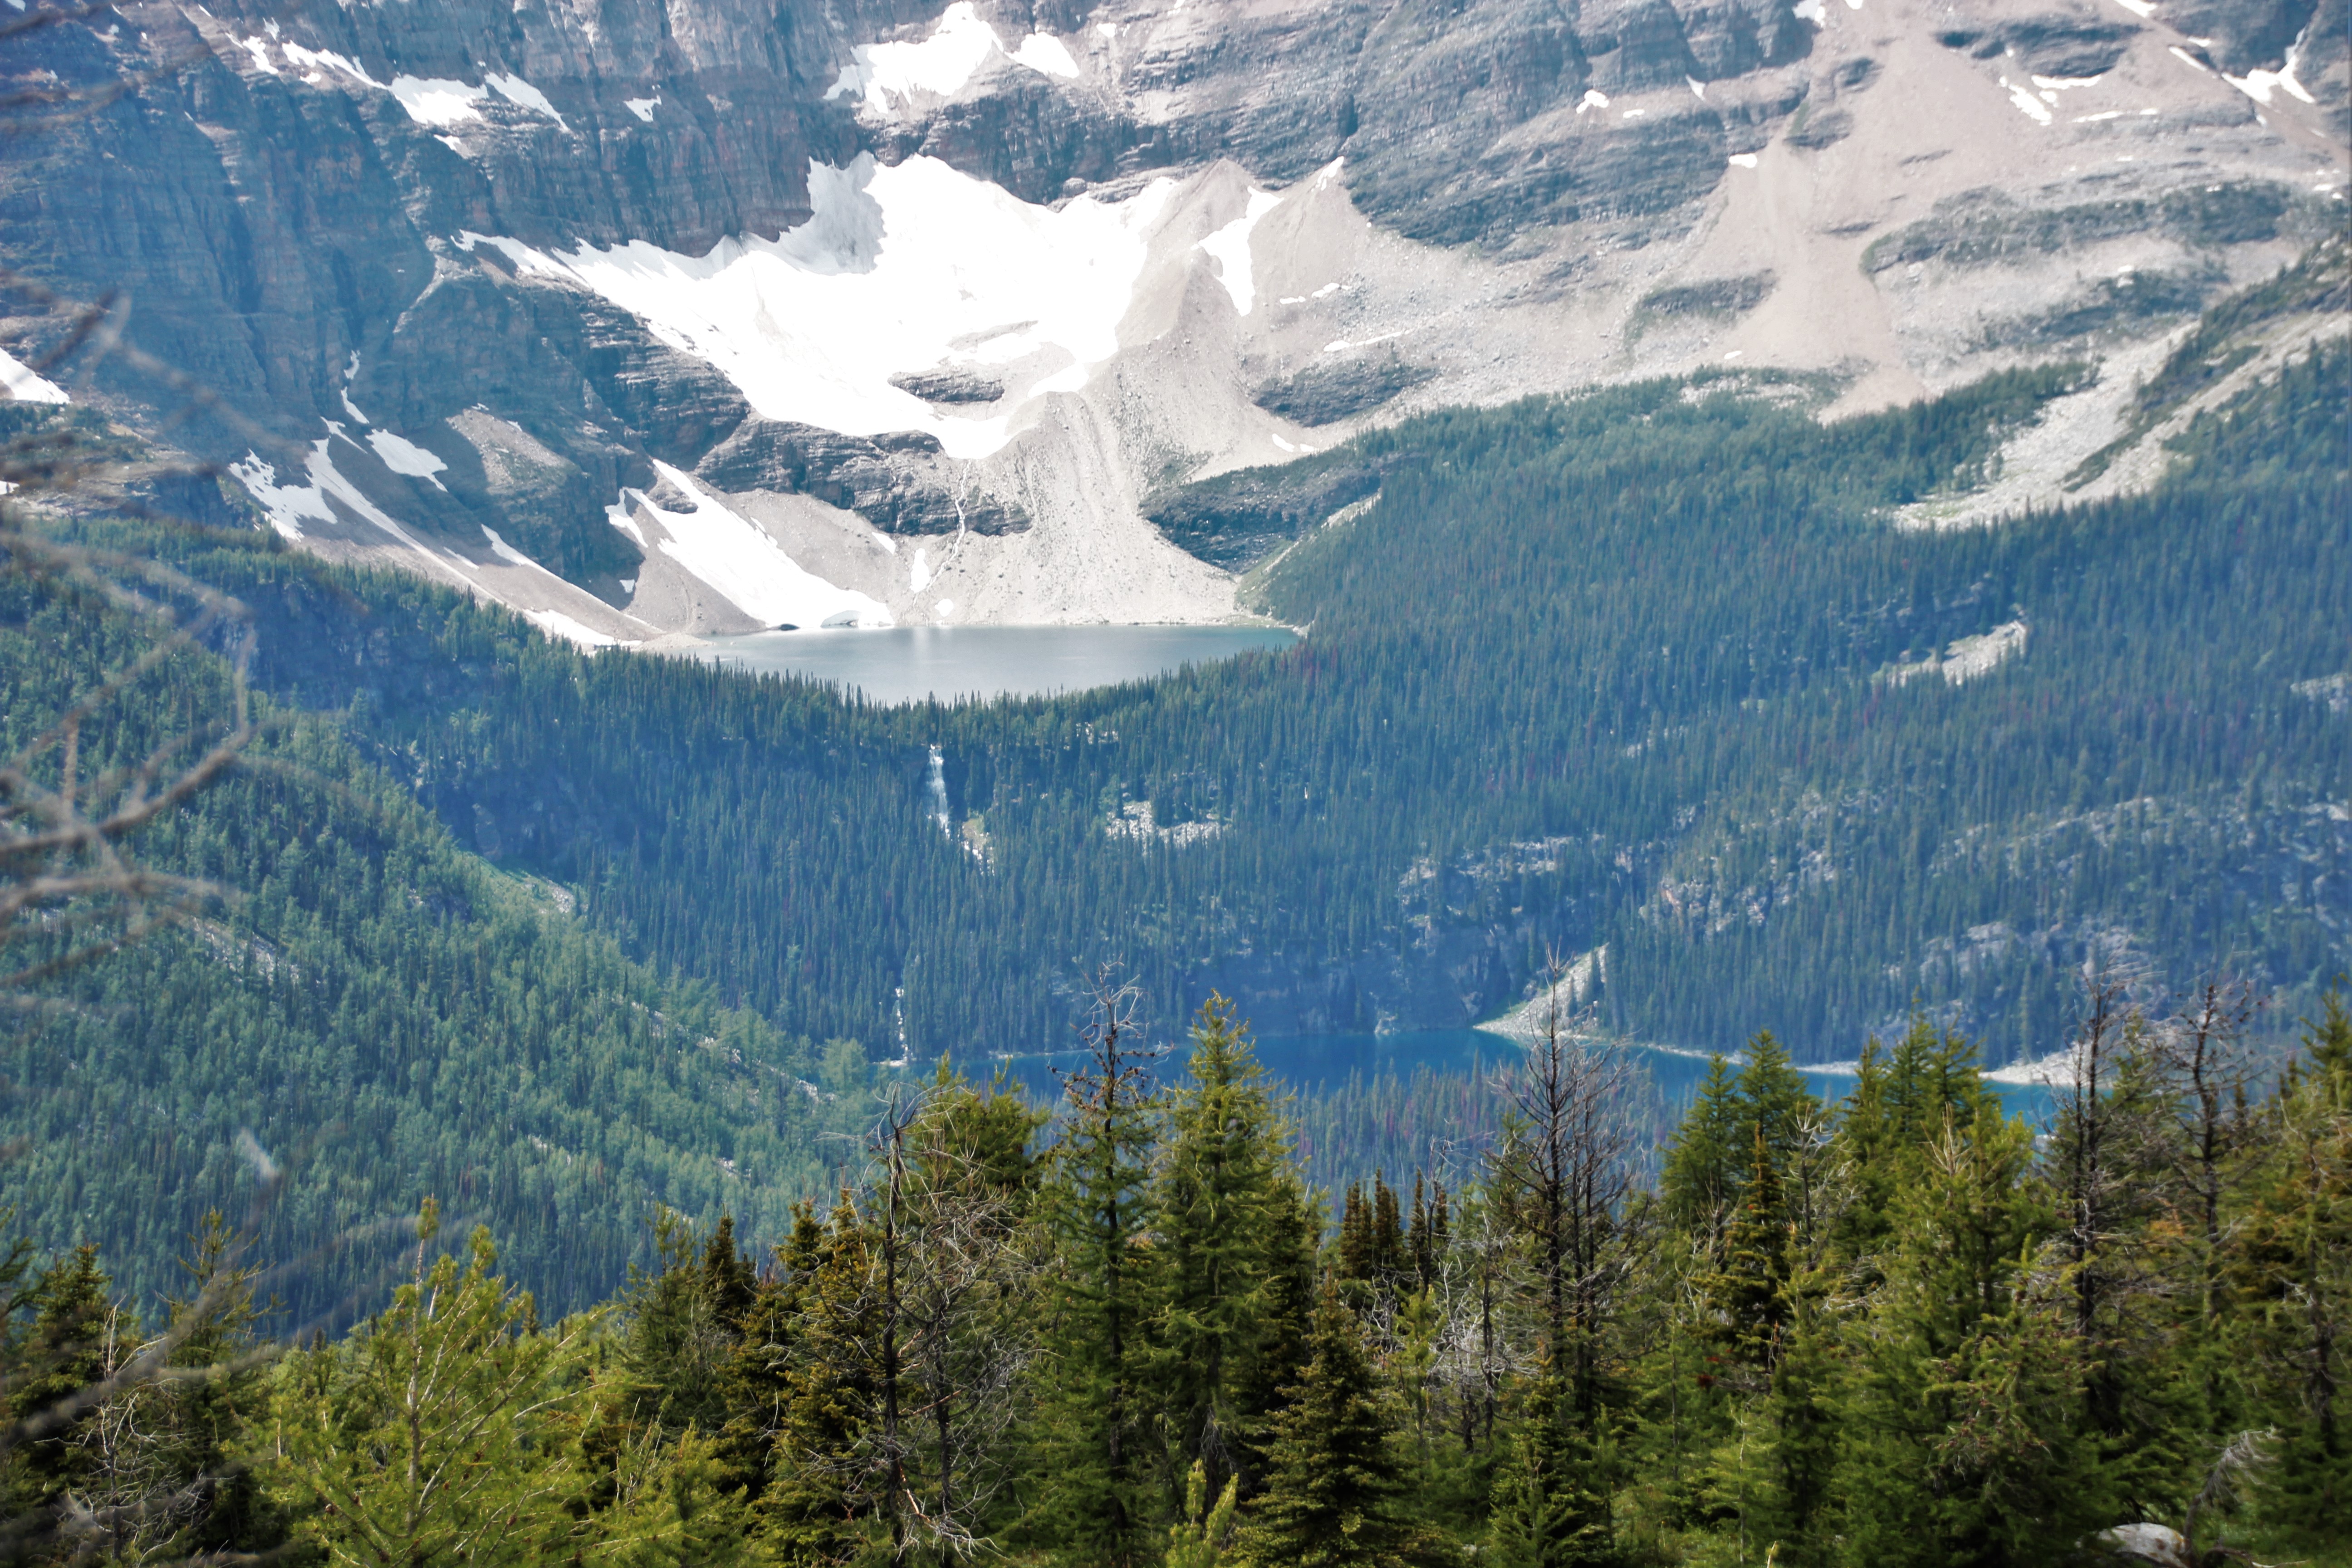
From the top of Healy Pass you can see about 70 Km of the Great Divide including Mt. Assiniboine and other spectacular peaks along the north end of the Monarch Ramparts. It was really breathtaking and I was in absolute awe.

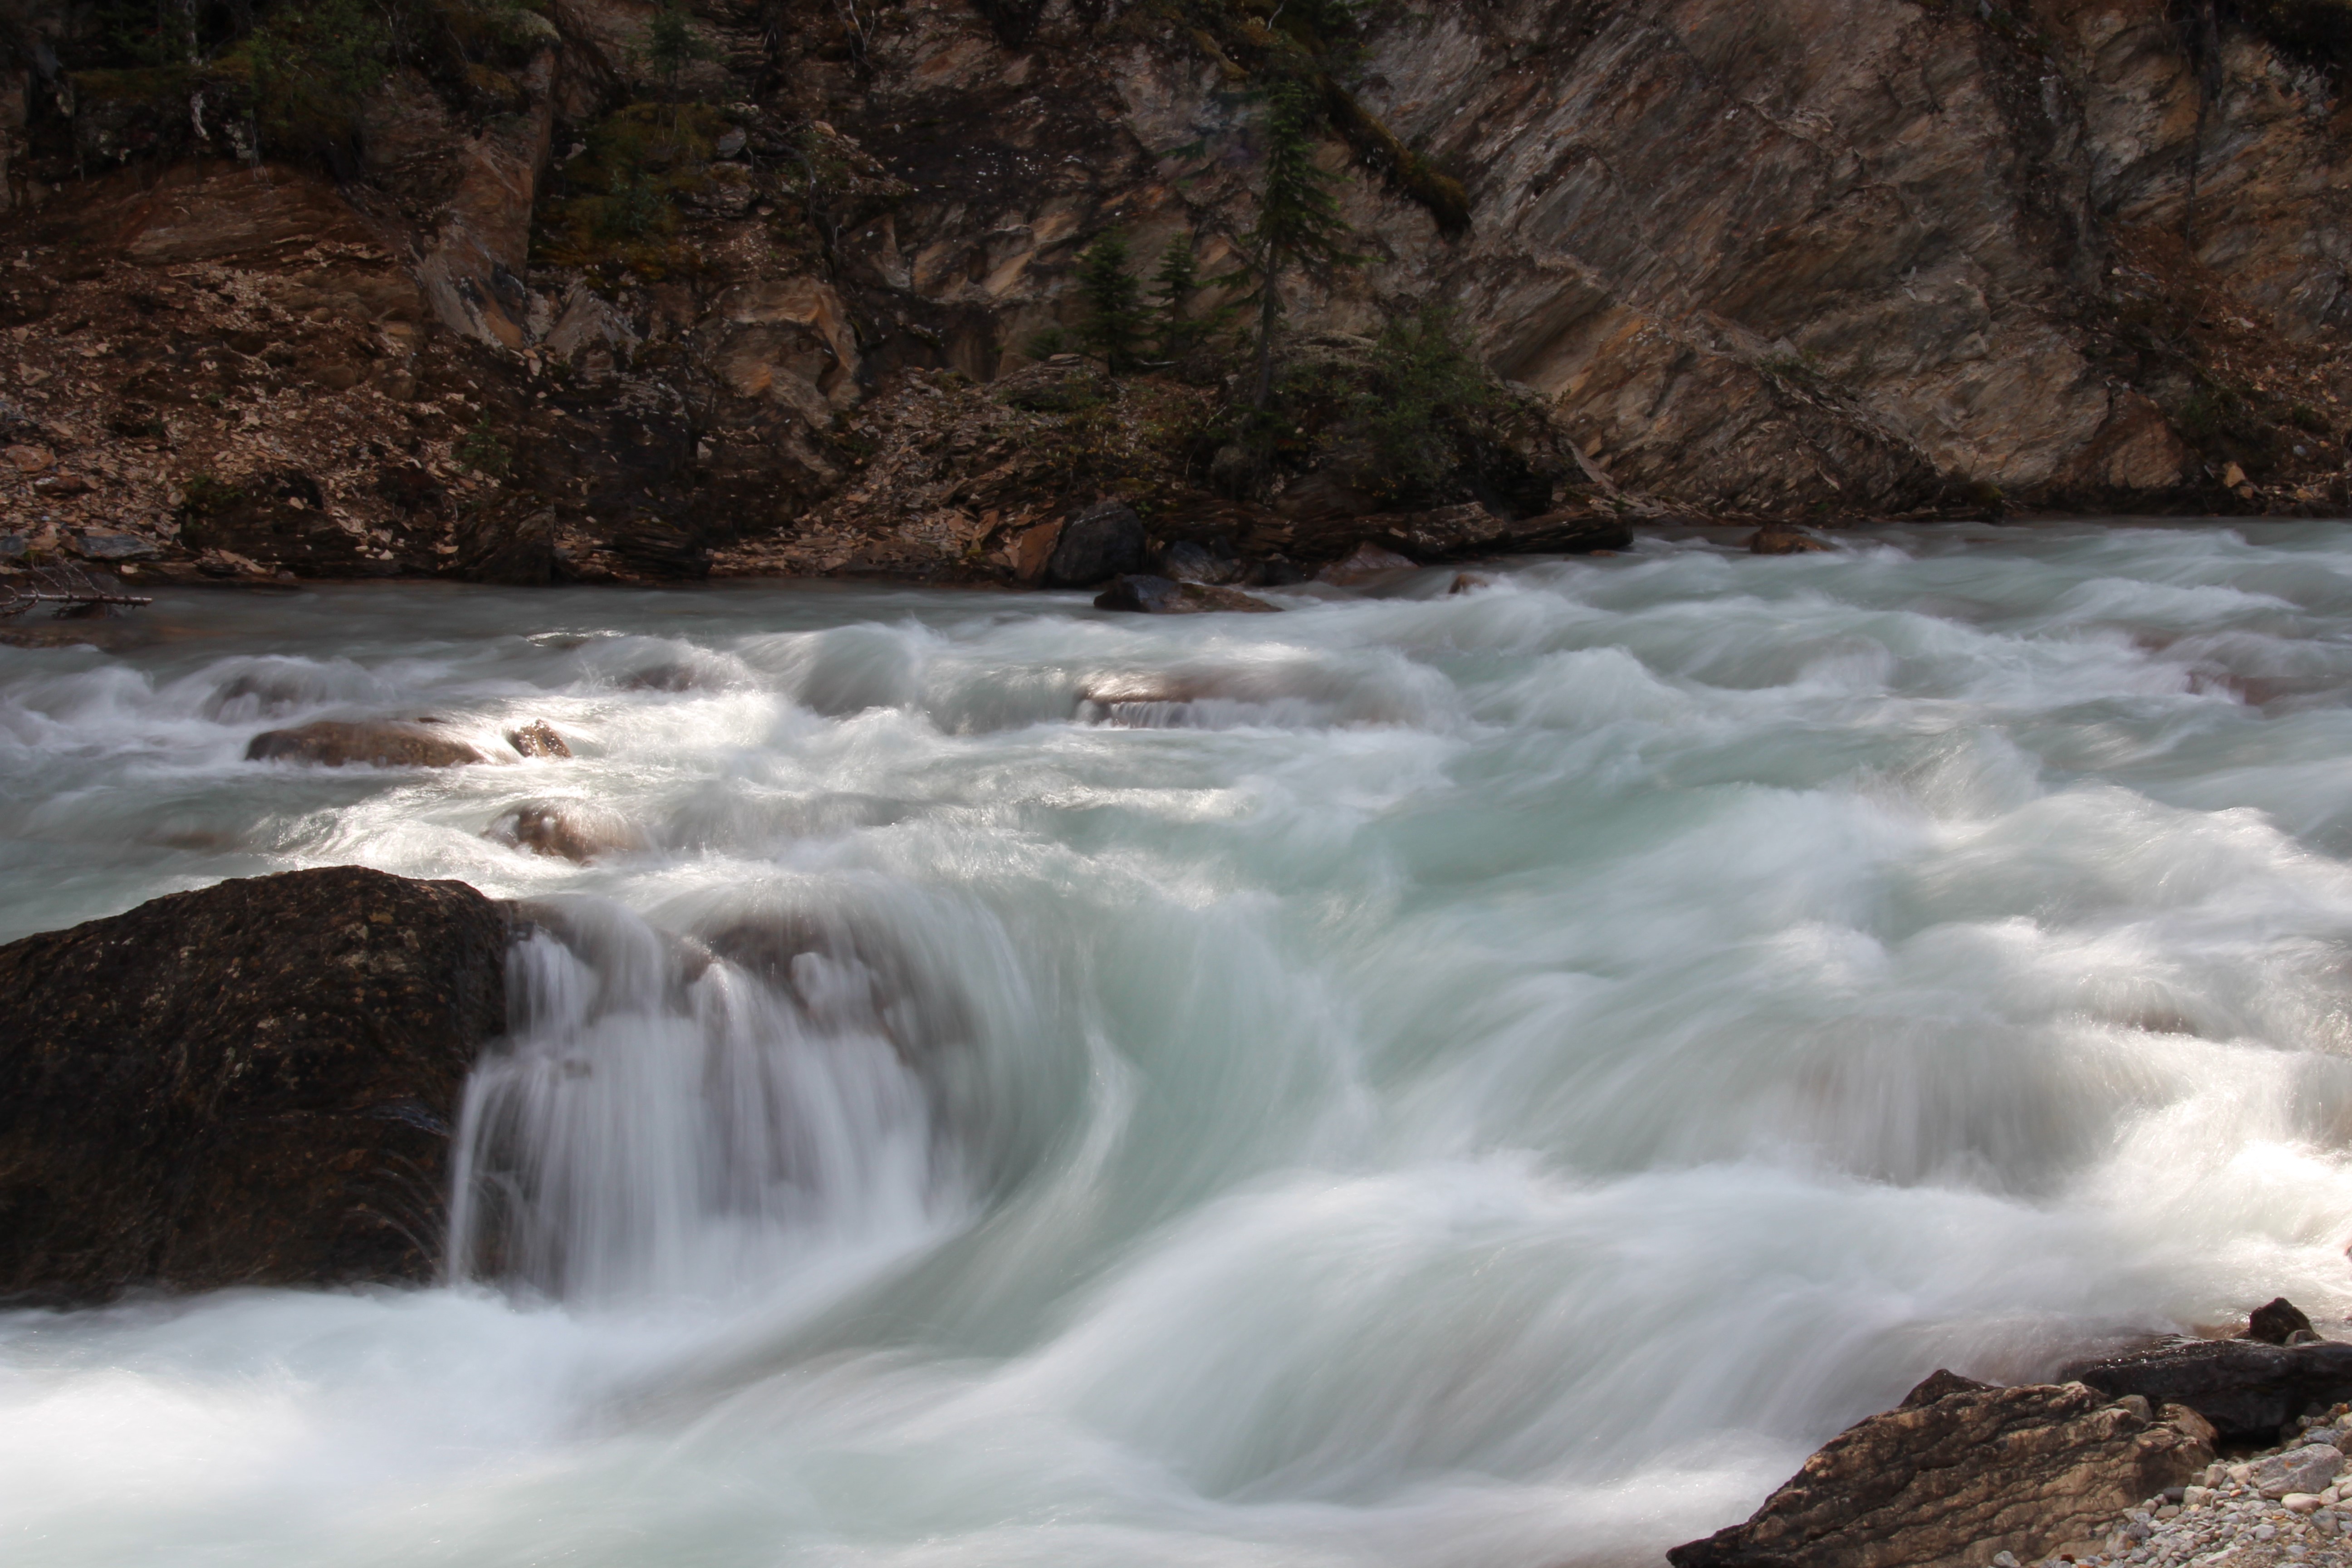
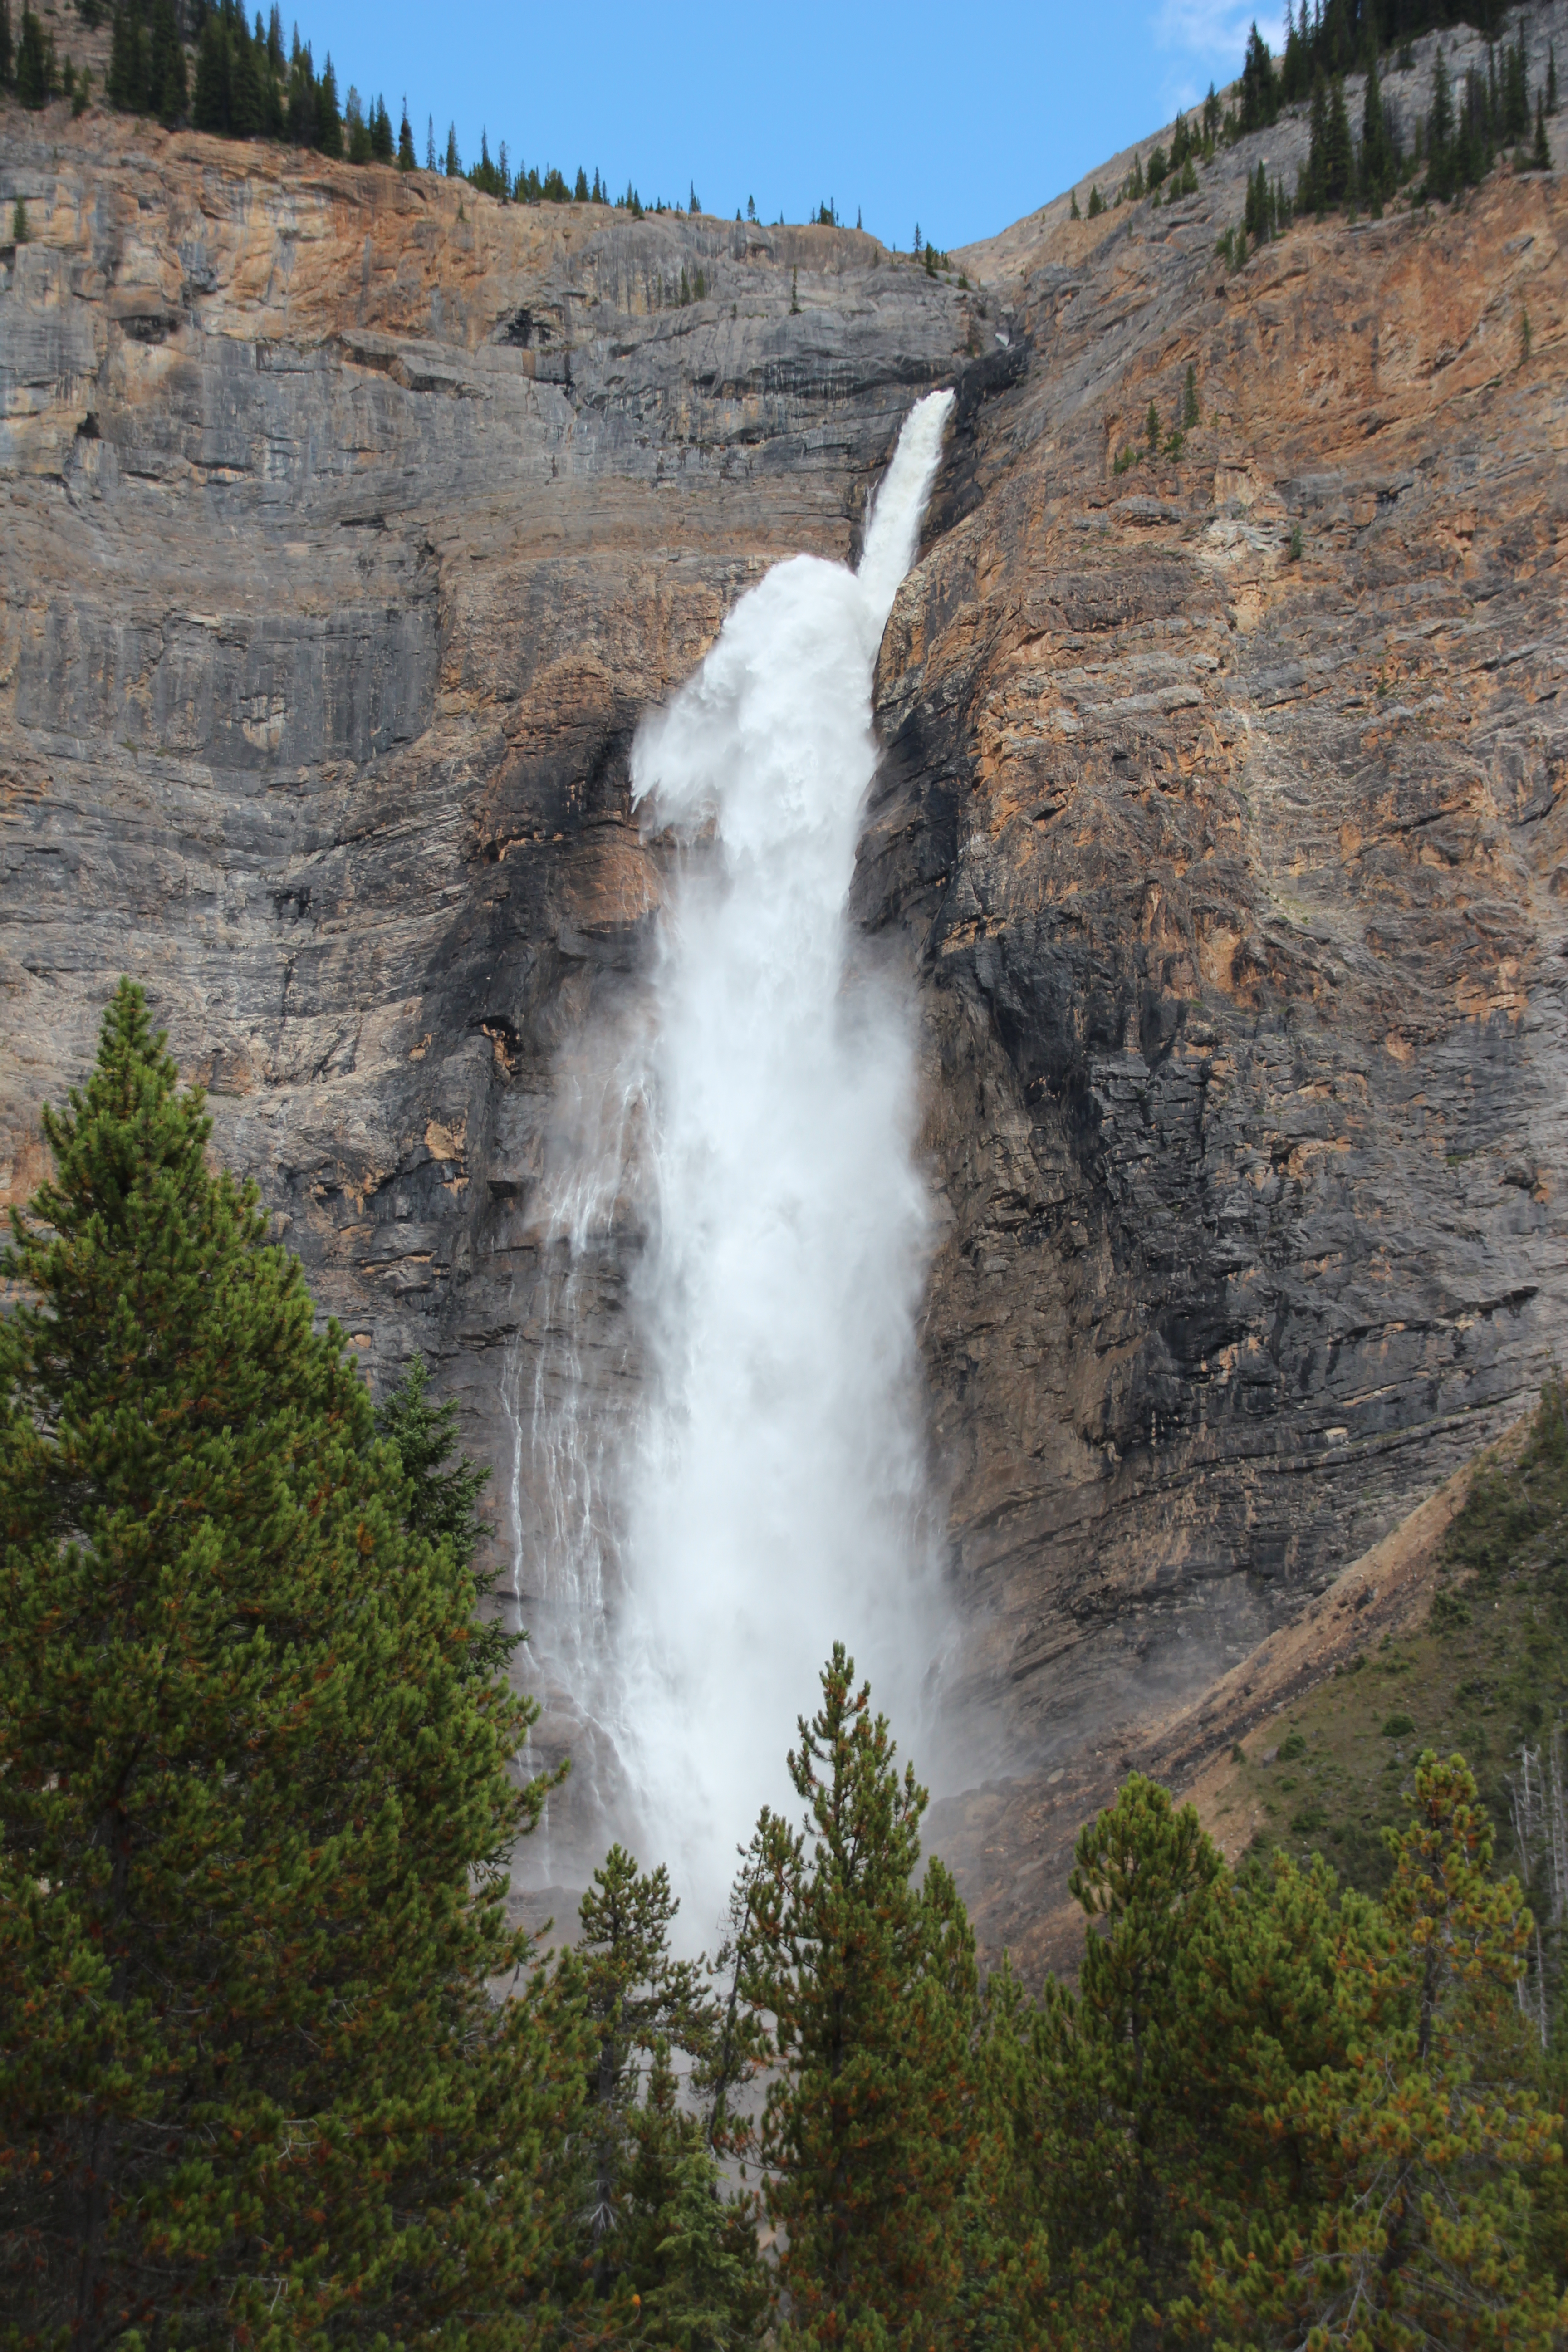
When I looked in the other direction, I could see Egypt Lake far below me, and what I didn’t realize – Scarab Lake was right above it with a waterfall draining from Scarab to Egypt. It was amazing and I wasn’t expecting it. None of my research had uncovered this view.

IMG_7052 ed

The last few Km are straight down to the valley below. This is a knee and toe punishing route that is really steep and hard on the legs at a time when the legs might already be a little tired from the long uphill to get there.

I finally made it to the campsite 7 hours after I started. I am usually pretty slow but most of the guides say it will take between 6 and 7 hours. When I got to the campsite, though, I was done. I set up the tent and crashed for a bit. There is a bare bones shelter cabin at the campsite that hadn’t been booked for the night so some other campers and I decided we should all cook inside and stay out of the cold – it was really chilly that first night. We had a great time. There was a couple with two  young kids from Cranbrook and another couple from Saskatoon and me. It was a lot of fun. I did some writing in my tent and went to bed early after hanging my food in the shelter.

Day 3 – Egypt Lake

IMG_7057

The Egypt Lake campsite is a popular place to set up a base as there are a number of trails that intersect at the site making it great for day trips. Everyone told me the hike up to Scarab Lake was steep but offered a really great view of the lake above and the waterfall that flows below into Egypt Lake. From there you could do a ridiculous 1-2 Km (reports vary wildly) scramble over boulders to Mummy Lake. I decided to skip that hike and rest my toes and knees and just hung out at the lake, which is about 800 m from the campsite. After all, it was my holiday and I could do what ever I wanted. I spent the morning at the lake and took hundreds of pictures. I came back after and flopped in the tent, laughing evilly at the squadrons of mosquitoes and flies that were trying to get in, and let my mind wander. I ended up working on a screenplay idea I wasn’t expecting to work on and really getting into it so that was interesting.

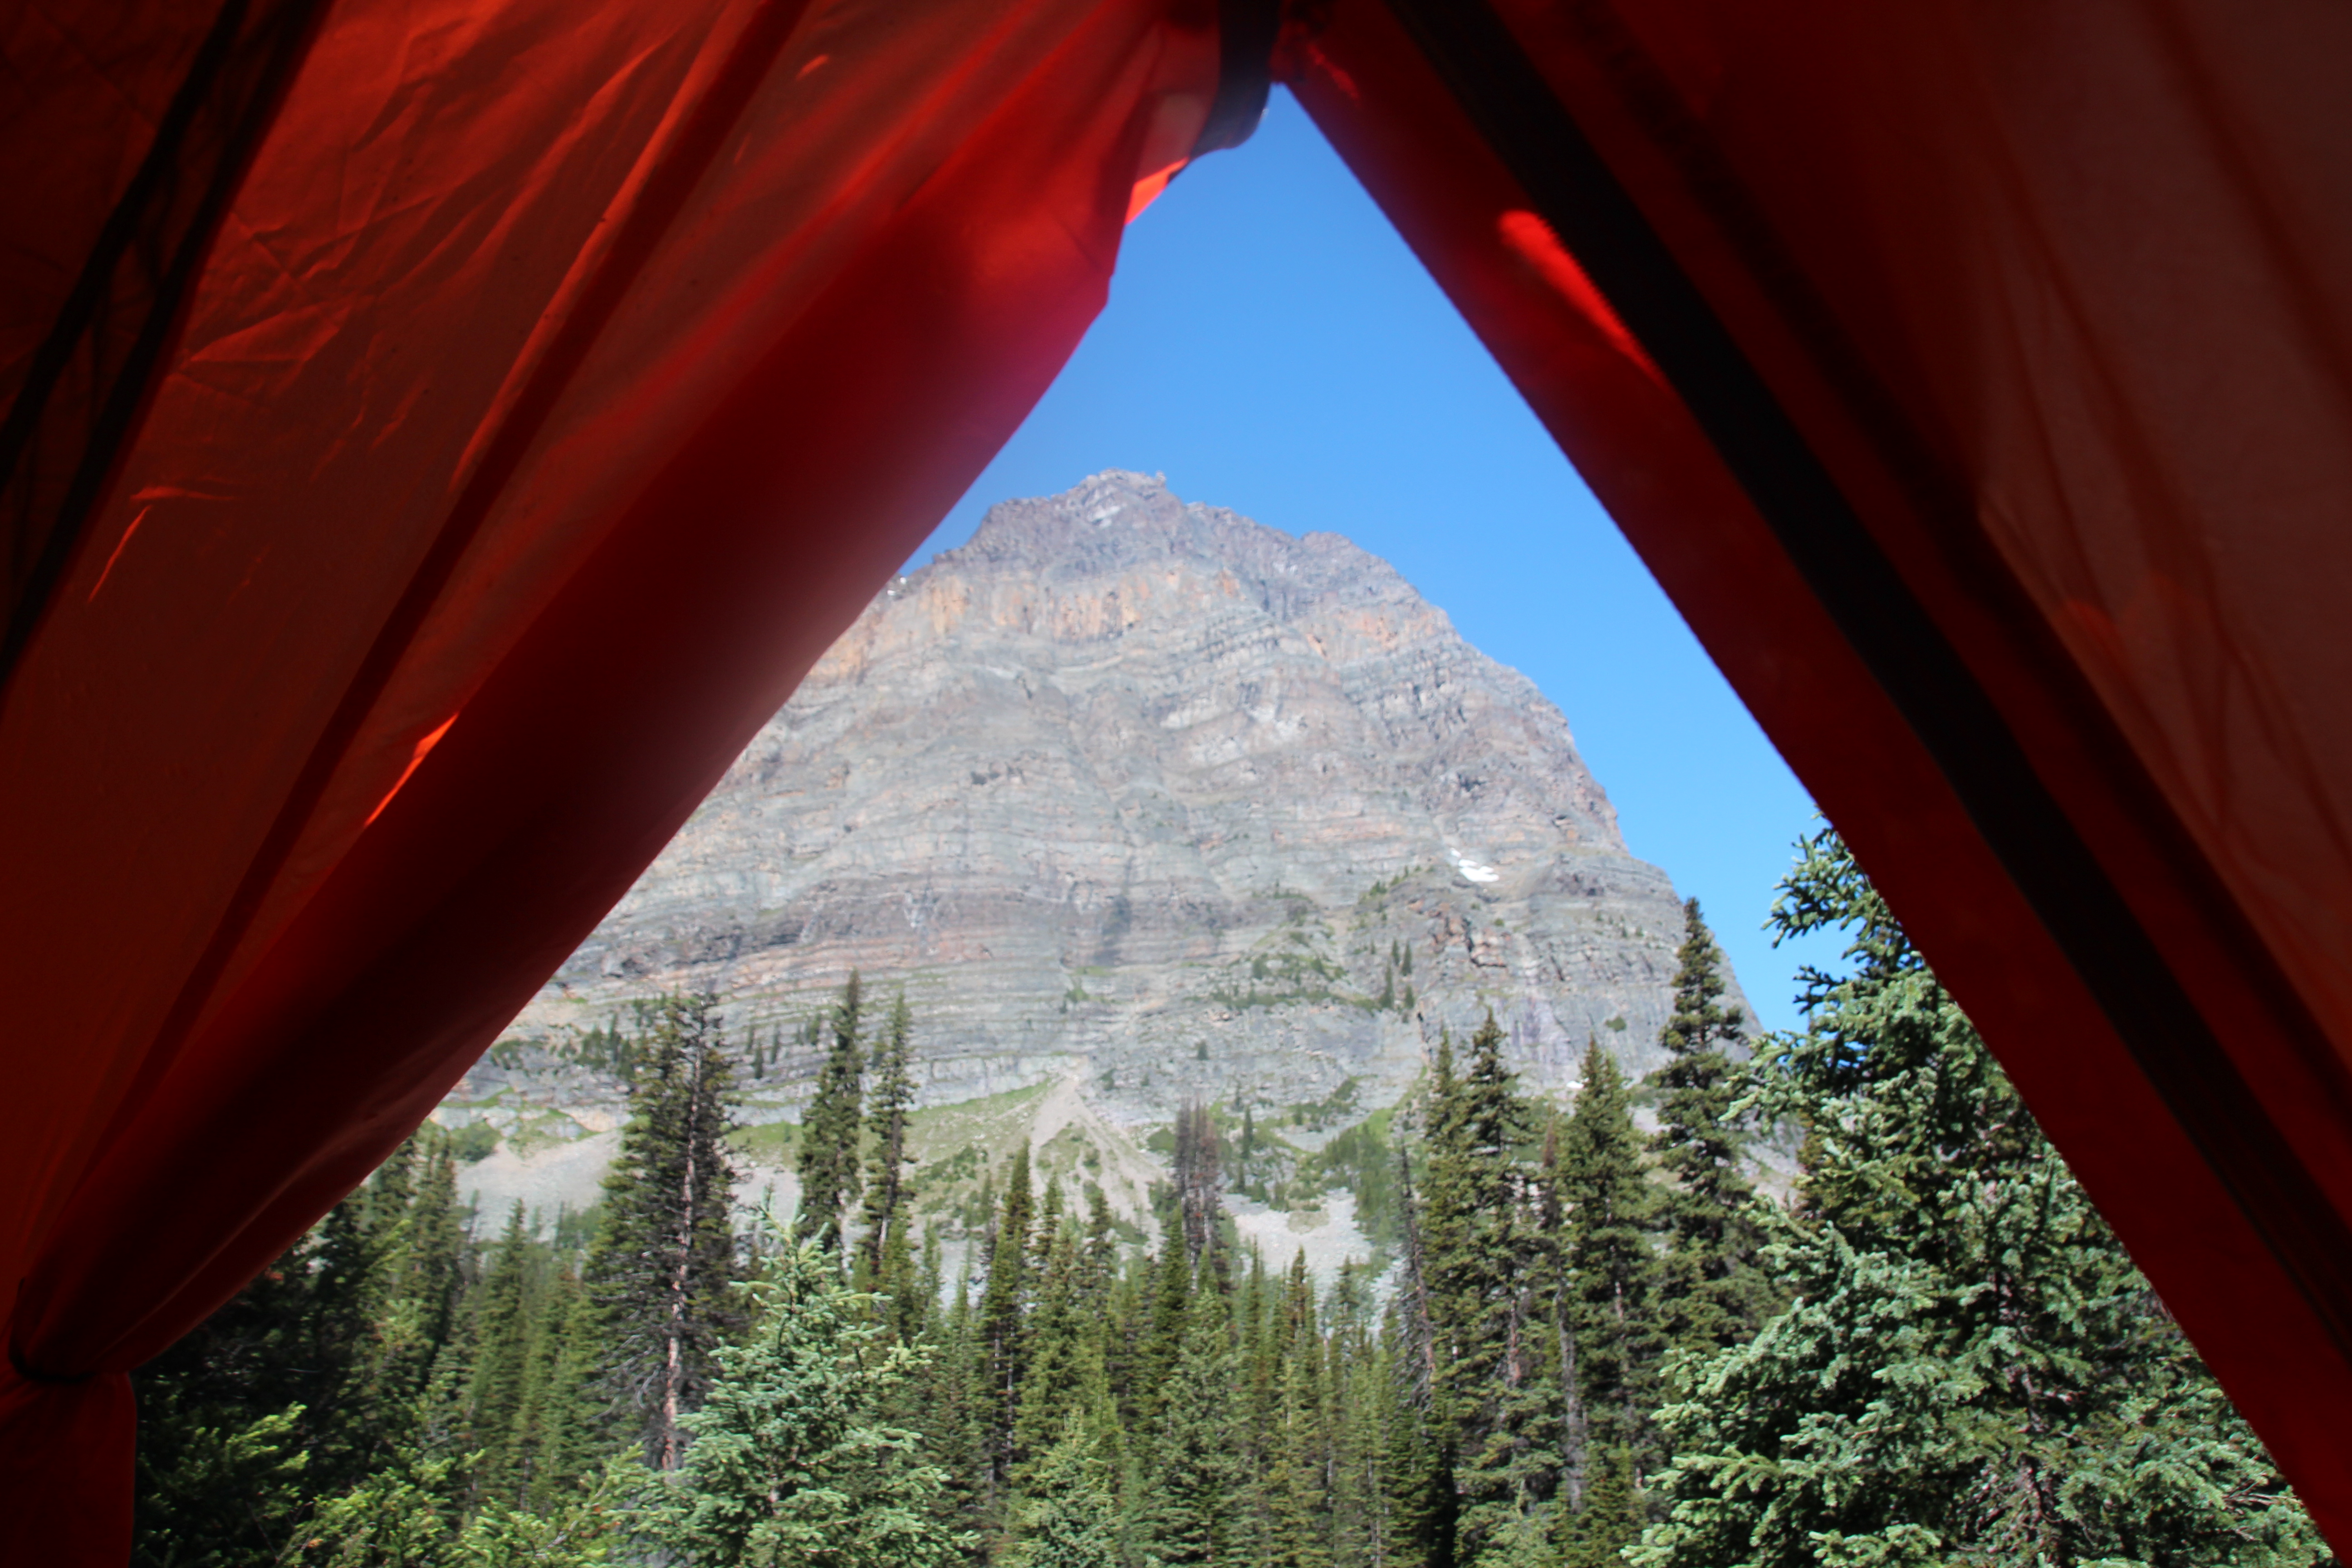
The campsite itself is a bit underwhelming. It sits at the base of Pharoah Peak, which is impressive, but it is very marshy so if you step off a trail you end up ankle deep in water. There are lots and lots of Hoary Marmots for entertainment and I listened to countless bird songs that I didn’t recognize. The place where you hang your food is a good 3-400 m from the campsites which is good to keep bears away but it sucks if you want a snack. They have a great cable system though which makes hanging the food, cookware, and toiletries pretty easy. About 300 m in the other direction is Pharoah Creek, the nearest location for water. With the lake 800 m in the third direction, this campsite is very spread out. One woman commented that if she had to walk that far to the fridge at home for a snack she would be much thinner. I agreed.

I was beginning to realize how spoiled I was at Berg Lake last summer – the lake was right at the campsite. You could hear the glacier calving all night. The bear lockers and cooking area were nearby. There was always plenty to see and do.

I noticed the steep downhill had made the ends of my toes a bit numb and I was worried I was going to lose toenails – not a big deal – it happens sometimes with half marathons. Just not very attractive but it’s not like a have a crowd of people looking at my feet.

That whole day I made of point of not rushing. It was nice and sunny. I slowed down, I noticed a bird, a Spotted Sandpiper, at the lake that wouldn’t leave me alone and it absorbed my attention. The ‘should’ in me said if I came all this way I ‘should’ hike to Scarab Lake, blah blah blah. Instead my mind took me to that screenplay idea that was pretty much plotted out by the end of the day.

Day 4 – Egypt Lake to Kamloops

Well, the day started OK.

While at Egypt Lake several other backpackers told me about the Simpson Pass route to return on. They all said it was more interesting and less of a steady downhill. I could get a burger in Sunshine Village and then take a shuttle bus down to the gondola parking lot. The weather was supposed to be nice so I planned to do it.

My biggest worry (ahead of time) was the 3 Km straight up to the Healy Pass summit. Really, though, I should know better. Hard goals that are clearly defined are easy for me to get my head around. I put one foot after the other, stop and rest when I need to and then keep going. Such a good metaphor for life. Such a great feeling when I accomplish the goal.

I got to the top of the pass in 2 hours and I was pretty pleased with myself. I met a group of guys from Utah at the top. They were half way through a 100 Km trip and were taking the Simpson Pass route too – they heard the burgers calling. I took group pictures of them at the top and we parted company.

Simpson Pass:

I could see the rain clouds approaching when I got to the top but I hoped they would hold off. I went down through the wildflowers again and reached the junction where the Healy Pass and Simpson Pass trails met. I could have taken the easy, known, less interesting route that I had come up but I chose to take the other trail and it became my adventure. I didn’t take as many pictures  – misery doesn’t make me feel very creative.

The Simpson Pass trail was not as well defined as the Healy Creek trail. It was narrower, muddier, with no bridges across streams – just slippery rocks. I had the sense I didn’t know where I was going because I had no idea what to expect – no landmarks to go by. I just kept going and trusted the process. As the trail moved on I met more and more people so even though I did know I was on the right trail, I still felt a bit of panic. I hadn’t planned on this trail so I was out of my comfort zone. I’m not one for just going with the flow without a plan.

As I continued the trail started to get worse. It was steeper (up and down) and muddier which made it slippery. The weather started to get worse and was soon full blown rain. As I went up and down steep and tall ridges, my knees and toes were protesting mightily.

The thing that was most frustrating was I had no sense of how far along the trail I was or how far I had to go. I would ask people and feel somewhat reassured, but I was out of my element. I like to know and I’m not big on surprises.

At one point, with about 5 Km to go, I was moving along a steep and narrow part of the trial when I encountered a group of six or seven people who changed my outlook completely. The trail was narrow, running alongside of a mountain. It was really muddy. They were pushing and carrying a woman in a TrailRider. I had seen these on TV before, but not in real life. The trail was difficult and they were coming toward me. They would have been about 5 Km from Sunshine Village at that point. Having a heavy pack I take up a lot of room so we all carefully squished and squeezed so I could get by. I was amazed at their commitment – they all went through a lot of effort to give this woman an amazing mountain experience. It was pretty humbling. Here I was in my head stressing about the trail and they were moving this huge contraption through the same mud, up and down the same slopes, and over the same streams. Suddenly my problems seemed a bit smaller.

For the rest of the trip my head would start to complain again and just as that whiny voice would get louder in my brain, I would look down and see the track of the thick tire of the TrailRider. Humbled again.

I passed by three large red cones mounted into concrete and realized I was right at the Alberta / BC border. This was kind of cool. Around this point the trail seemed to disappear and go in all directions thanks to some runoff areas because of the rain. When I calmed my mind, though, I could see the trail and then I would see hikers coming toward me and I felt relieved again.

Eventually, the rain cleared and I saw something that pretty much made me want to cry. At the top of a nearby peak I saw a chairlift… something man made… something related to a ski village! The trail improved dramatically and there were day hikers all over the place. I walked down a steep snowshoe trail for 1.6 Km apologizing to my toes all the way. Finally I was there. I took my backpack off and left it outside, bought a ticket on the Shuttle, and ordered a burger, ginger ale, and fries….. heaven!

When I got down to the village I ran into one of the guys from Utah. His leg was bleeding. It turns out he had slipped and fallen on one of the steep inclines in Simpson Pass. Both of us admitted the trail was a lot harder than we were expecting.

I had planned to do two nights at Johnston Canyon but with more rain in the forecast and my knees and toes complaining, I decided to go home… it was my holiday and I could do whatever I wanted.

Although my knee was swollen and my toes were numb (updated report… 3 toenails probably toast) I felt pretty good the next day and decided to do something decadent on my holiday. I drove from Kamloops to Vancouver to visit a used bookstore.

I love holidays!

Looking back, this trip was about being OK with being uncomfortable. I like to have everything in my life planned and controlled. I like to control my surroundings. This was good practice at not being able to control my surroundings and just going with what was happening all around me. Very valuable and powerful.  I’m not sure I’d do Egypt Lake again. There are other trails in Banff, Yoho, and Waterton I’d like to tackle and I love Berg Lake so I know I’ll do that one again. I think it was a gorgeous place to go but I’m not sure it’s my go to place – that’s still Berg Lake.

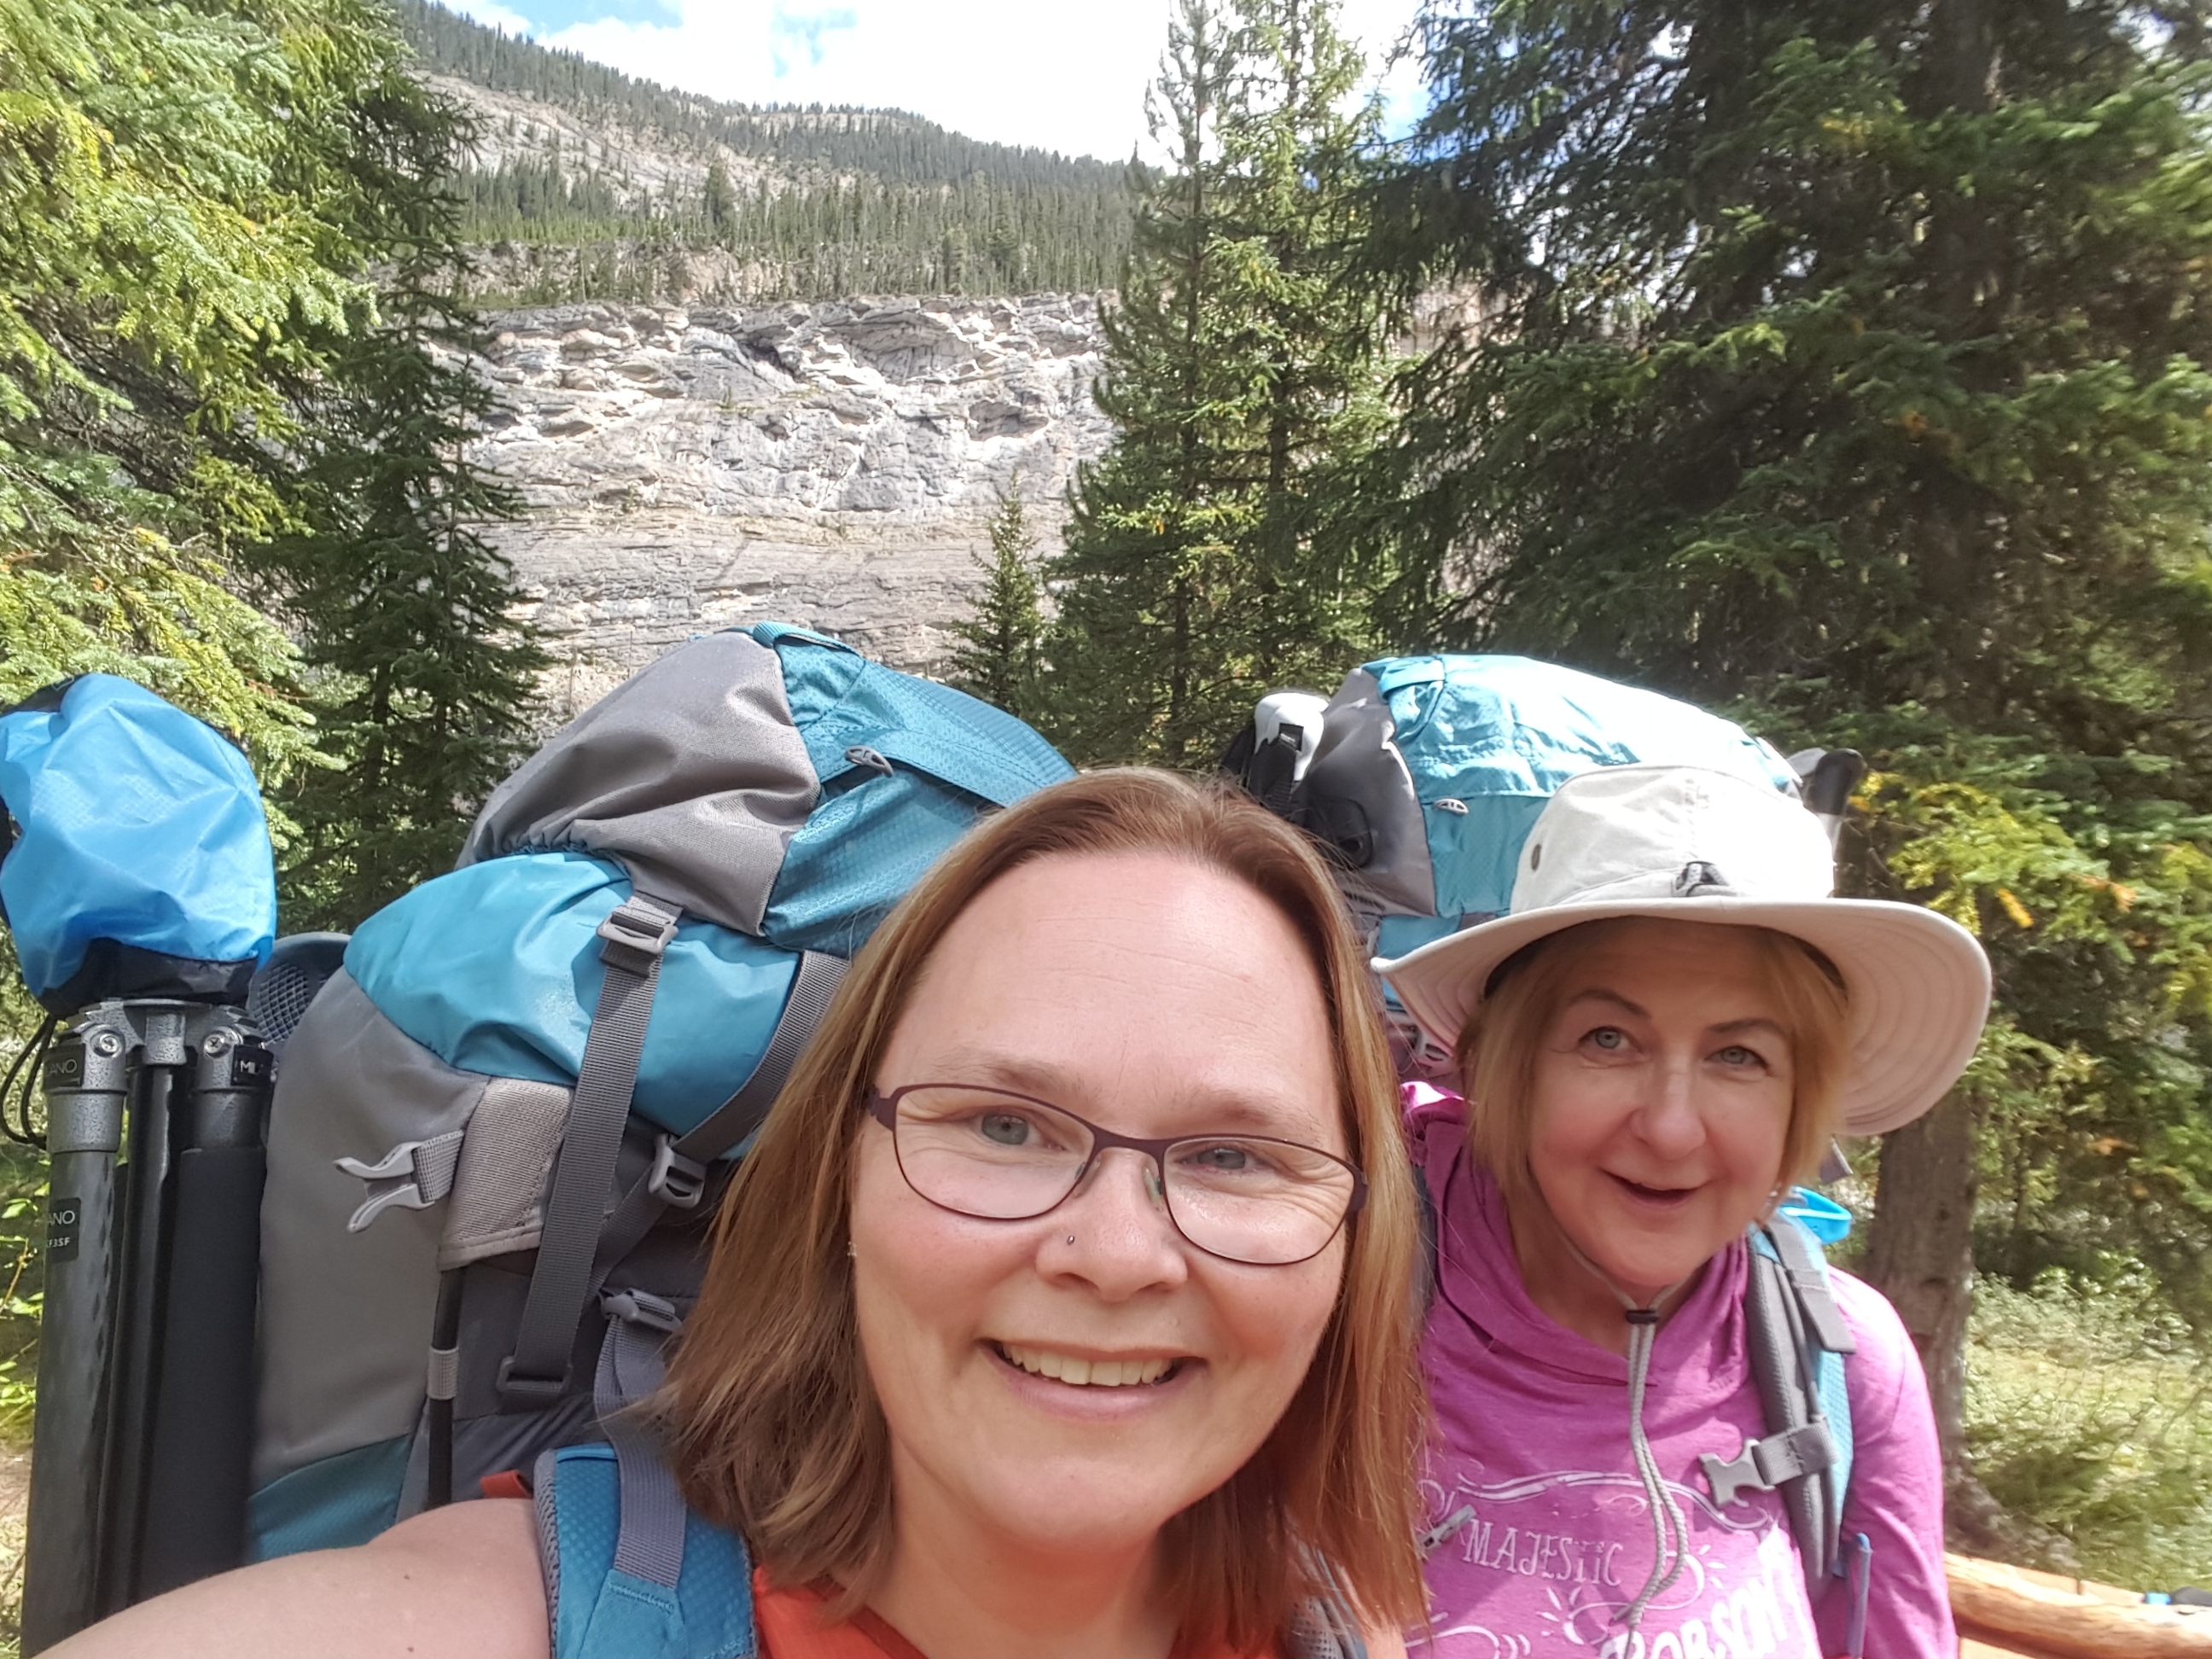
Next up is a quick backpack in Yoho with a good friend. This will be the first time I’ve backpacked with someone else – I can’t wait!


Making Movies – A Crazy Thing Gets Really Real

20160614_123322An addendum to Crazy Thing #45.

I finally got to see my first paid screenplay being filmed. After months of rewrites from the producers and director and with changing budgets, directors, and locations it was finally out of my hands. Although I have been insanely overscheduled and busy this month I managed to keep one whole day free for a quick day trip to Vancouver.

Originally the production was supposed to be shot in Duncan but they changed to Vancouver, which was extremely convenient for me. A 3 ½ hour drive vs. 6 hours and a ferry ride was very manageable.

I actually really enjoy driving when I’m not in insane traffic or three feet of snow so leaving at 6am and driving the Coquihalla on a (then) sunny June day was a treat I should give myself more often. I got to Ft. Langley and followed the directions to the parking area for the crew. On the way through Ft. Langley I drove through another film set where they had the streets set up for winter – not my movie. There are over 50 film projects underway in Vancouver and there is a desperate scramble for locations, crew, and equipment. The crew parking was at a golf course where they were sharing the parking with the crew from the film I had just driven through.

When I arrived I was asked which production I was with and had a bit of a shiver when I said, “Justice Unleashed” – well now, this was starting to feel real. They directed me to park and another crew member asked if I was in the crew. I said no, I was just visiting.

He looked skeptical. “Do they know you’re coming?”

“Yes, I’m the writer.”

“Oh, sorry!”

Suddenly the conversation moved much quicker. I was driven to the shooting location where the trailers for the cast were set up. After checking in with the AD, who apparently didn’t expect me to check in with anybody, I walked to the very modern, very “out of my budget” house where the day’s shooting was taking place and I was greeted by another crew member. Although I wished, for the sake of claustrophobia in crowds, that it was an outdoor shoot. The astonishing waves of rain later in the day made me glad I was inside. I lived in Vancouver for 15 years and never did like the rain but it’s not often you see it come down that hard.

When I arrived they were shooting in the garage. I was shown into a tiny hallway where more crew were working and the sound guy was huddled in a tiny corner with headphones on.

Having driven for three hours the urge to pee was pretty huge so I asked one of the production assistants where the washroom was. He pointed me to some trailers outside – no big deal. The man who greeted me at the door interrupted and said, “Actually she’s a VIP – she’s the writer. She can use the washroom in the house.” Well! There was a perk I never expected. Everyone in the hallway stopped working and stared at me when I went into the washroom – awkward!

20160614_102819

Finally, they finished the shot and I was escorted in to meet Farhad Mann – the director. We had spoken for hours on the phone but had never met in person. He invited me in and told me what they were shooting and let me watch the monitors with him. The garage was so crowded it was making my skin crawl – I don’t do crowds of people in tight spaces – not a big fan of parties either. I sucked it up, though, because when I saw the crowd it hit me that I had created a project that, for a brief time, was keeping all of these people employed. That was a pretty huge dose of reality.

I remembered when I was in my early 20’s and worked as an extra and a script reader to make extra cash. That was a long time ago, but a feeling came back to me that I had forgotten – despite the crowds, the “hurry up and wait” pace, and the frenetic energy – this was a place where I felt comfortable, where I belonged.

Through the day the crew and equipment moved from one part of the house to another. I felt in the way a lot but I was trying to be more of a fly on the wall than a fly the crew wanted to swat. I think I was partially successful.

20160614_102520

Farhad introduced me to a lot of people, most of whom did a double take when they found out I was the writer. In true introvert fashion I said hi to a lot of people but really only connected with a couple. Sarah, the Script Supervisor, and I had a great talk about writing and the Director of Photography and I had a few laughs.

As the day went on I realized I wasn’t very interested in what the actors were doing, but I was more interested in what the crew was doing. I was trying to absorb as much information as I could and that’s where most of the action was happening. I loved it.

20160614_114917_001

I got a message in the afternoon that there was a snow storm brewing on the Coquihalla and they were expecting at least 6” of snow so I decided to leave a bit early. It had been a great day and a total success from my point of view.

On the drive home I was thinking about the next Movie of the Week I have in the works – I’m waiting for notes from the producers and the network, and a short film I’m writing that I’m really excited about, as well as other writing projects I have lined up. From start to this point the process for Justice Unleashed had taken two years, but it was more like a year if you took out all the long waiting periods. The story idea I submitted in the beginning is completely different than the story I watched being filmed. That’s OK. That’s how the process works. Working with Odyssey Media has been awesome and I’m looking forward to what our next project becomes.

I’m writing this on the last day of shooting for Justice Unleashed – now they move on to editing and post production. I’ll post again when I know when it will be broadcast.

20160614_082356

From the drive home


Save

Save

I schooled a guy on fit or fat… happy day!

20160129_195222

This is a fit person… get over yourself!

Feeling a bit “pretty woman”-ish. I wasn’t going to post this publicly but I think I will.
I had just gotten back from a great run this morning (I was still sweaty) when I got this message from a guy I’ve never seen before on POF (Plenty of Fish… see Crazy Thing #14 ):
“So I just scanned through your profile and I have a question, your very fit but you say your a few extra pounds doesn’t fitness predicate that your not ” a few extra pounds” ?”
Note: I have my body type set as “A few extra pounds” on POF and in my profile it says I am very fit but not fast.
Taking the high road and ignoring the grammatical errors in his question, I responded thus:
“Hi, well.. I guess I should be grateful you scanned my profile.
The answer to your question is no… level of fitness and extra weight are not even close to being the same thing. I just got back from a 7K run this morning and I just checked and… yup… still have about 30 lbs to lose. If you look at large sporting events (ie a marathon or half marathon) you will see people of all shapes and sizes. They are all fit if they are able to train for and do that distance. I know plenty of ‘thin’ people who are horribly unfit and would collapse trying to run or do any physical activity for more than 5 minutes.
Today is my 869th day of consecutive exercise. Some days it’s weight training, in the winter it’s cross country skiing at least 5 days per week (600 kms this winter), indoor cycling, hiking, etc.
This year I will run one obstacle course race, two 10Ks, a half marathon, and a bunch of 5ks. That’s what I’ve planned so far. I also plan to do the Berg Lake Trail again (44kms, 500 m elevation over 4 of those kms) plus at least one other overnight backpack. I’m pretty sure I’m fit.
Thanks for asking, have a great day!”
If he contacts me again I’ll launch my Kinesiology Degree at him, and then I’ll sick the grammar police on him.
I continued happily along on my day with an extra skip in my step and a grin on my face!

20151108_184551

post workout