Picture Books to Read Aloud

After 12 years of reading picture books to kids, these are some of my favourites. A good picture book is so perfectly written and edited it just feels natural. That is harder than it seems to accomplish and many authors and publishers miss the mark but the ones that do it well do it really well.

What is a picture book?

Picture books are usually between 24 and 32 pages and their large size makes it easy to spread out and read with a child tucked next to you or on your lap. From my perspective, they are easy to hold in one hand when you’re facing it forward to a group of children and the images are large and easy for kids in a group to see. The words are easy to read when looking from the side so you can read without having to move the book around a lot and so you can read it in front of you Storytime-style.

Reading aloud

Picture books are meant to either be read aloud or flipped through by children who understand the story by exploring the pictures. The print often isn’t huge as it’s meant for the adults who are reading them. The images, though, are usually spectacular and that’s the part that the children connect with. They hear the story orally and connect with the pictures as they listen.

This oral way of delivering a story emphasizes when the words are written well … and when they aren’t. I cringe when I see picture books with large amounts of text filling a page. Not in all cases, but in many the text is over explaining and lacks the crucial rhythm and flow that make reading aloud so magica. A great picture book to read aloud has beautiful flow and a natural and engaging rhythm. Every word is chosen with precision with the reader and listener in mind.

Tips for reading aloud.

Reading aloud when you’re reading to children in your life (children, grandchildren, friends) is easier than reading to a critical group of toddlers or pre-schoolers in a storytime program. But even if you know the children some people worry that they don’t have a great voice or get nervous about the performance aspect of it. My biggest tip if this is intimidating to you is to just relax and read “with wonder” – meaning embrace the story. To a child that knows and loves you, your voice is already perfect. It makes them happy and gives them comfort. Don’t get stuck on trying too hard or trying to be perfect. Just slow down and embrace the wonder and the story. Play with some voices too. Try giving big creatures a lower voice and smaller creatures a higher voice. Don’t make it complicated. It should be fun for you too and if it’s not, the children will know right away.

The biggest thing is to slow down and play with the story. If you know there is a surprise coming, then maybe hold off on turning that page and build the suspense. Children love play, and books and stories are a big part of that. Play involves experimenting and trying new things.

Allow for questions about the story as you read. Books provide great opportunities to talk about relationships, emotions, morality, and even cultural details that are different than what the child experiences in their everyday life. There are picture books that are written to deal specifically with issues of diversity and life issues such as grief and loss, and behaviour issues like sharing or kindness.

Some of my favourite picture books to read aloud:

Here are some of my favourite pictures books to read to children. There are thousands or amazing picture books around and I’ll review more as I come across them, but these are my trusty standbys. They are all a little older but they have stood the test of time. I know the stories well and I can easily get into the voices.

The Book With No Pictures by BJ Novak (Dial Books, 2014) Ironically, the first picture book I’m going to recommend has no pictures! This is easily the most popular book I read to preschool, kindergarten, and even grade 1 and 2 kids. It’s so popular they request it when they walk in the door and I limit them to twice per year or I’d have to read it every week. This is a performance piece for readers. It’s the book I recommend all parents get their kids and read it to them. Must use voices! They never get tired of it!

The Pout Pout Fish by Deborah Diesen, illustrated by Dan Hanna (Farrar, Straus and Giroux, 2008) There are lots of Pout Pout fish books now but the original, just titled “The Pout Pout Fish” is the best – you will need develop good voices!

Brontorina by James Howe, illustrated by Randy Cecil (Candlewick, 2013) This is a great one if your family likes dance but even if nobody dances, it’s a fantastically fun story about inclusion.

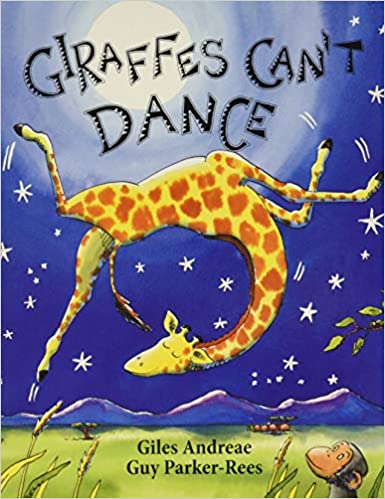
Giraffes Can’t Dance by Giles Andreae, illustrated by Guy Parker-Rees (The Watts Publishing Group, 2001) This is a great book about individuality and self-expression.

The Wide Mouthed Frog (popup book) by Keith Faulkner, illustrated by Jonathan Faulkner (Dial Books, 1996) This is so much of a favourite for me that I’ve pretty much memorized it and it both read it to children and tell it to children. I love it! I have developed some good voices and the sense of surprise is fun to build up. Pop up books are a favourite of children but for the little toddlers they will destroy them. They are a great lesson on how to care for books but if they get destroyed, you just get another one. It’s worth it.

Don’t Push the Button by Bill Cotter, illustrated by Bill Cotter (Sourcebooks Jabberwocky, 2013) There is a surprise on every page of this book and kids and adults have a lot of fun with it. It has some good reminders about cause and effect.

Fortunately, Unfortunately by Michael Foreman (Anderson Press, 2011) This is a really fun book with lots of adventure that really emphasizes how you can feel like all is lost but really you have the tools at hand to solve a problem. Plus there are pirates and aliens!

If You Give a Mouse A Cookie by Laura Numeroff, illustrated by Felicia Bond (Scholastic Paperbacks, 1988) There are several of these books but I like the original one the best. They are all excellent and lots of fun to read and to listen to.

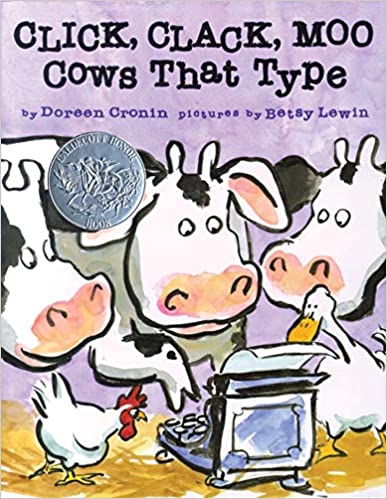
Click Clack Moo: Cows that Type by Doreen Cronin, illustrated by Betsy Lewin (Athenium Books for Young Readers, 2000) This one never gets old. It’s all about negotiation tactics.

A Porcupine in a Pine Tree by Helaine Becker, illustrated by H. Werner Zimmerman (Scholastic, 2010) – This is the 12 Days Of Christmas Canadian Style. Each year I read this to any kid or group of kids I can find. If they’re older I break them into groups and let each take a part which makes it a lot of fun. I think it’s best Canadian Christmas book ever!


My first chapter book, The Spyders: Slither Me Timbers, will be out soon in print, ebook and audiobook.

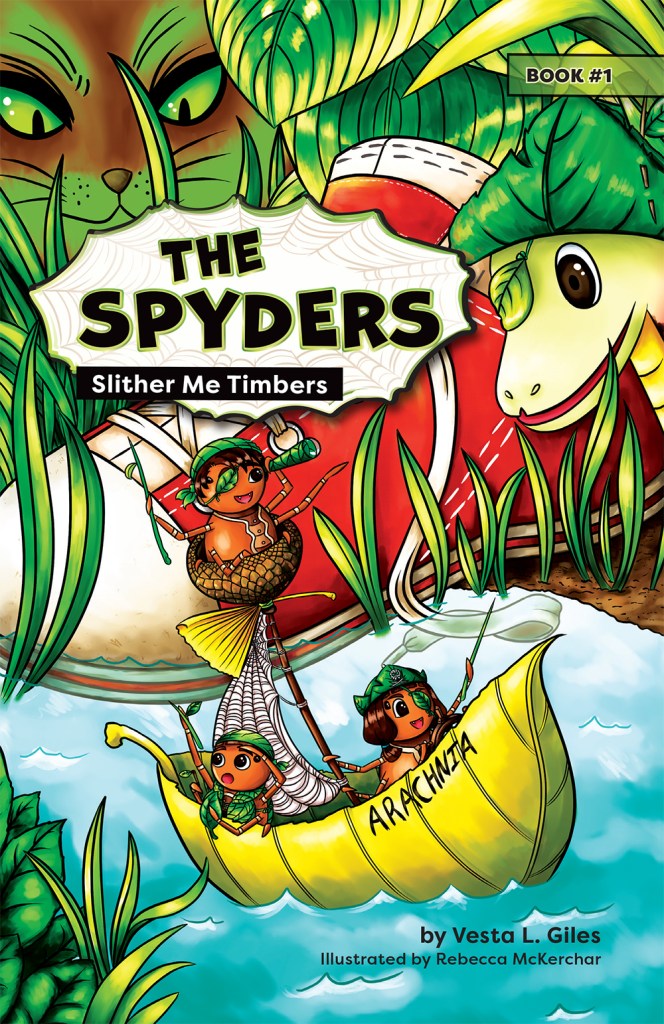
Visit http://www.vandelsopress.com for more info or sign up for the newsletter here.

The Joy of Chapter Books

My first chapter book, The Spyders: Slither Me Timbers, is coming out in print, ebook, and audio around the end of May (date still to be determined) and I am beyond excited. While there are many books I want to write for both adults and kids, and I have plans to finish several in the next year, I’m pretty pleased that my first book for my new publishing company and for me as an author will be a chapter book and it’s the first of a series.

I think chapter books are the unsung heroes of children’s literature and I don’t think they get the respect and admiration they deserve. Chapter books are the keys to accessing countless worlds of wonder for new readers.

What is a chapter book?

A chapter book is a short novel that’s usually in the 100 – 150 page range. Think of the Captain Underpants series (by Dav Pilkey), Diary of a Wimpy Kid (by Jeff Kinney), or the Magic Treehouse books by Mary Pope Osborne. Aimed at newer readers in the 7-10 age range, chapter books look like novels. They have chapters (hence the name) and usually black and white images that are sprinkled throughout the book. Their print size is larger than the standard novel but not so big they look like words for babies or little kids.

In the beginning – board books and picture books

Books for younger children, picture books or board books, or even beginning readers, lean very heavily on brightly coloured images with few words per page. These are books that parents read with kids on their laps, and little kids flip the pages and make up stories based on the images they see and the words they remember grownups reading. They are often filled with spectacular artwork and for many of us they are the first books we remember as adults.

Beginning readers

The first books kids actually learn to read are usually beginning readers, with somewhere in the range of 30 pages, roughly 20 words per page, and simple, colourful images that enhance the words. In the old days they would have been Dick and Jane books, and then Dr. Seuss. They are wonderful for becoming the first books where children sound out a word and read a page, and then a whole book. When those first words are read, a window is flung open in their minds and they devour these thin little books like the sweetest candy.

Moving up to chapter books

Next comes chapter books. The kids that are reaching for chapter books want to read like their parents and their older brothers and sisters. They want a book that doesn’t look like it’s for little kids. A chapter book feels like a novel. The size and the paper feel the same. They are the gateway to Harry Potter and Percy Jackson and A Wrinkle in Time for kids who aren’t quite ready to tackle those books solo. But these chapter books are starting to have more complex stories, and they now feature many more words than pictures.

Beginning readers are the window to the joy of reading, allowing kids to look out on a world of stories and feel a sense of independence. They give kids a glimpse of what is possible. Chapter books allow them to step out the door and if they find the right book, their lives are never the same. They land on other planets, in ancient Greece, in a magic treehouse, or in my case, the tiny, unexpected world of spiders in the garden. Chapter books are also the first experiences these new readers will have of becoming hooked on a series.

Moving up from chapter books kids will begin to dive into longer novels with much more complex and emotionally challenging subjects and content. I love seeing them at this stage too, but nothing beats the first time hearing those magic words, “Can I read just one more chapter?”

The Spyders: Slither Me Timbers will be out at the end of May, 2021. Sign up for the newsletter for the latest details!

A book nook nerd in the making

What is a book nook?

A book nook is a piece of miniature art, designed as a scene, that sits on a bookshelf between books.

My first booknook.

How did I start?

When COVID hit and I was at home I became restless and decided I needed to completely redo my office and it had to happen NOW! I’m calling the projects I completed between April and August COVID projects. Surfing Youtube and Pinterest I started to see book nooks appear. Most of the early ones were Harry Potter themed but there were others and I was fascinated. Over the summer book nooks have shown up all over the place.

I went from loving book nooks but not knowing where to start, to being determined to create one after I saw a Youtube video by Rachel Maksy. She normally does amazing cosplay videos but she made a book nook in one video this spring and her easy way of making the structure convinced me I could do it. You can watch her video here.

I started watching other videos from people like Ara at Bently House Minis and Black Magic Crafts (I’m not a DnD player or gamer but this guy’s techniques and enthusiasm are awesome!) and fell back in love with miniatures, something I was interested in when I was a kid. I’m now completely obsessed.

Maybe it’s the filmmaker in me who loves models, or the little girl that read The Borrowers and the Littles when I was growing up that made miniatures so interesting. I’m not interested in doll houses because of the dolls – it’s about the stories.

The thing I like about this kind of activity is that it lets me give parts of my brain a rest. When I’m writing I often run into stumbling blocks and problems I can’t see easy solutions for. I need to have activities like knitting, or making crafts, or cooking risotto, or even long solo cross country ski days that put the problem on the back burner in my brain. It’s hard to describe but by taking the pressure off solving the problem the problem often solves itself. This has been a very good project for me during COVID when I was trying to do a lot of writing.

Materials

Keepsake box from Michaels
  • Keepsake Box (make sure it isn’t too tall to fit on your shelf. It will be sitting on it’s back edge with the opening flap on the top)
  • popsicle sticks
  • stain (I used Unicorn Spit because I had a lot available)
  • white glue
  • super glue
  • mod podge
  • craft paint (I used acrylics and basic craft paints from Michaels)
  • watercolour paper and paints
  • Tim Holtz Distress Ink pads
  • sharpie markers
  • clear vinyl (this is the type that they make table coverings out of. I had some on hand.)
  • foam core (sheets from Michaels)
  • craft foam (thick and thin – Dollar Store)
  • scrapbook paper
  • polymer clay
  • metal gear-shaped findings
  • steampunk charms
  • wooden skewers
  • Rustoleum clear coat
  • aluminum foil
  • silicone sealant
  • lights from Evan Designs

Construction

Structure

I started by cutting the end off the keepsake box for the opening. I saved the piece of cardboard I cut away as I used it later to make the back wall. This was a great idea from Rachel Maksy’s Youtube video (see link above). I didn’t want to build a box and this suggestion made all the difference. I roughly marked out where things would go on each wall with a sharpie. I ended up changing it pretty drastically by the end but it was good to have a reference to start out with.

Floor

The first thing I worked on was the floor. I used popsicle sticks and since I was already working on a massive bookshelf project using Unicorn Spit stain and I loved the bright colours, I used some for the floorboards. I laid out the bare floorboards first to make sure they fit. I lightly sanded the popsicle sticks and dampened them down first so the stain would penetrate. Once they were dry I varnished them with a Rustoleum clear coat that I also had on hand due to my large bookshelf project.

I laid the floor boards down in a pattern that looked pretty realistic with the colours and seamed spread out. I posted pictures on Instagram and some people thought it was a real floor.

Stairwell

Next I started working on the stairwell. I started with the arch and made it out of foam core. I discovered I hate cutting foam core. I then discovered the softer foam that is 5mm thick and I like that a lot more. The archway didn’t need to be that strong because it would be stuck to the wall and didn’t need to support anything.

For the backing of the archway I used a piece of cardstock and a layer of the thinner dollar store craft foam over top. I cut thin slices to make a ledge and I dug into the surface with a pen to make the stones and the stairs. I used wadded up aluminum foil to make the texture on the foam. I made sure to go really deep with the pen so the ridges between the stones and along the stairs were really deep.

I glued them together and realized I didn’t like the edge of the original foam core so I cut thin strips of foam to make some edging and trim around the arch.

To finish the arch I painted the stone using the stone painting tutorial by Black Magic Craft on Youtube. It’s perfect and I use it all the time now. I used Sharpie markers to colour the wood on the stairs and then I added a bit of watered down black paint as a wash to age them.

Originally I planned to have a wall sconce with a light in the archway but I realized at the end that it wasn’t deep enough and the light would have stuck out too much.

Fireplace

Next I made the fireplace in basically the same way I made the arch, minus the foam core. The fireplace is all thick and thin crafting foam. I didn’t need the top to be really strong because it was going to be glued to the wall. Later I added banners with fabric, wooden skewers, steampunk charms, and some of the gears I included in other places as well that I painted and folded in half to make brackets.

Bookshelves

The bookshelves were made with thick and thin foam as well. The outside panels are made from the thick foam and the shelves and back are made from the thin. I painted them and aged them to look like wood. The books are made from individually cut pieces of the thick foam and coloured on 3 sides using sharpie markers. Then I used a combination of fine gold or black pen to make the lines across the back. I coloured the tops of the books (where the pages would be) with beige or gold marker.

Furniture and Accessories

Most of the furniture, lighting fixtures, and accessories were made from polymer clay and the metal gears I got from Michaels in the jewellery department.

The chair is polymer clay with a metal gear piece in the back and fabric for the seat cover. The logs for the fireplace are polymer clay and the metal piece the are resting on is made from pieces from the gear package. The books that go on the desk and the fireplace mantle are polymer clay and paint. The desk is a combination of wood for the top, with legs made of foam, wood skewer, and metal gears. The crow, typewriter and inkwell are polymer clay.

The light sconces on the wall are polymer clay with translucent polymer clay on the top (with a bit of orange ink added in) and gear parts. The main chandelier on top is made of curved gear pieces.

Stained glass window and view

The back window is made from vinyl from a fabric store. I tried other types of acetate but the colours looked dull on them. I used bright sharpie markers for the stained glass. The back wall is the cardboard I cut from the side of the box that I trimmed down a bit. I covered it with foam so I could have the same stone look as the arch and fireplace and added trim and a chair rail before using the stone painting technique again. Behind the window is a watercolour painting that is just layers of orange and yellow to try and make it look like a sunset.

Ceiling

I wanted the ceiling to look a bit like it was falling apart and boards could be seen where the plaster had fallen. I used the thin foam again and dug really deeply with a pen to make deep wide grooves between the boards and roughed it up a lot with a ball of aluminum foil. I gave it a light wash of watered down brown paint. I then got watercolour paper and added layers of colour by taking distress ink pads and just rubbing the whole pad along the paper. I then dampened the paper and ripped it so it would show the edges. and then aged it. When I showed the picture on Instagram a friend told me she was sorry to see I was having ceiling troubles. Best compliment ever!

Walls

The walls were textured scrapbook paper that I rubbed a yellowish distress inkpad all over. I wanted them to look like old plaster.

Lights

The lights were the best and most frustrating part of this project and I learned a lot from them. The staff at Evan Designs are fantastic and really helpful. I’ll be making a large order soon for future projects. The nightmare with the US Postal Service this summer was very frustrating and it took a long time for the lights to arrive but that wasn’t the shipper’s fault – it was the shut down of the postal service.

The wires on the lights are very fine so the most important thing I learned is to not keep messing with them and connecting and disconnecting them. Just stop!

Now that I’ve had the lights I would do things a little differently. First, if I was going to keep opening the side of the box to work on it after placing the lights I wouldn’t put lights on that wall that moves. I had one wall sconce and the fireplace on that wall and they kept becoming disconnected, which kind of makes sense of you think ahead! If you do put lights on that wall then put them all on one switch.

The flickering lights all need to be on the same switch (or with other flickering lights – they can’t go with steady lights). When you put them all on one switch they will flicker at the same time. I would put them on a few different switches. It will mean a bit more expense and more switches to deal with but the randomness of the flickering would be nice.

I had 3 nano sized lights in the chandelier and they worked well. The fireplace that flickers is awesome and I used a small amount of silicone sealant to make a blob (spread it on a piece of glass and let it dry, then peel off) that wraps around them so they aren’t so bright.

I used a white nano sized light and an orange pico sized light in the back to light the sunset. I will be replacing the orange with a bigger one as it wasn’t big enough.

I started with only 2 switches in the back. One for the flickering lights and one for the steady lights. Doing it again I would use more switches based on the location of the light in the scene so I wasn’t stretching wires all over the place. The wires are glued in beneath the ceiling and behind the wallpaper and I’ll be removing them soon to redo my lighting.

The finished project

I love my book nook! There are definitely things I would do differently, like plan the lighting better and alter the layout a bit so it was easier to see things at the back, but overall I love it! I painted the outside black with acrylic paint that is already scratching off so I would definitely use some sort of scrapbook paper or something to cover the pattern on the box.

I made a front piece to glue on so the edges would be really clean and I would probably plan that better on the next one as well. I would also put some thought into scale early on. I realized I hadn’t done that and needed to know how big to make things so I created a little stick person who was the right size for this room, but it’s definitely not a standard scale. You can see my little stick person in some of the photos.

Other than that I am really pleased with my first attempt!

Next one(s) – the addiction continues

I have already started my next nook and I have plans for a couple of others as well as a condo building of rooms that pay homage to different murder mystery authors. I’m hoping this isn’t an indication of how long COVID is going to last.

When I’m Dead – the journey

When Im Dead-Vesta-Final-2pages2 (002) cover art sm 2

March 29, 2018

It’s been a little over a year since I was sick at home with bronchitis and decided I had to write a short film script about something that happened with a late friend and her mother. Fast forward through a year of grieving the loss of my friend and trying to get this project off the ground.

It was a year of applying for a huge grant and in the process meeting a great producer who I hope to work with in the future, discovering how to write a grant application and a budget, casting two amazing people to star in my film, and being devastated and then actually relieved that we didn’t get the grant. The timing wasn’t write and it would have been rushed.

At the time I wondered if we would get to make the film at all. I was at the end of something and I didn’t know what direction to take. I didn’t know where the new beginning started. This was September, 2017. I had no idea how, or if, I would be able to make this 10 minute film that meant so much to me.

Then, on a cool fall day I went for a bike ride to the lookout at Stake Lake. This was where I wanted to shoot part of the film. It’s a place with memories, and a place where I can think. After long rolling hills and a steep uphill, the lookout is on a plateau with short winding tree-lined trails that open up to an expansive view of Lac Le Jeune. The winding trail is flat with tight curves that weave through the trees. As I was riding I heard a loud whooshing noise beside me. I looked, and there was a Great Grey Owl flying at my eye level right next to me. I was astounded. It pulled ahead of me and soared along the path, gracefully tilting as it took the curves. Then, still stunned, I heard another noise behind me and there was a second owl. It followed the path of the first ahead of me and then both rose up to the tree tops and disappeared. Right then I arrived at the lookout and the view hit me. Owls have always been special to me. I don’t see them very often, but when I do I pay attention. To me they always seem to indicate big moments that make me pay attention to where I am. Standing at the lookout I knew I would make this project happen. I had no idea how, but I knew I had to do it.

In October I went to the Vancouver International Film Festival’s Totally Indie Day and heard Jonas Woost, (Executive Producer, Telus Original Content & STORYHIVE), talk about the Storyhive granting program and I suddenly realized I might qualify for a Storyhive grant. They are a lot of work, (making pitch videos, etc.) and the grant amount of $10,000 wouldn’t be enough to completely make the film, but it would go a long way.

20180311_144301

Nolan McAllister and Amanda Cowell helping me with the pitch video.

After that I talked to local people who might be interested in helping me make the film. Suddenly I have a talented cast and crew and a huge cheering squad.

So, here we are. Our pitch is in for the Storyhive Digital Shorts edition and voting will be happening between April 3 – 6. Either way we are shooting in early May. We have a small window of opportunity when our dream cast and most of our dream crew are available to shoot for 3 days. We have to make it work. We will need to do some crowdfunding to cover things like equipment rental (if we don’t get the Storyhive grant), and making sure people get paid and fed if we do get it. I’ve decided to document the process here. I’ll keep a bit of a journal about the entire production process. We are shooting in a little over a month and there is so much to do!

Wish us luck!

Daughter for Sale – available for viewing

20160614_114917_001

On set – Daughter for Sale (Justice Unleashed)

Update – the link is no longer available 

OK this is pretty cool. My first movie of the week, Daughter for Sale (Lifetime, US) is now available for Canadians to view via Youtube. Not sure who has uploaded it, or if it will last, but finally my friends and family can watch it. Now, remember, they can do (and did do) whatever they wanted after I handed in the script and it is a low budget Movie of the Week. Still, it’s pretty cool to see my name in the credits.

Dangerous Designs is the next Movie of the Week – I have no idea when that will be filmed. There are other irons in the fire as well but I won’t report on them till they actually become something.


Making Movies – A Crazy Thing Gets Really Real

20160614_123322An addendum to Crazy Thing #45.

I finally got to see my first paid screenplay being filmed. After months of rewrites from the producers and director and with changing budgets, directors, and locations it was finally out of my hands. Although I have been insanely overscheduled and busy this month I managed to keep one whole day free for a quick day trip to Vancouver.

Originally the production was supposed to be shot in Duncan but they changed to Vancouver, which was extremely convenient for me. A 3 ½ hour drive vs. 6 hours and a ferry ride was very manageable.

I actually really enjoy driving when I’m not in insane traffic or three feet of snow so leaving at 6am and driving the Coquihalla on a (then) sunny June day was a treat I should give myself more often. I got to Ft. Langley and followed the directions to the parking area for the crew. On the way through Ft. Langley I drove through another film set where they had the streets set up for winter – not my movie. There are over 50 film projects underway in Vancouver and there is a desperate scramble for locations, crew, and equipment. The crew parking was at a golf course where they were sharing the parking with the crew from the film I had just driven through.

When I arrived I was asked which production I was with and had a bit of a shiver when I said, “Justice Unleashed” – well now, this was starting to feel real. They directed me to park and another crew member asked if I was in the crew. I said no, I was just visiting.

He looked skeptical. “Do they know you’re coming?”

“Yes, I’m the writer.”

“Oh, sorry!”

Suddenly the conversation moved much quicker. I was driven to the shooting location where the trailers for the cast were set up. After checking in with the AD, who apparently didn’t expect me to check in with anybody, I walked to the very modern, very “out of my budget” house where the day’s shooting was taking place and I was greeted by another crew member. Although I wished, for the sake of claustrophobia in crowds, that it was an outdoor shoot. The astonishing waves of rain later in the day made me glad I was inside. I lived in Vancouver for 15 years and never did like the rain but it’s not often you see it come down that hard.

When I arrived they were shooting in the garage. I was shown into a tiny hallway where more crew were working and the sound guy was huddled in a tiny corner with headphones on.

Having driven for three hours the urge to pee was pretty huge so I asked one of the production assistants where the washroom was. He pointed me to some trailers outside – no big deal. The man who greeted me at the door interrupted and said, “Actually she’s a VIP – she’s the writer. She can use the washroom in the house.” Well! There was a perk I never expected. Everyone in the hallway stopped working and stared at me when I went into the washroom – awkward!

20160614_102819

Finally, they finished the shot and I was escorted in to meet Farhad Mann – the director. We had spoken for hours on the phone but had never met in person. He invited me in and told me what they were shooting and let me watch the monitors with him. The garage was so crowded it was making my skin crawl – I don’t do crowds of people in tight spaces – not a big fan of parties either. I sucked it up, though, because when I saw the crowd it hit me that I had created a project that, for a brief time, was keeping all of these people employed. That was a pretty huge dose of reality.

I remembered when I was in my early 20’s and worked as an extra and a script reader to make extra cash. That was a long time ago, but a feeling came back to me that I had forgotten – despite the crowds, the “hurry up and wait” pace, and the frenetic energy – this was a place where I felt comfortable, where I belonged.

Through the day the crew and equipment moved from one part of the house to another. I felt in the way a lot but I was trying to be more of a fly on the wall than a fly the crew wanted to swat. I think I was partially successful.

20160614_102520

Farhad introduced me to a lot of people, most of whom did a double take when they found out I was the writer. In true introvert fashion I said hi to a lot of people but really only connected with a couple. Sarah, the Script Supervisor, and I had a great talk about writing and the Director of Photography and I had a few laughs.

As the day went on I realized I wasn’t very interested in what the actors were doing, but I was more interested in what the crew was doing. I was trying to absorb as much information as I could and that’s where most of the action was happening. I loved it.

20160614_114917_001

I got a message in the afternoon that there was a snow storm brewing on the Coquihalla and they were expecting at least 6” of snow so I decided to leave a bit early. It had been a great day and a total success from my point of view.

On the drive home I was thinking about the next Movie of the Week I have in the works – I’m waiting for notes from the producers and the network, and a short film I’m writing that I’m really excited about, as well as other writing projects I have lined up. From start to this point the process for Justice Unleashed had taken two years, but it was more like a year if you took out all the long waiting periods. The story idea I submitted in the beginning is completely different than the story I watched being filmed. That’s OK. That’s how the process works. Working with Odyssey Media has been awesome and I’m looking forward to what our next project becomes.

I’m writing this on the last day of shooting for Justice Unleashed – now they move on to editing and post production. I’ll post again when I know when it will be broadcast.

20160614_082356

From the drive home


Save

Save

50 Crazy Things in my 50th Year #45 – Write a screenplay

Screenshot_2016-02-23-16-12-58-1-1

I do feel a bit weird about announcing this. It’s not a totally done thing yet but my part is done and the rest is out of my hands.

Actually, that title is a little bit misleading. I have been writing screenplays, among other things, for many years. The difference with this one was that I was going to sell it and it was going to be made into something that someone other than me could see. Generally, the criteria for my crazy things is that it had to be something I had some control over. You can’t just say “I’m going to win the lottery” because we don’t really have control over that… or at least we shouldn’t!

I had pitched some ideas already to Odyssey Media of Vancouver. They produce a lot of movies of the week for networks like Lifetime and SyFy, among others. Right before my crazy year began they picked one of my story ideas and asked me to develop it further. I did, and eventually I got a contract to write a script for a movie of the week that would air on the lifetime network. This is a pretty big deal. It’s not a union production and it’s not huge money, but it’s a 90-minute credit on a major network and it’s a nice toe in the industry door. The fact that I didn’t have to be living in Vancouver or Los Angeles was extraordinary – yay for the internet! I was given deadlines for the synopsis, treatment (basically an outline) and once that was approved, the full script. Now came the hard part, I had to deliver a script and they had to approve it.

screenwriter1

When I tell people I’m having a writing day, I (usually) really am writing and this year I had an extremely tight schedule because I didn’t want to have to take time off my job to get this done. 90 pages needed to be finished and approved. I also have some minor… or maybe major… issues with procrastination.

screenwriter3

I’m happy to say I accomplished my goal and in October the script for Justice Unleashed, a mother-daughter thriller about human trafficking, was complete and approved. This was very much a process of writing for the specific needs of a client rather than just writing creatively with no need to have anyone approve what I’ve done. They did request changes, and some of them were … well… ridiculous… but in the end they are the client and what they say goes. It was difficult because I could see somewhere great that the story could go but the network has very strict requirements based on demographics, markets, etc. Not my call.

screenwriter2

I have done a lot of professional writing in the past – magazine articles, book contributions, marketing writing, etc. I’ve also been paid to write video scripts for different organizations for training and promotional purposes so being paid to write is not new to me. The fact that I created a project that will have a $2-3 million budget (making it a low budget production) and take a year to complete – that’s new for me.

I didn’t write this earlier because the crazy thing is still ongoing. When the script for Justice Unleashed was approved, they asked me if I felt like doing another one. I said.. “Sure!”… (duh!). I’m currently working on it and I’m hoping the first draft will be finished in the next few weeks.

Justice Unleashed has a director, but he’s not yet locked in with a contract and I’ve just been told it will likely be shot at the end of June or early July in Vancouver. If it is in Vancouver I’ll also be able to visit the set, which should be exciting! I’ll do more blog posts on this as I know more.

Once the one I’m currently working on is finished I’m going to take a break from movies of the week and concentrate on a script I’ve been dabbling at for about a year or so… something about a woman who does 50 Crazy Things in her 50th Year.

Why was this crazy?

How many other people do you know who are doing it and getting paid?

Would I do it again?

Oh yeah!

Save

The Labyrinth Shirt

2014-05-14 07.21.07


Not too long ago I made a shirt with the image of labyrinth appliqued on the front. I’m not the best at sewing but I’ve been learning hand sewing techniques from the book Alabama Studio Sewing + Design by Natalie Chanin of the Alambama Chanin studio. This book and the studio promote handmade work using organic materials and slow, thoughtful craftsmanship.

ac book

This philosophy blends well with the reason I sew, knit, paint furniture, or even make risotto. I find I need to have creative projects to do with my hands when I’m writing, and even when I’m not writing. Working with my hands uses a different part of my mind and energy that takes the pressure off of the ‘writer’ part of my brain. I look at ideas like a big bag of gum balls or jellybeans. The red one in the middle is the one I need, the idea I’ve been searching for, the answer to a difficult plotting problem, or even a brand new project I haven’t even thought of yet.

The trick is, all of those gumballs or ideas get dumped into a funnel, or a gumball machine. In order to get to that red gumball, all the other ones, have to move through the funnel first. Sometimes they get jammed. Putting pressure on them only jams them further. By working on something with my hands, like sewing, knitting, or cooking, it takes the pressure off and they all move a little here and a little there, wiggling against each other and eventually unjamming and starting the flow again. Once the flow starts happening the red one comes through easily. If, however, I kept applying pressure to try and force them out, they just get more stuck. This is the best way I can describe the writing process in my head. I need projects to do with hands in order for other projects in my head to wiggle themselves free.

Now, back to my shirt.

I love labyrinths. As opposed to a maze which is filled with dead ends, a labyrinth has only one path to the centre, but it twists back and forth on itself so you can’t see the route you’ll take to the centre, you just have to trust you’ll get there if you just stay on the path. There are labyrinths around the world that people walk as a form of meditation. There is even a society, The Labyrinth Society, that teaches labyrinth walking and even how to build them. Kamloops has a labyrinth on the path between Riverside and Pioneer Parks.

The most famous labyrinth is the one in built in the thirteenth century in the cathedral in Chartres, France.

chartres labyrinth

Chartres Labyrinth

So I envisioned a navy blue sleeveless t-shirt with a turquoise labyrinth and red stitching on the front.

Although I’ve followed the Alabama Chanin instructions and done reverse applique a few times, where the image is underneath the front piece of fabric, this is the first time where I’ve done applique and placed the image on top of the front fabric.

Materials list:

1 m of navy jersey fabric

Small amount of turquoise fabric

Navy bugle beads

Approx. 4 spools or Coats Dual Duty Plus Craft and Button Thread (red)

Freezer paper for making shirt pattern

Plain paper for image

I started by making a pattern using a fitted stretch shirt I that I liked. I used one of my ski shirts.

I made the neck using the curve of a tank top I liked, and then adjusted the whole pattern to fit better as I went.

I printed the image of a Chartres Labyrinth from the Labyrinth Society Website and sized it so it fit the front of the shirt. The navy fabric I chose is standard jersey t-shirt material, but the turquoise is much thinner. If I was to do it again I would have attached some fusible interfacing to the back of it to make it stronger and easier to sew. Hindsight is wonderful! I did have a bit of a brain wave, though, and I used temporary spray adhesive and stuck the paper to the fabric so I could cut out the thin curvy line that loved to twist back and forth on itself with a bit more ease.

After I cut the image out it took quite a bit of effort to lay it flat on the shirt fabric. Once I got it there I used the spray adhesive again to stick the image to the shirt fabric. I started stitching the image down, peeling the paper away as I went.

2014-04-22 09.04.31

Image adhered to the turquoise fabric and cut out with the paper left on.

Once I completed the stitching I added some decorative beading to the centre. I had planned to do a lot more but it seemed to be too much so I quit while I was ahead.

2014-05-14 07.28.09

I planned to use red beads to make the markings that go around the outside of the labyrinth but I decided the beads I was going to use were a bit too big and they would have been out of proportion with the rest of the image. After some thought I looked back Alabama Studio Sewing +Design book and saw some of the embroidery techniques she was using. French knots popped out at me and they worked perfectly. As a bonus, I learned how to do a French knot!

2014-05-06 17.07.01

Once the image was finished I sewed up the sides according to the instructions in the book. Chalking the seams was a very good idea because I can’t even walk a straight line, never mind sew one. I felled the seams as well which makes it look really nice, and it’s definitely not going to cause a wardrobe malfunction! Felling is when you take the seam (or the part where the two pieces come together and fold them back on the material and sew a second seam.

2014-05-14 07.28.26

Next came the binding around the arms and neck. Yet another opportunity to learn something knew as I’d never done binding before and never done Cretan stitch. I had to look on Youtube  to see how the stitch really worked because the diagrams weren’t working for me. This is the video I used. I also used the stitch in a later project and had to Youtube it again because obviously this stuff doesn’t come naturally to me.

I left the bottom seam unfinished because I think it looks nice and it’s not going to unravel.

Overall, I am pleased! In the process I worked on a screenplay and had a lovely balance of creative energy happening in both projects.

2014-05-14 07.10.41


The Spray-paint Lady Smiles

Dublin cement bridge 1989


For my first post I thought it would be most appropriate to highlight some of my writing. Part of the reason for the blog is to be more available and more visible in my own world and the world at large. I wrote this in January for the CBC Canada Writes Creative Non-Fiction contest. I didn’t win, or even place (there were over 1,800 others who didn’t either) but I’m very proud of what I wrote and writing it got me fuelled for writing for the rest of the year. Even now, seven months later, I’m still proud of it and I wouldn’t change a thing.

The story is one that haunts me even 25 years after it first happened. It’s hard to believe 25 years ago I was living in Ireland trying to figure out my life. I’ve since discovered that trying to figure out my life is like trying to bottle a cloud. It just doesn’t work that way.

I hope you enjoy.

Click here to read:   The Spray-paint Lady Smiles