What is a book nook?
A book nook is a piece of miniature art, designed as a scene, that sits on a bookshelf between books.

How did I start?
When COVID hit and I was at home I became restless and decided I needed to completely redo my office and it had to happen NOW! I’m calling the projects I completed between April and August COVID projects. Surfing Youtube and Pinterest I started to see book nooks appear. Most of the early ones were Harry Potter themed but there were others and I was fascinated. Over the summer book nooks have shown up all over the place.
I went from loving book nooks but not knowing where to start, to being determined to create one after I saw a Youtube video by Rachel Maksy. She normally does amazing cosplay videos but she made a book nook in one video this spring and her easy way of making the structure convinced me I could do it. You can watch her video here.
I started watching other videos from people like Ara at Bently House Minis and Black Magic Crafts (I’m not a DnD player or gamer but this guy’s techniques and enthusiasm are awesome!) and fell back in love with miniatures, something I was interested in when I was a kid. I’m now completely obsessed.
Maybe it’s the filmmaker in me who loves models, or the little girl that read The Borrowers and the Littles when I was growing up that made miniatures so interesting. I’m not interested in doll houses because of the dolls – it’s about the stories.
The thing I like about this kind of activity is that it lets me give parts of my brain a rest. When I’m writing I often run into stumbling blocks and problems I can’t see easy solutions for. I need to have activities like knitting, or making crafts, or cooking risotto, or even long solo cross country ski days that put the problem on the back burner in my brain. It’s hard to describe but by taking the pressure off solving the problem the problem often solves itself. This has been a very good project for me during COVID when I was trying to do a lot of writing.
Materials

- Keepsake Box (make sure it isn’t too tall to fit on your shelf. It will be sitting on it’s back edge with the opening flap on the top)
- popsicle sticks
- stain (I used Unicorn Spit because I had a lot available)
- white glue
- super glue
- mod podge
- craft paint (I used acrylics and basic craft paints from Michaels)
- watercolour paper and paints
- Tim Holtz Distress Ink pads
- sharpie markers
- clear vinyl (this is the type that they make table coverings out of. I had some on hand.)
- foam core (sheets from Michaels)
- craft foam (thick and thin – Dollar Store)
- scrapbook paper
- polymer clay
- metal gear-shaped findings
- steampunk charms
- wooden skewers
- Rustoleum clear coat
- aluminum foil
- silicone sealant
- lights from Evan Designs
Construction
Structure
I started by cutting the end off the keepsake box for the opening. I saved the piece of cardboard I cut away as I used it later to make the back wall. This was a great idea from Rachel Maksy’s Youtube video (see link above). I didn’t want to build a box and this suggestion made all the difference. I roughly marked out where things would go on each wall with a sharpie. I ended up changing it pretty drastically by the end but it was good to have a reference to start out with.
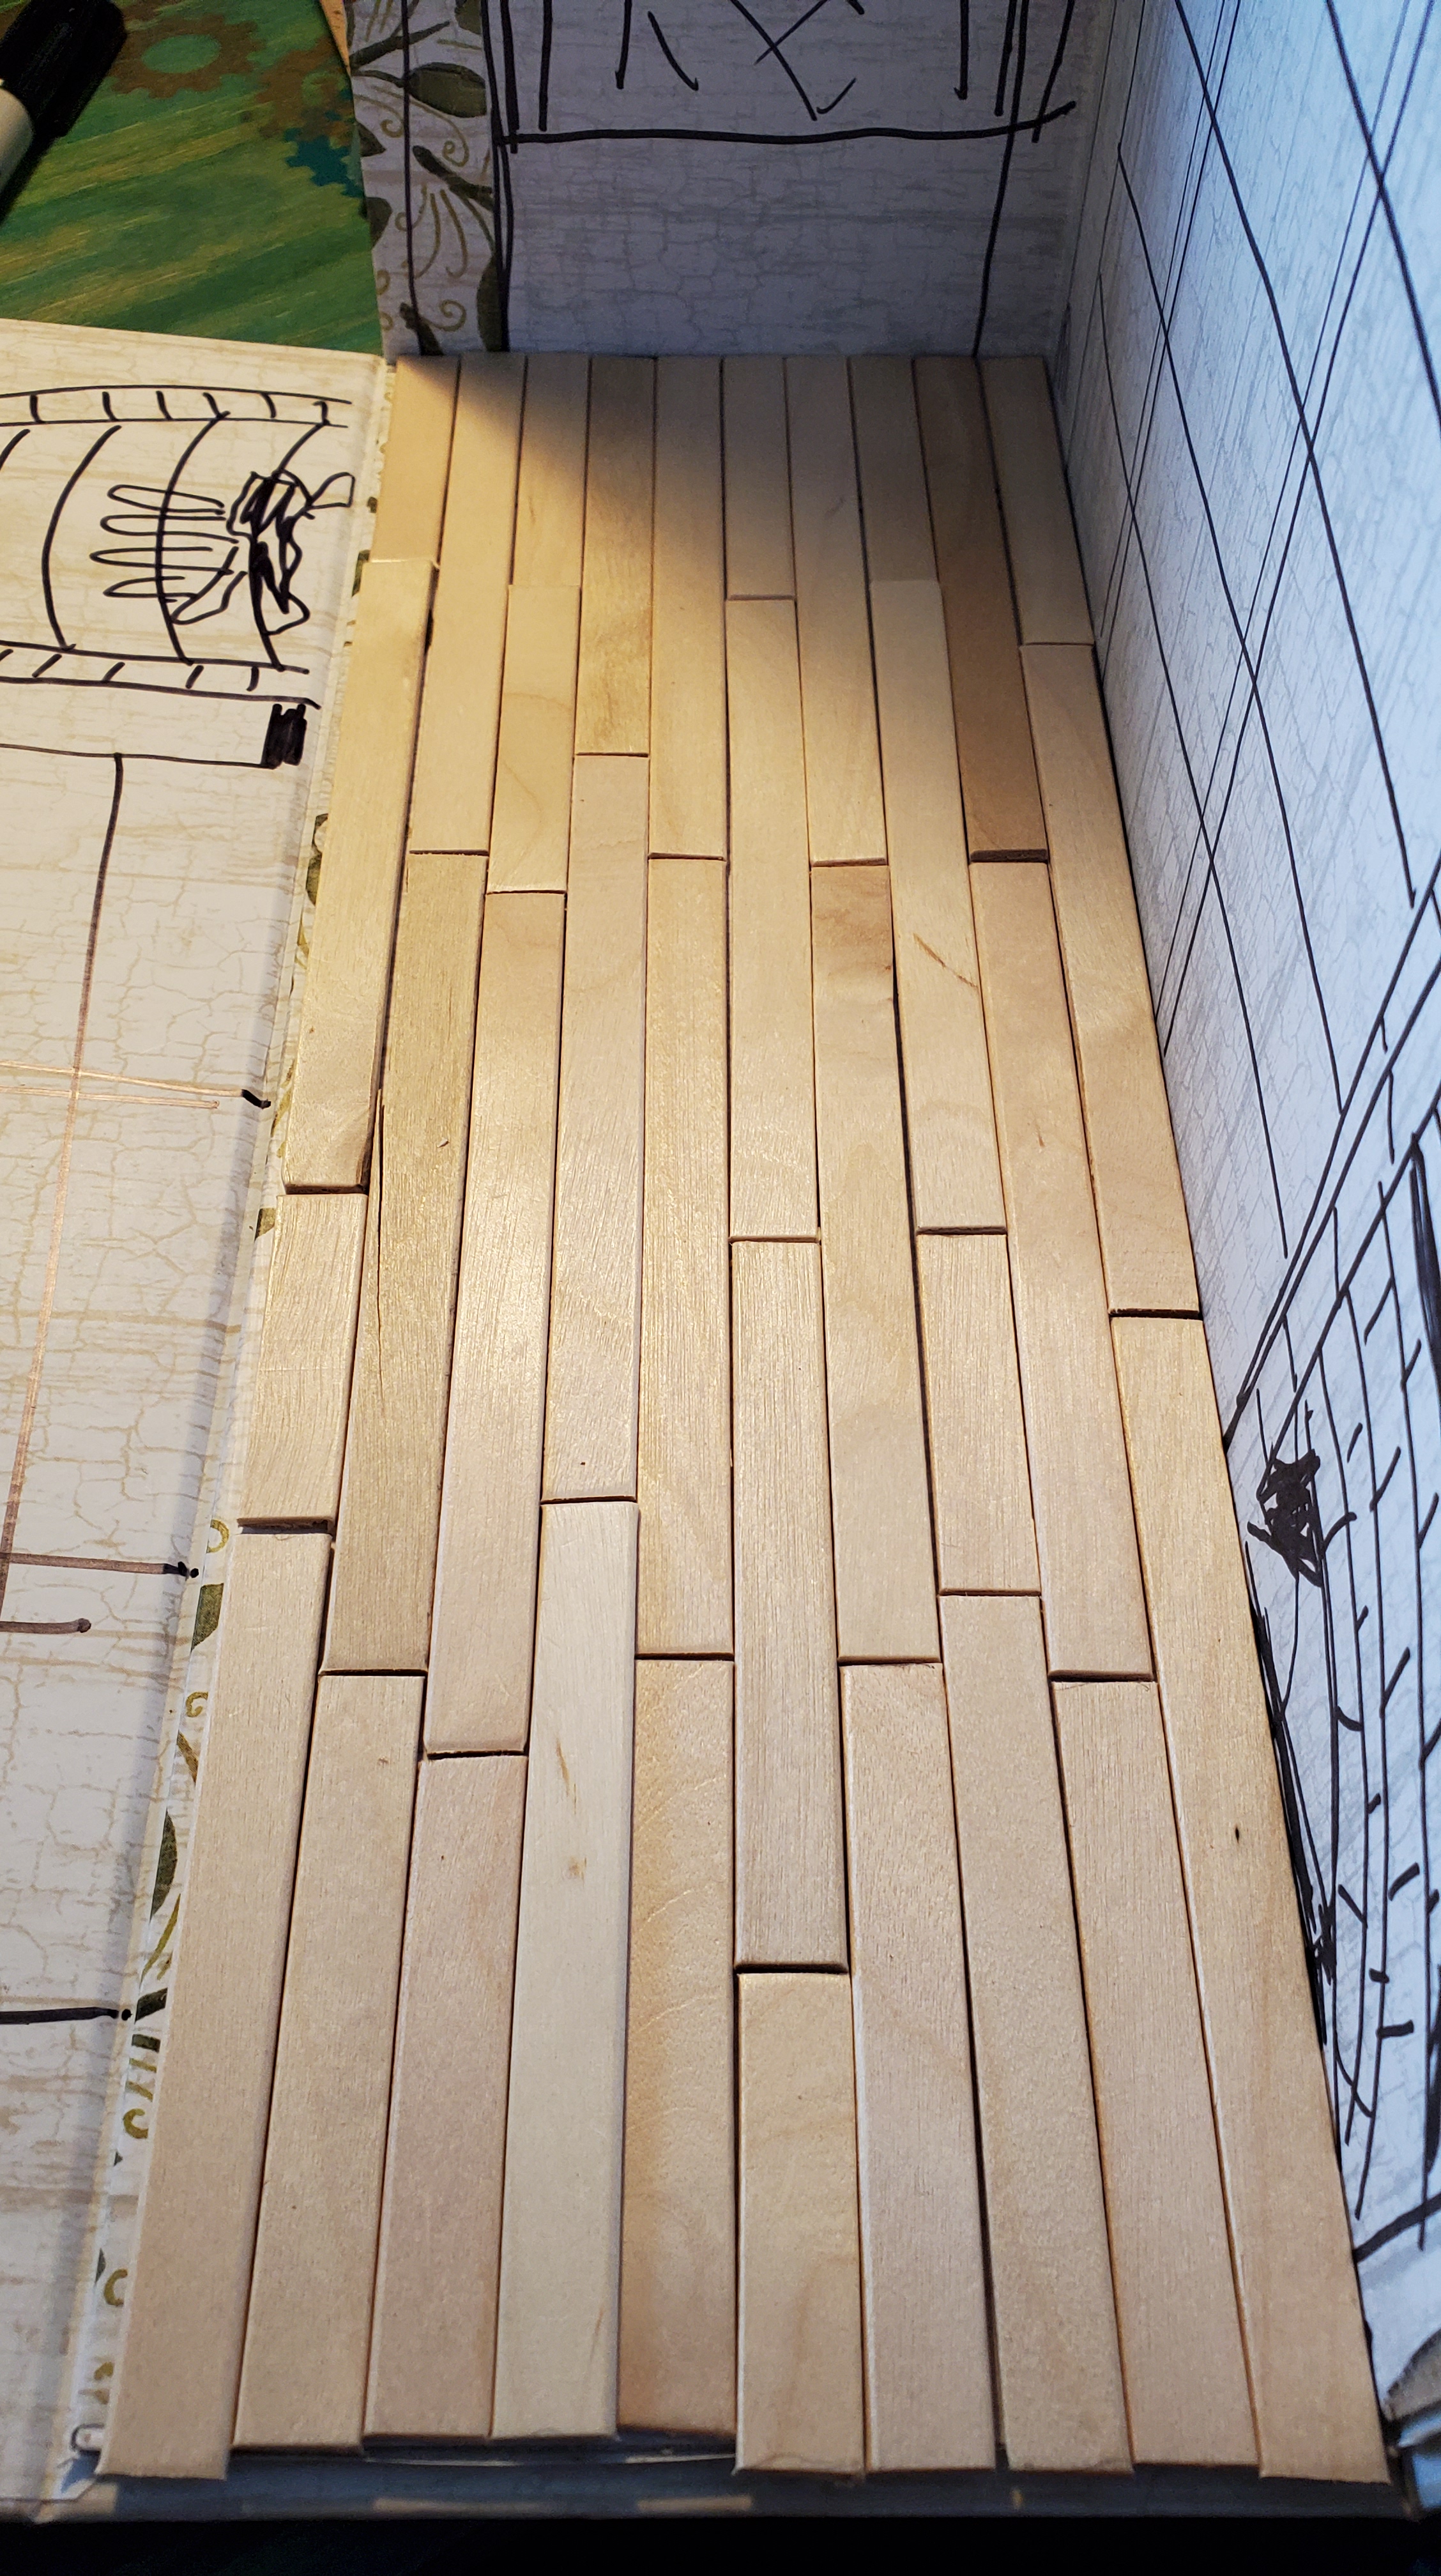
Floor
The first thing I worked on was the floor. I used popsicle sticks and since I was already working on a massive bookshelf project using Unicorn Spit stain and I loved the bright colours, I used some for the floorboards. I laid out the bare floorboards first to make sure they fit. I lightly sanded the popsicle sticks and dampened them down first so the stain would penetrate. Once they were dry I varnished them with a Rustoleum clear coat that I also had on hand due to my large bookshelf project.
I laid the floor boards down in a pattern that looked pretty realistic with the colours and seamed spread out. I posted pictures on Instagram and some people thought it was a real floor.


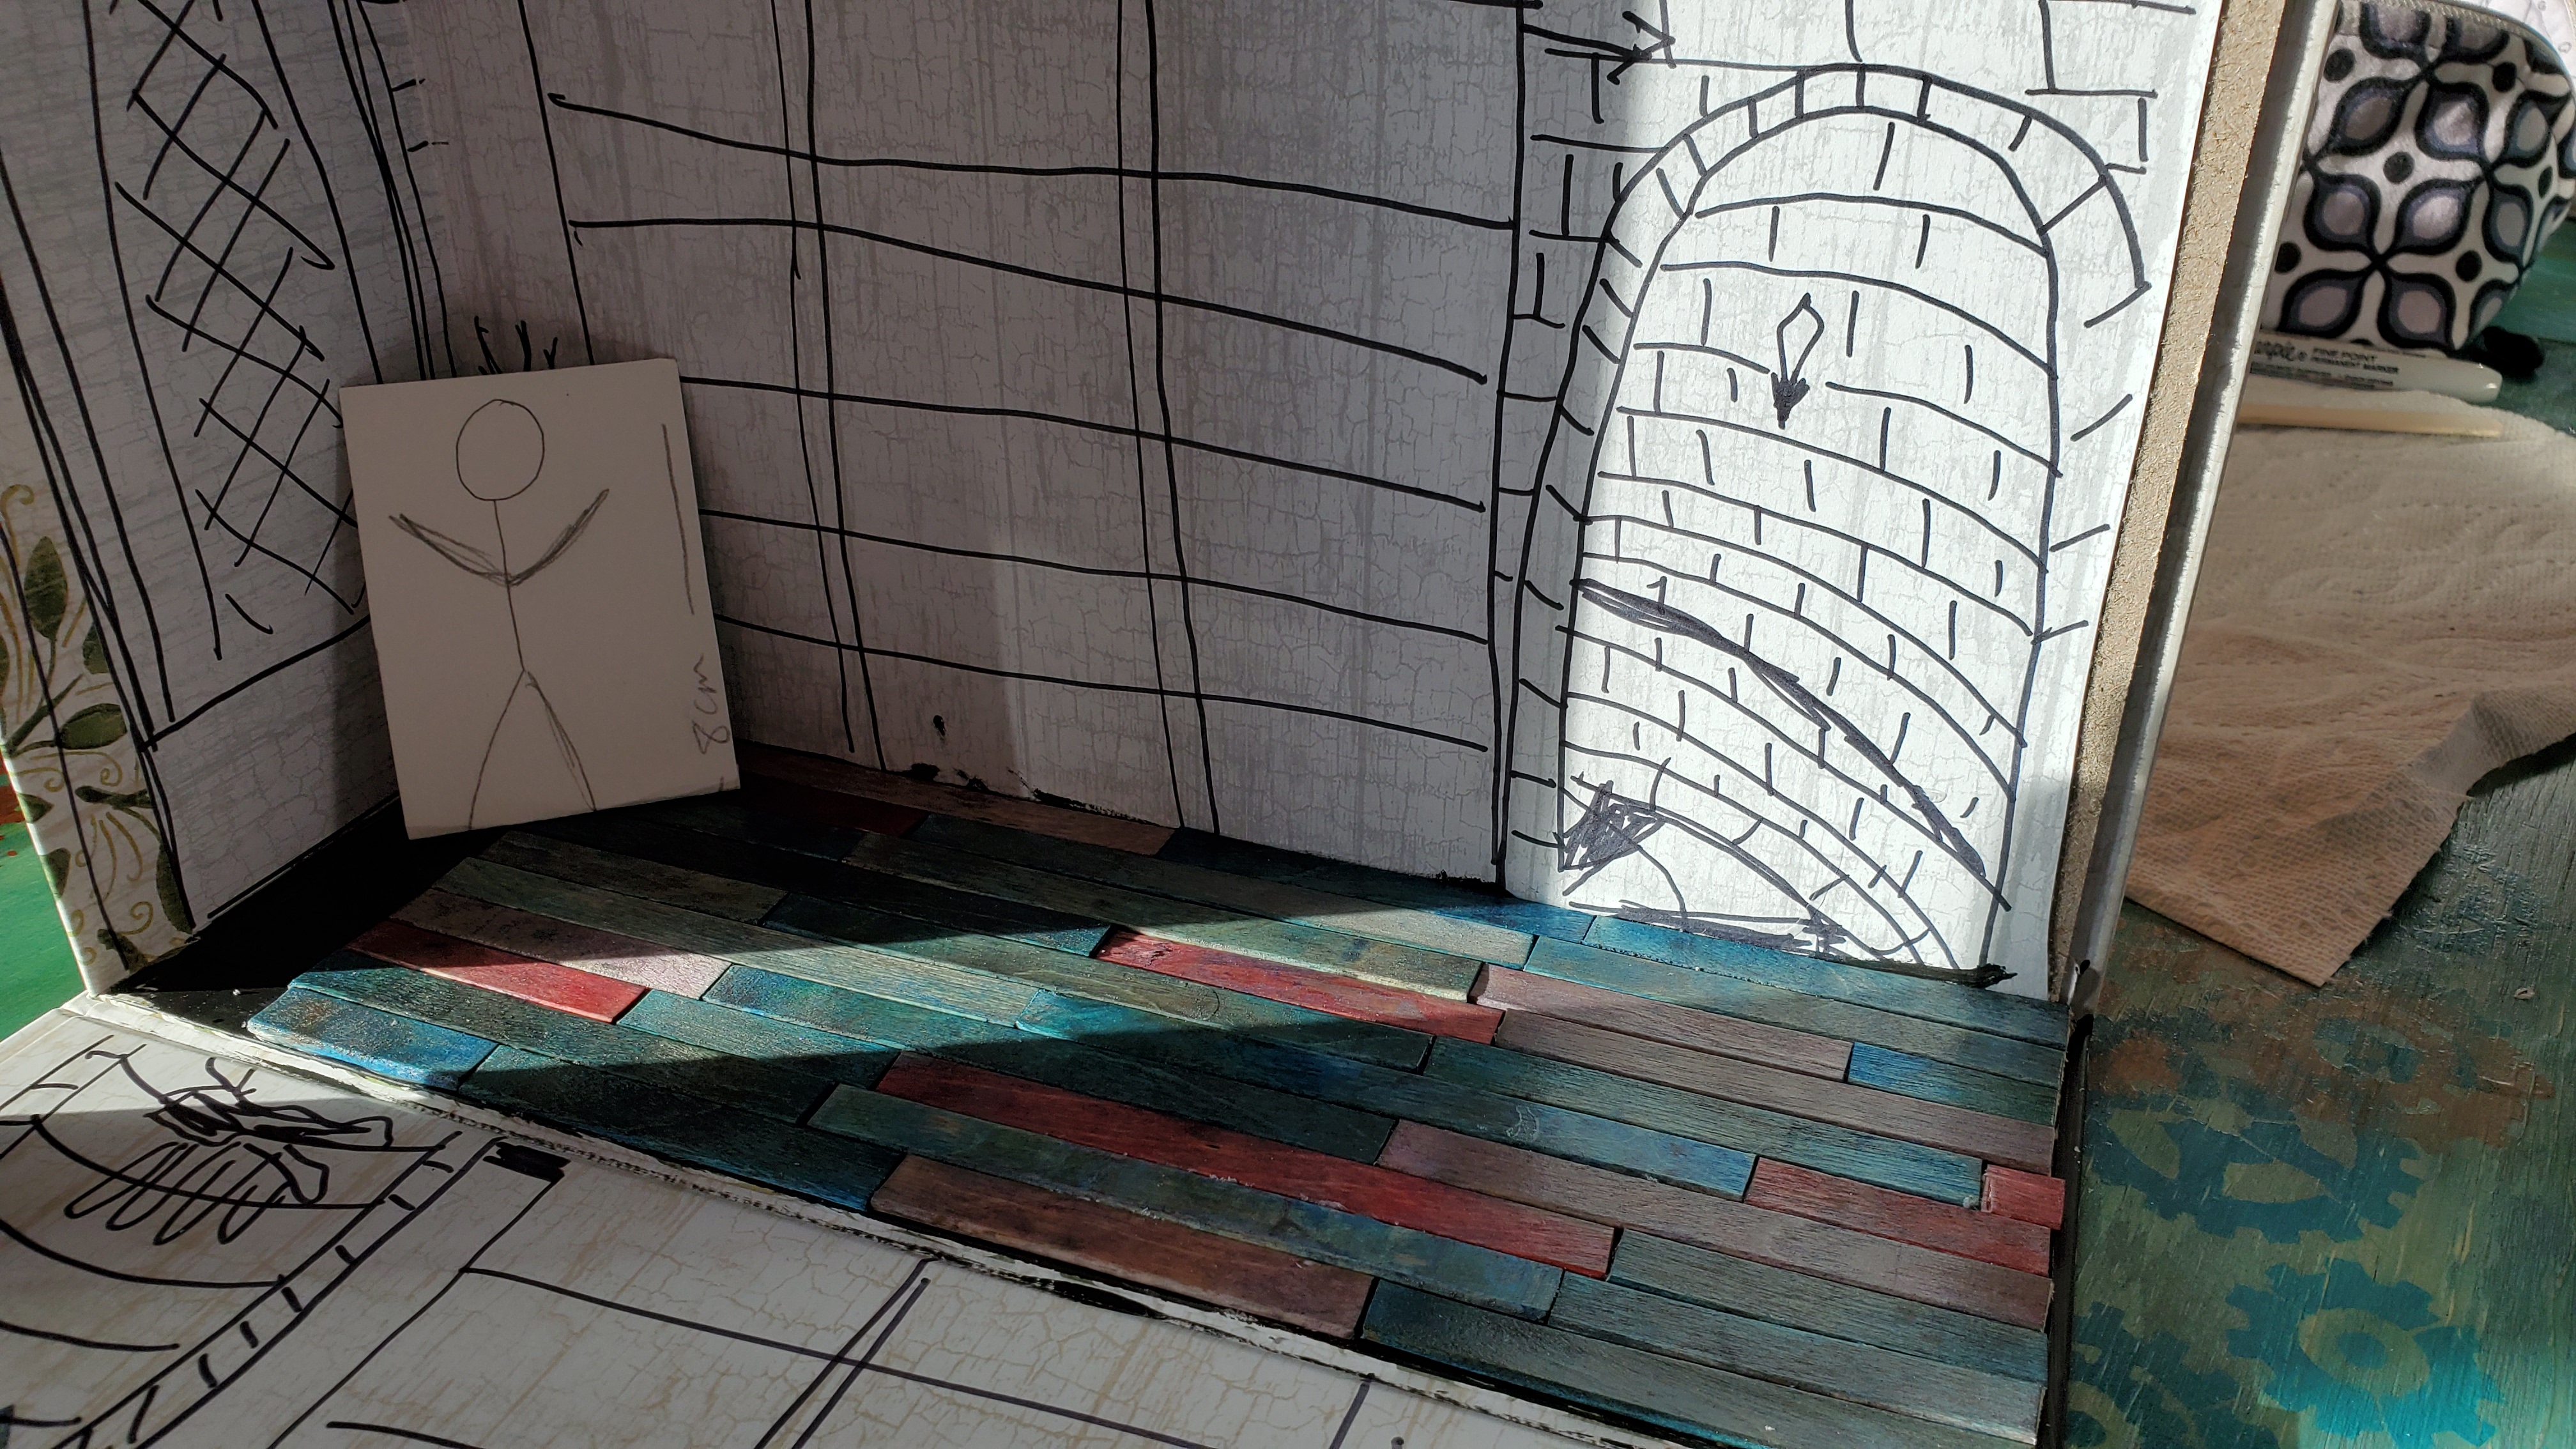

Stairwell
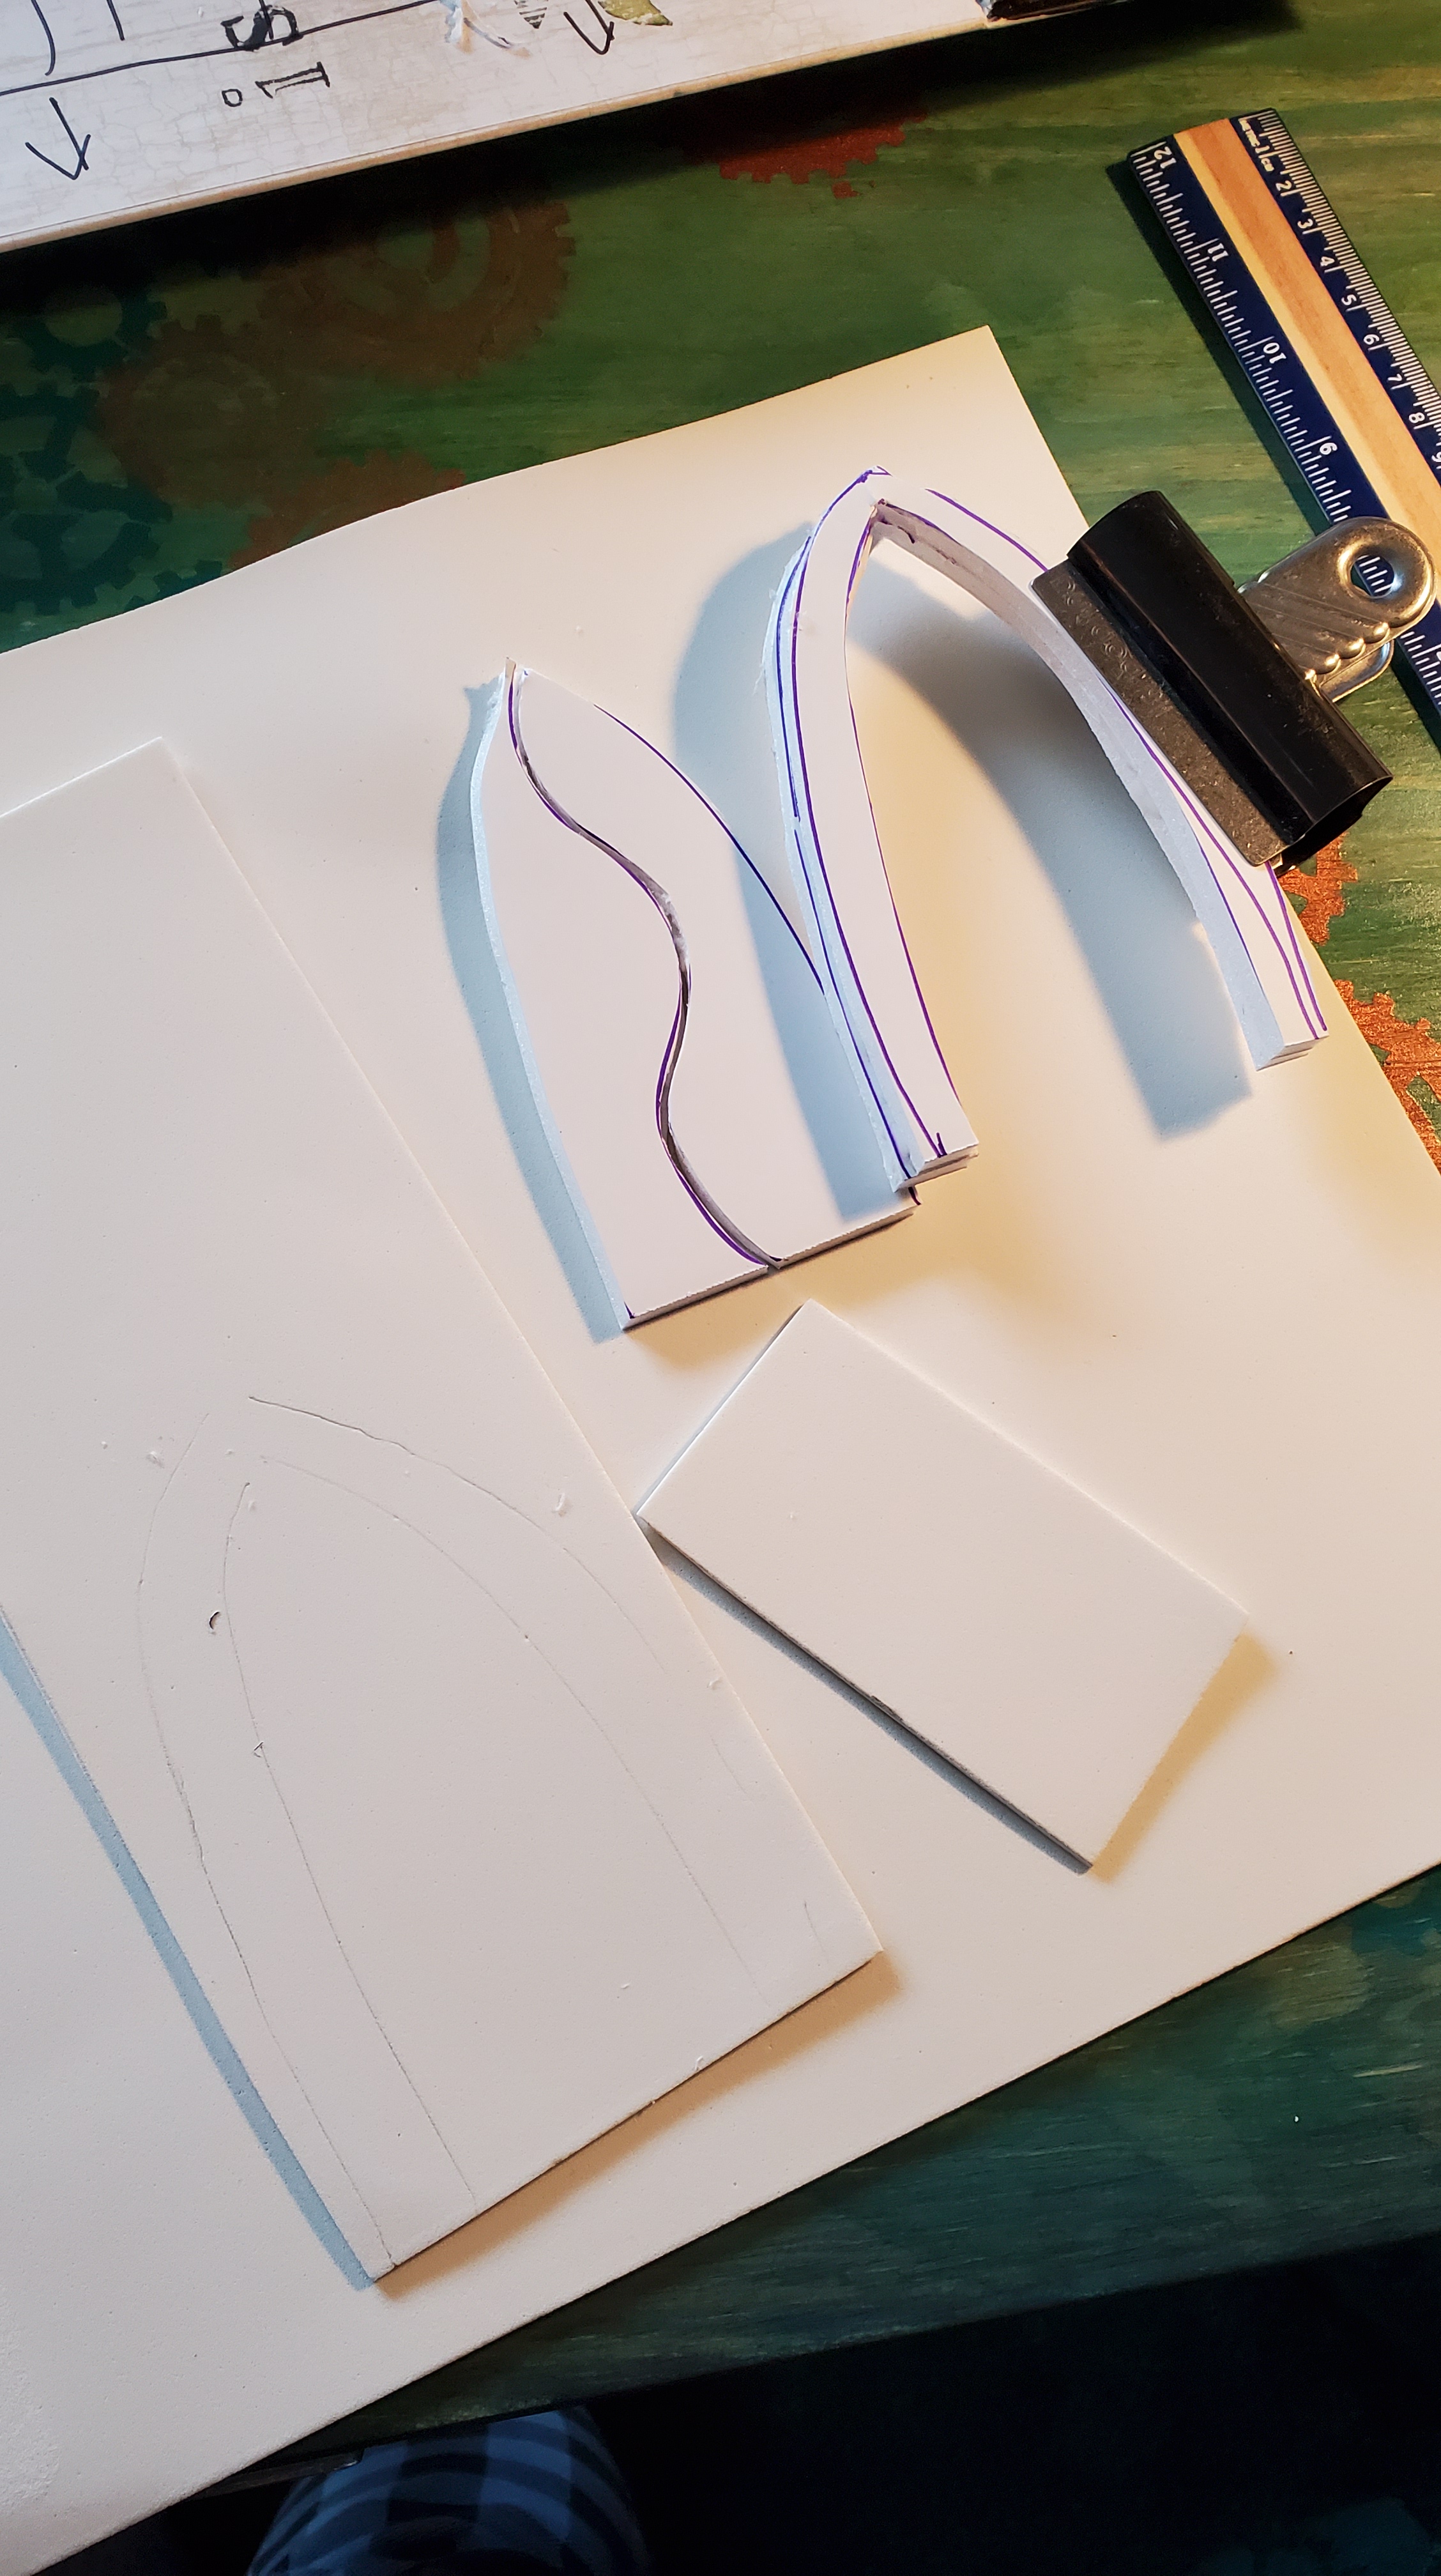
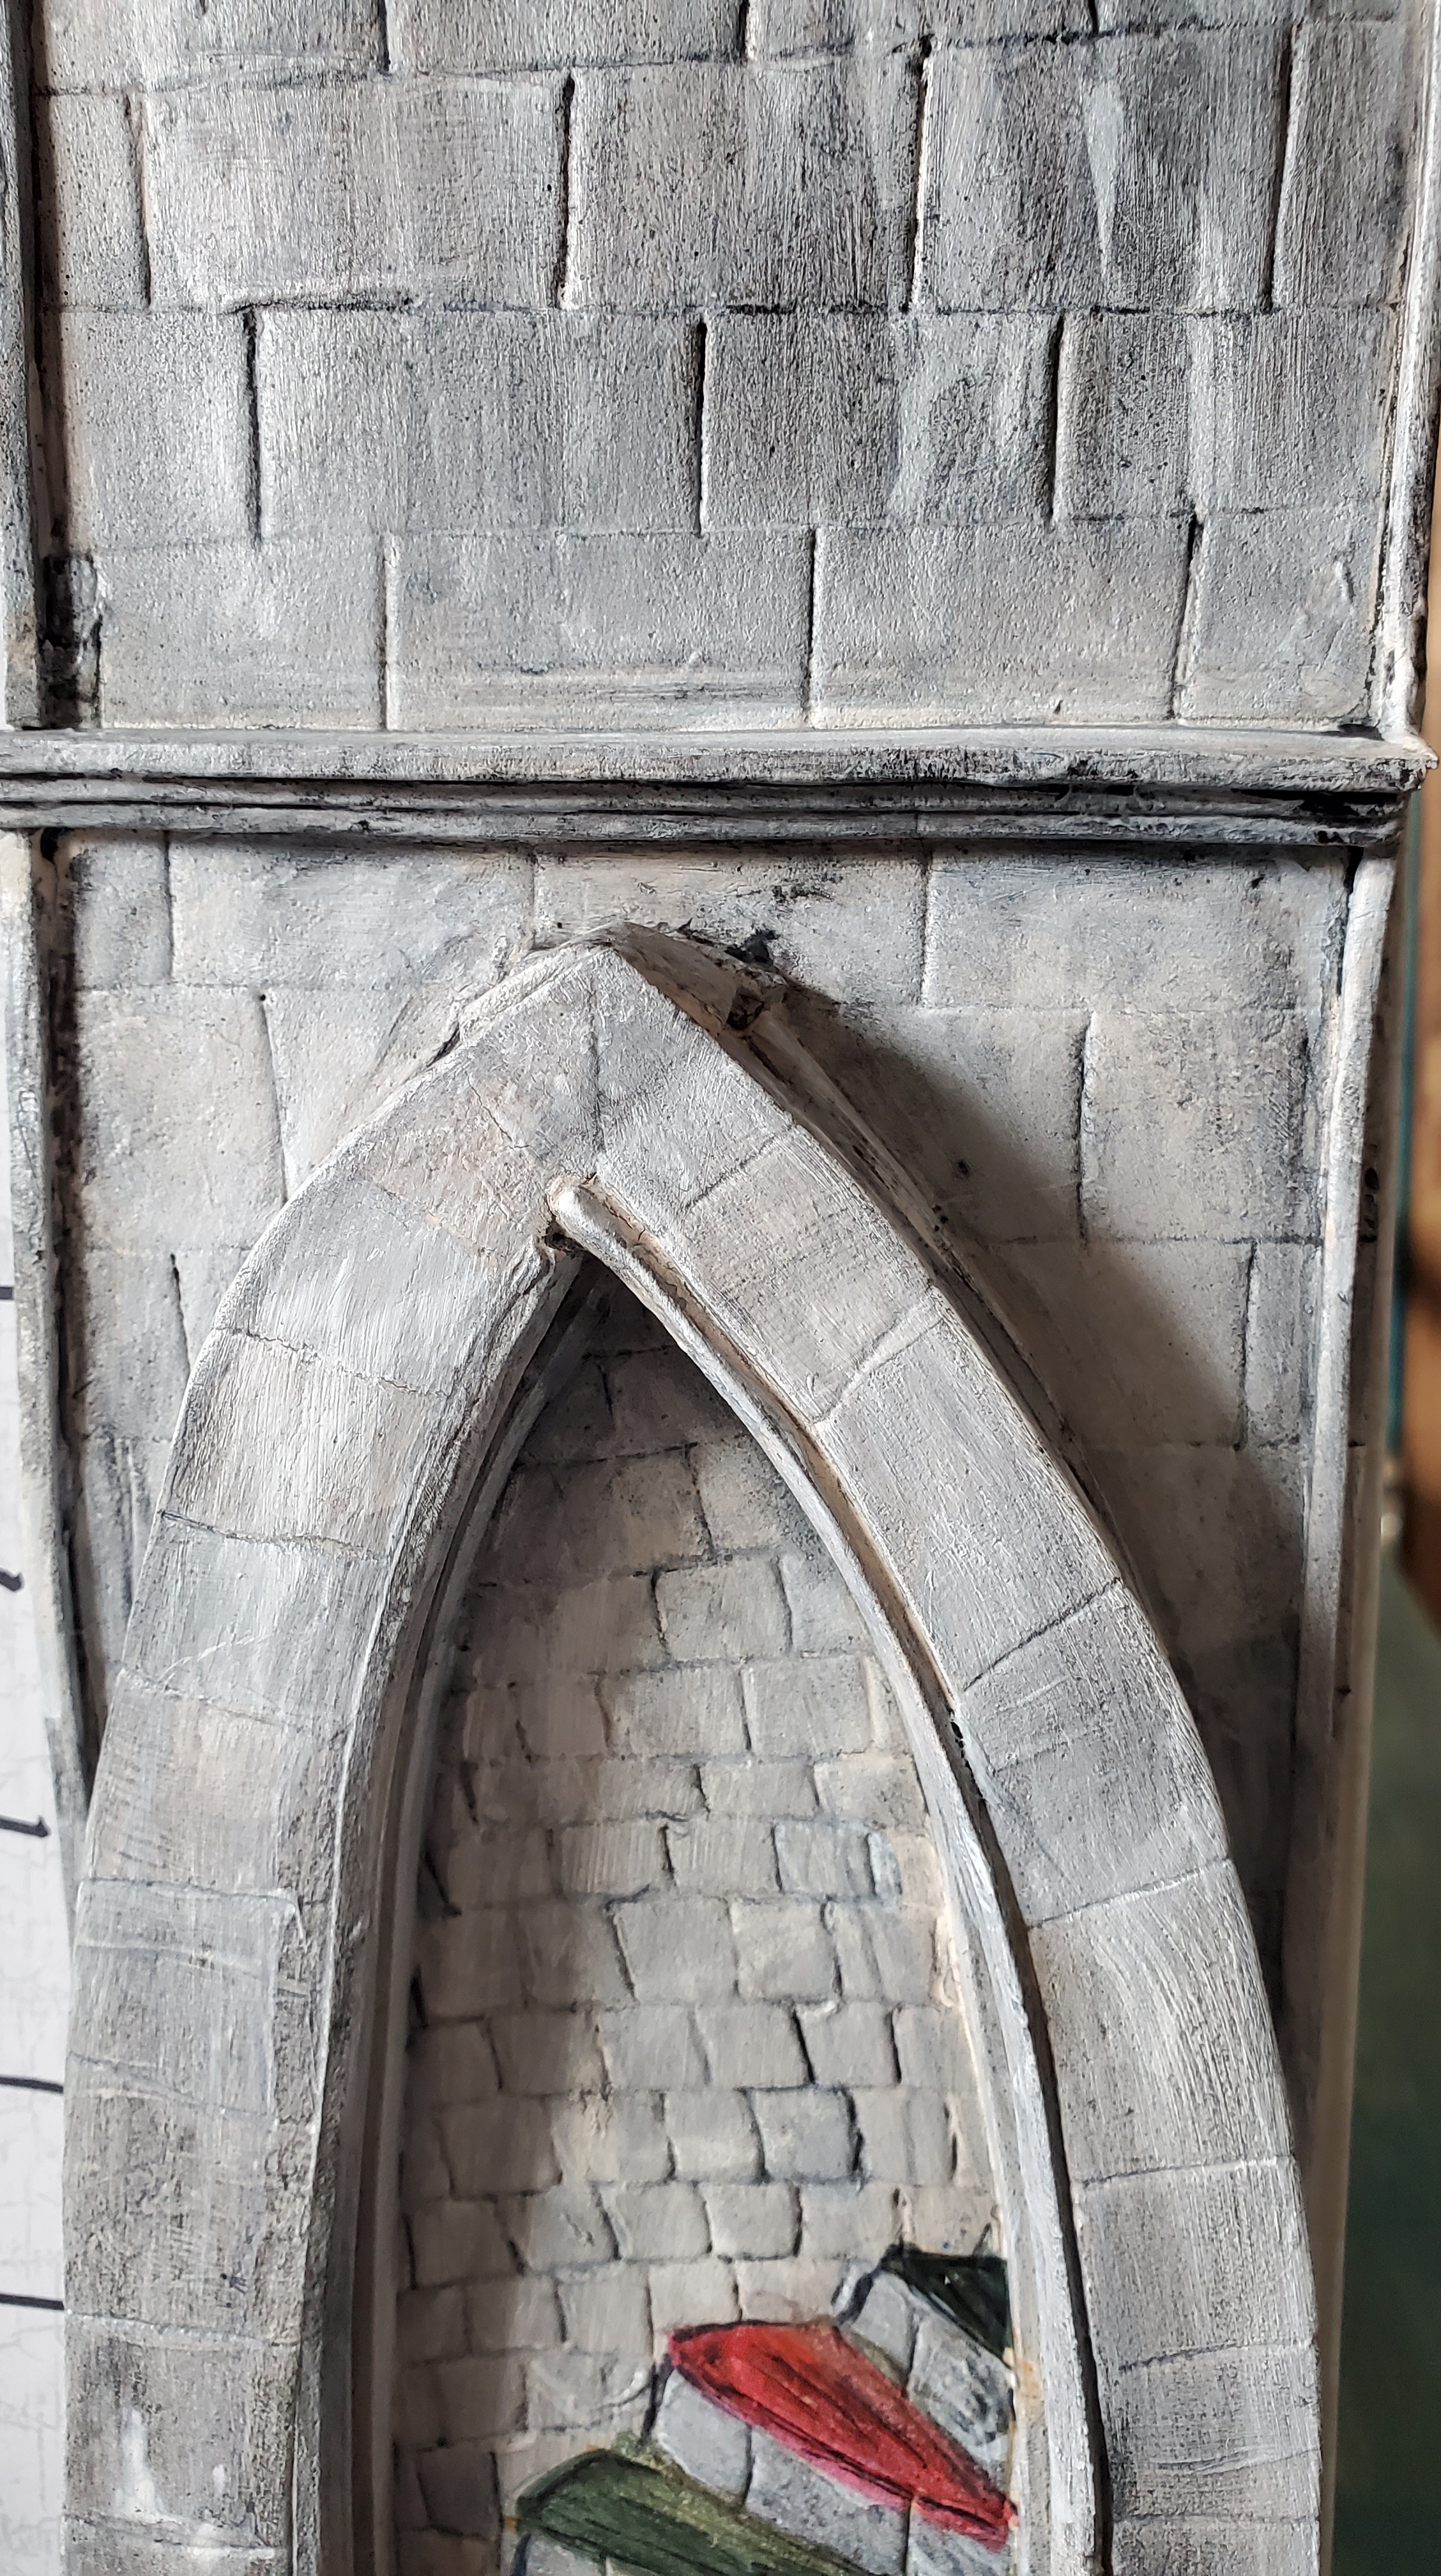
Next I started working on the stairwell. I started with the arch and made it out of foam core. I discovered I hate cutting foam core. I then discovered the softer foam that is 5mm thick and I like that a lot more. The archway didn’t need to be that strong because it would be stuck to the wall and didn’t need to support anything.
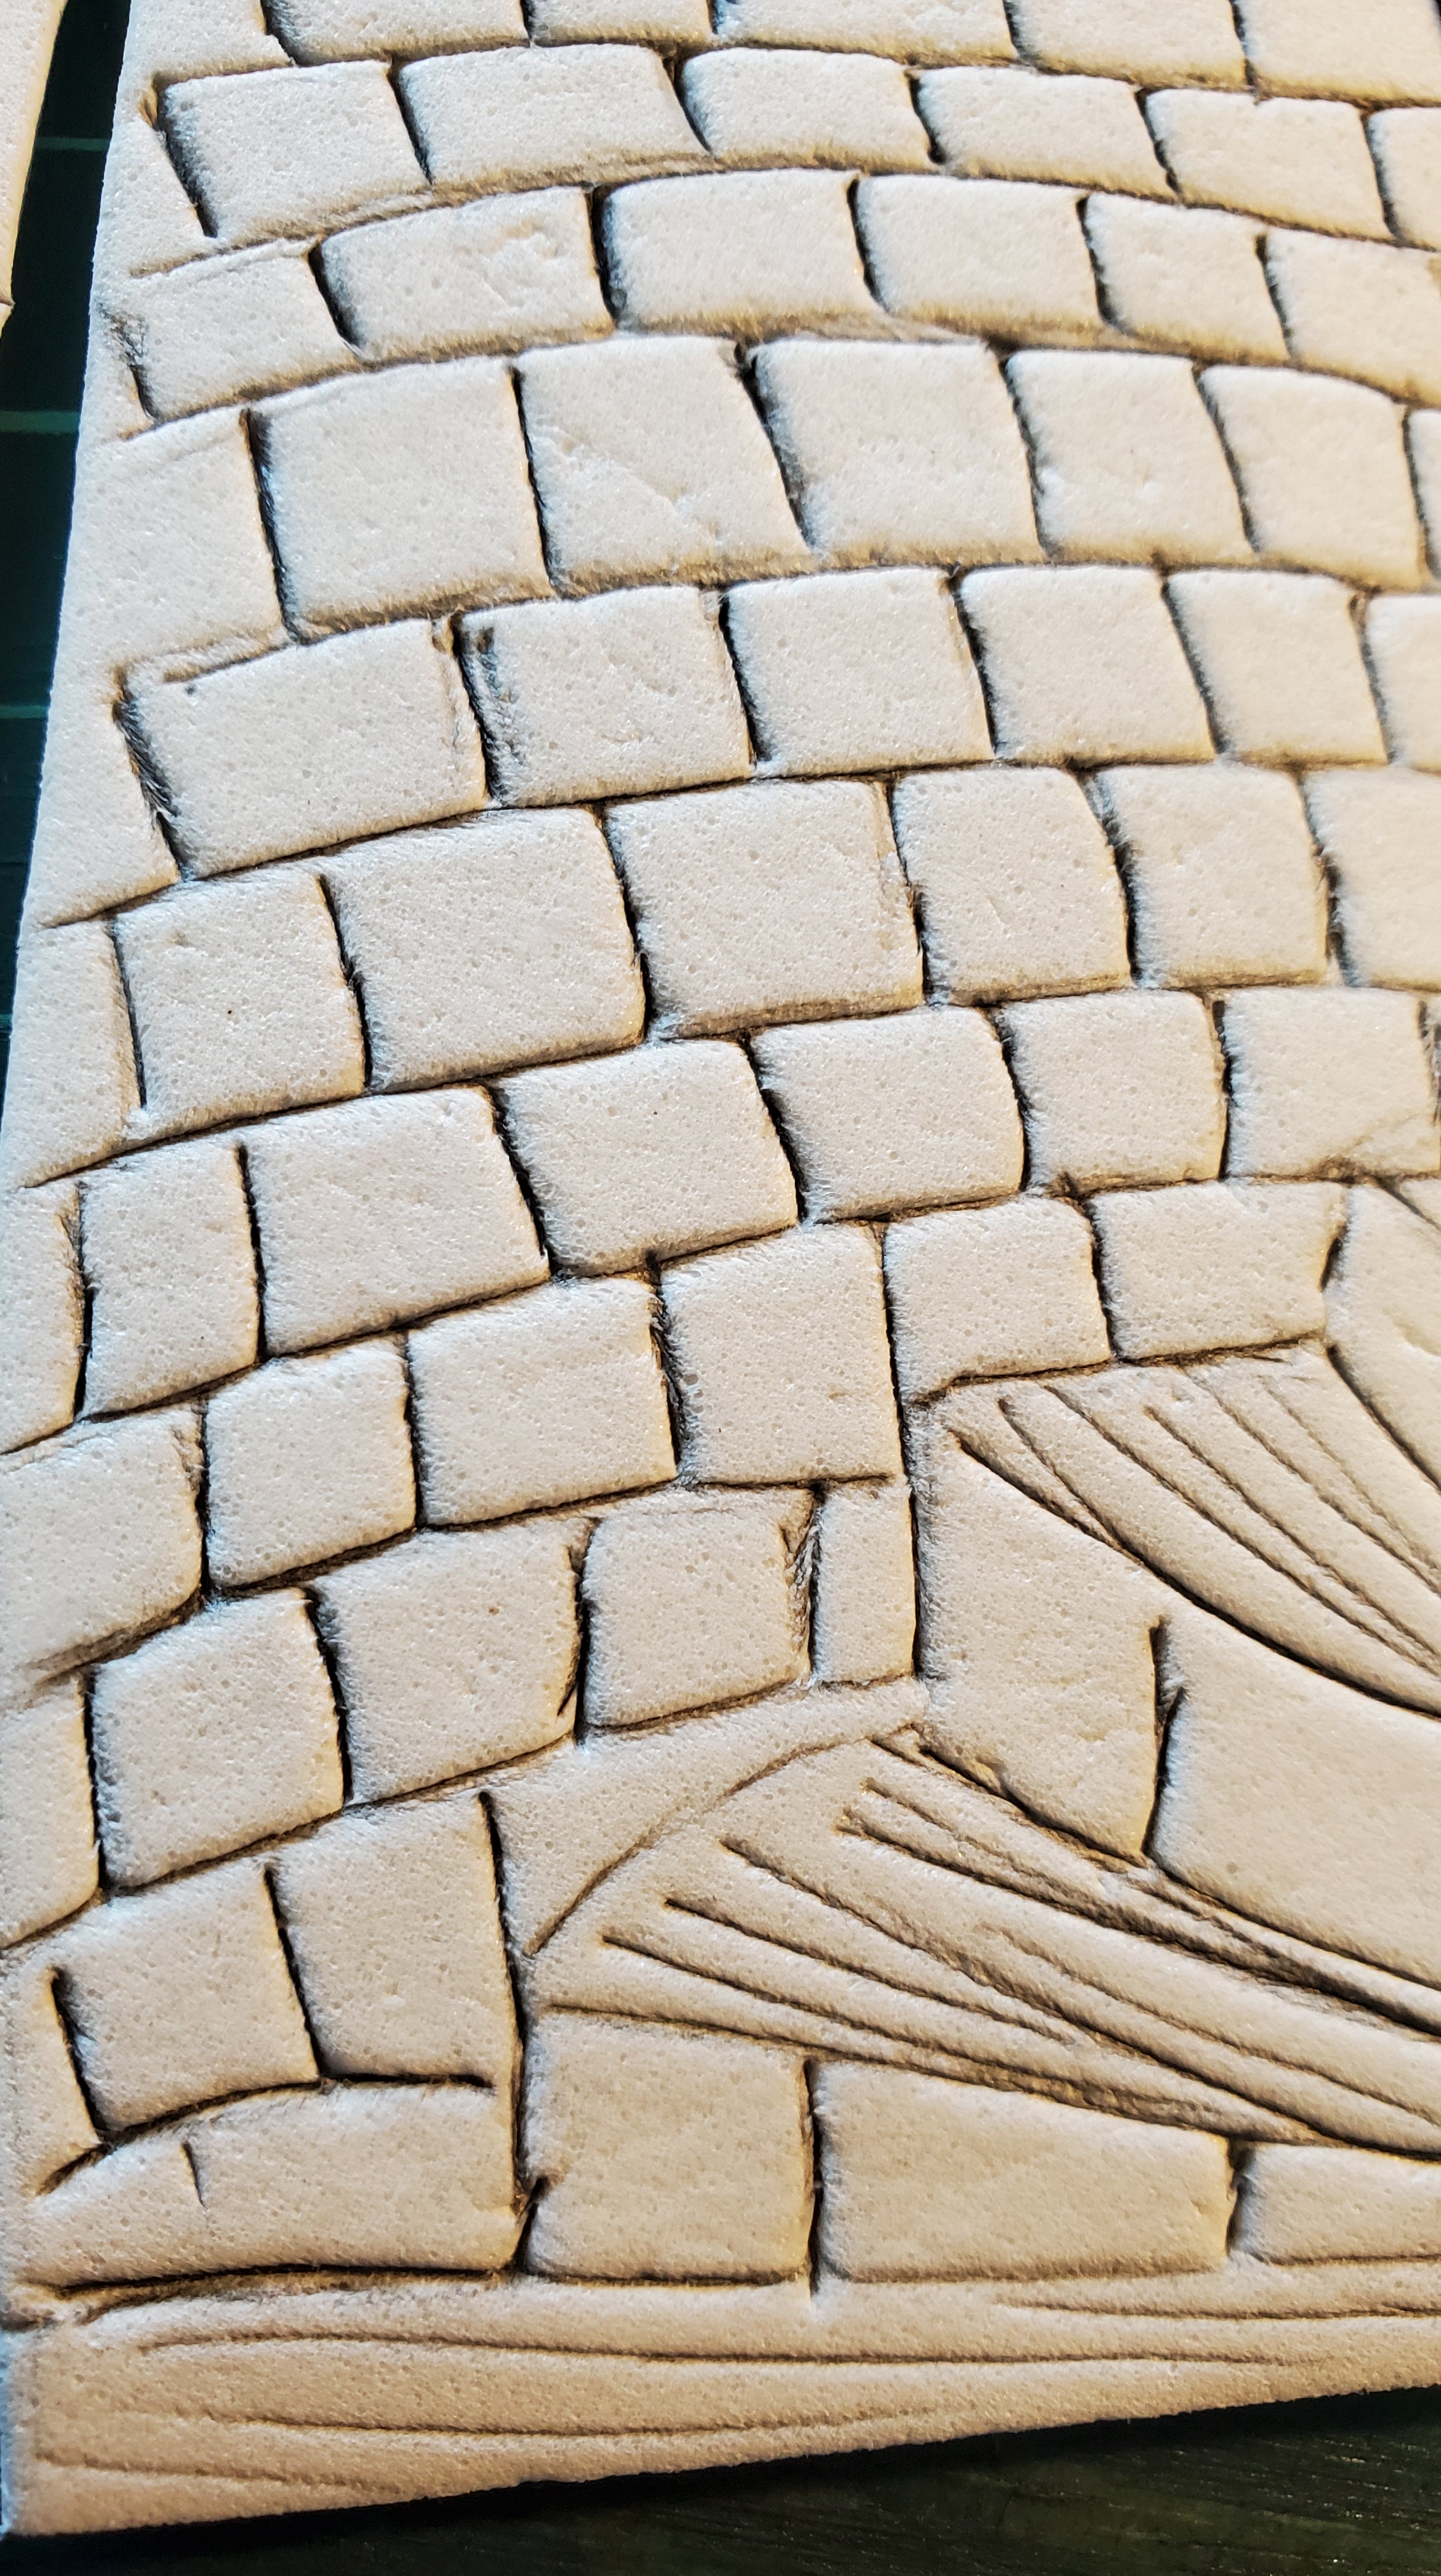
For the backing of the archway I used a piece of cardstock and a layer of the thinner dollar store craft foam over top. I cut thin slices to make a ledge and I dug into the surface with a pen to make the stones and the stairs. I used wadded up aluminum foil to make the texture on the foam. I made sure to go really deep with the pen so the ridges between the stones and along the stairs were really deep.
I glued them together and realized I didn’t like the edge of the original foam core so I cut thin strips of foam to make some edging and trim around the arch.
To finish the arch I painted the stone using the stone painting tutorial by Black Magic Craft on Youtube. It’s perfect and I use it all the time now. I used Sharpie markers to colour the wood on the stairs and then I added a bit of watered down black paint as a wash to age them.
Originally I planned to have a wall sconce with a light in the archway but I realized at the end that it wasn’t deep enough and the light would have stuck out too much.


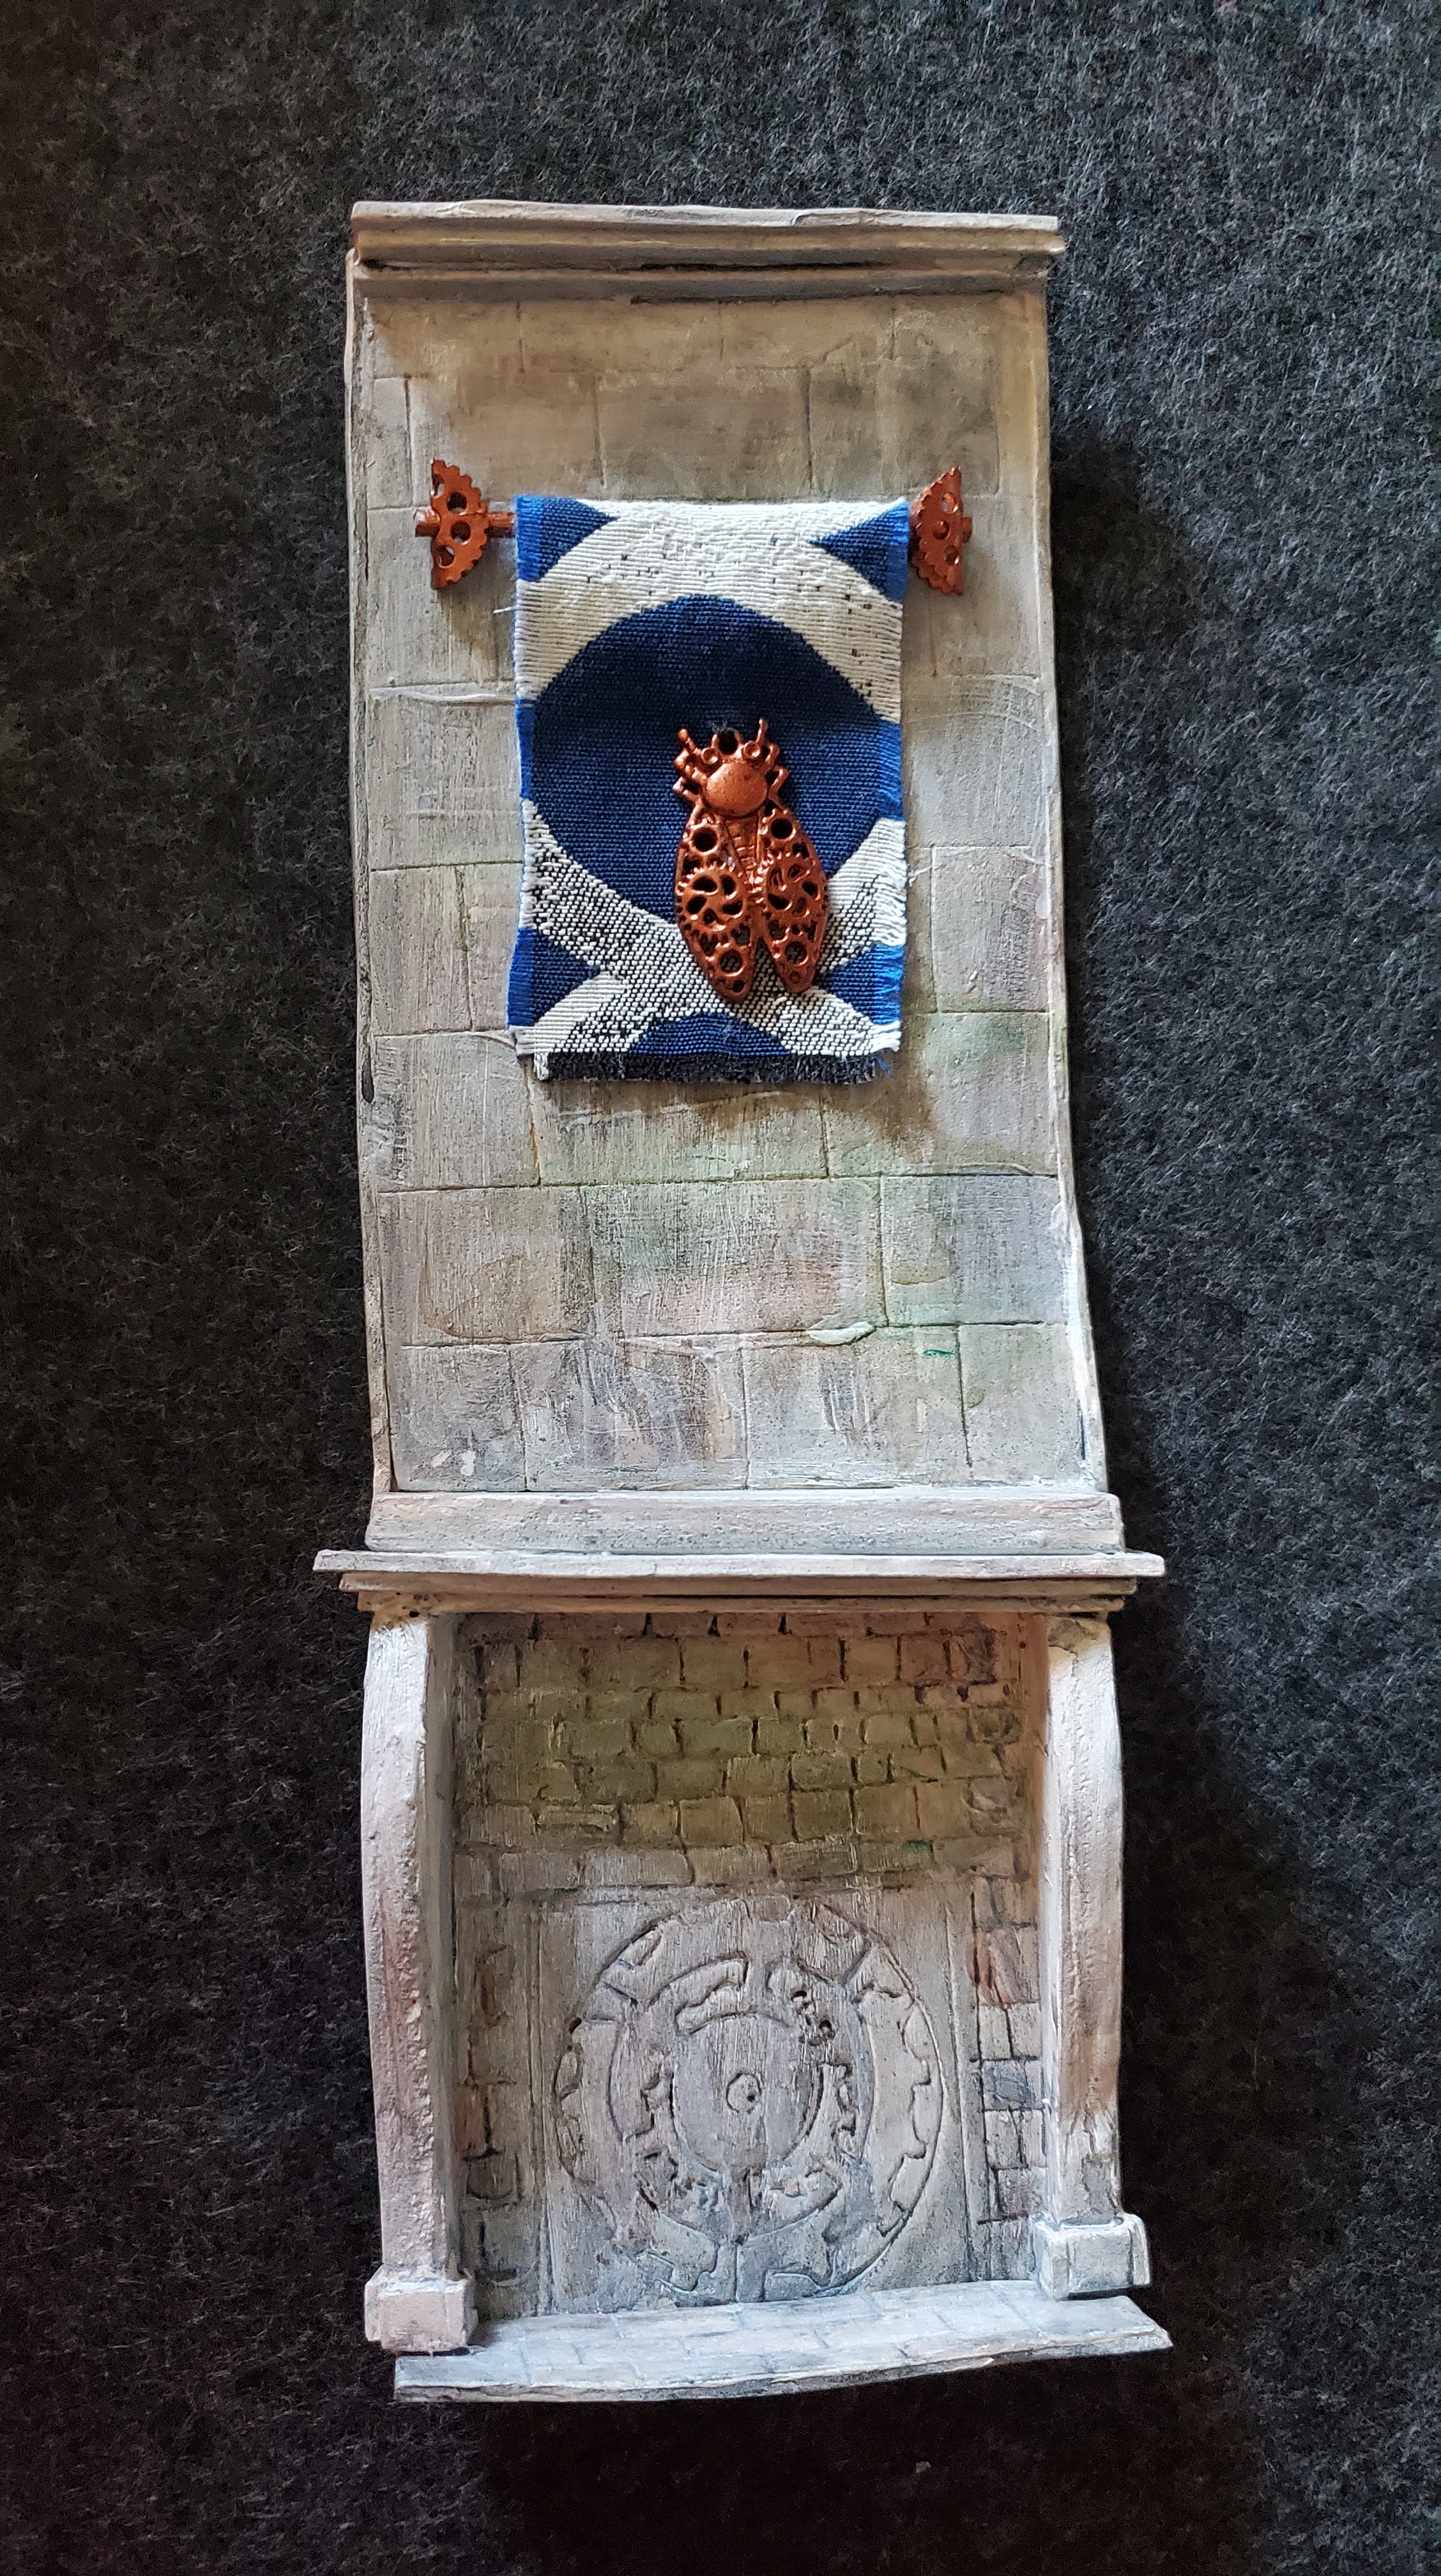
Fireplace
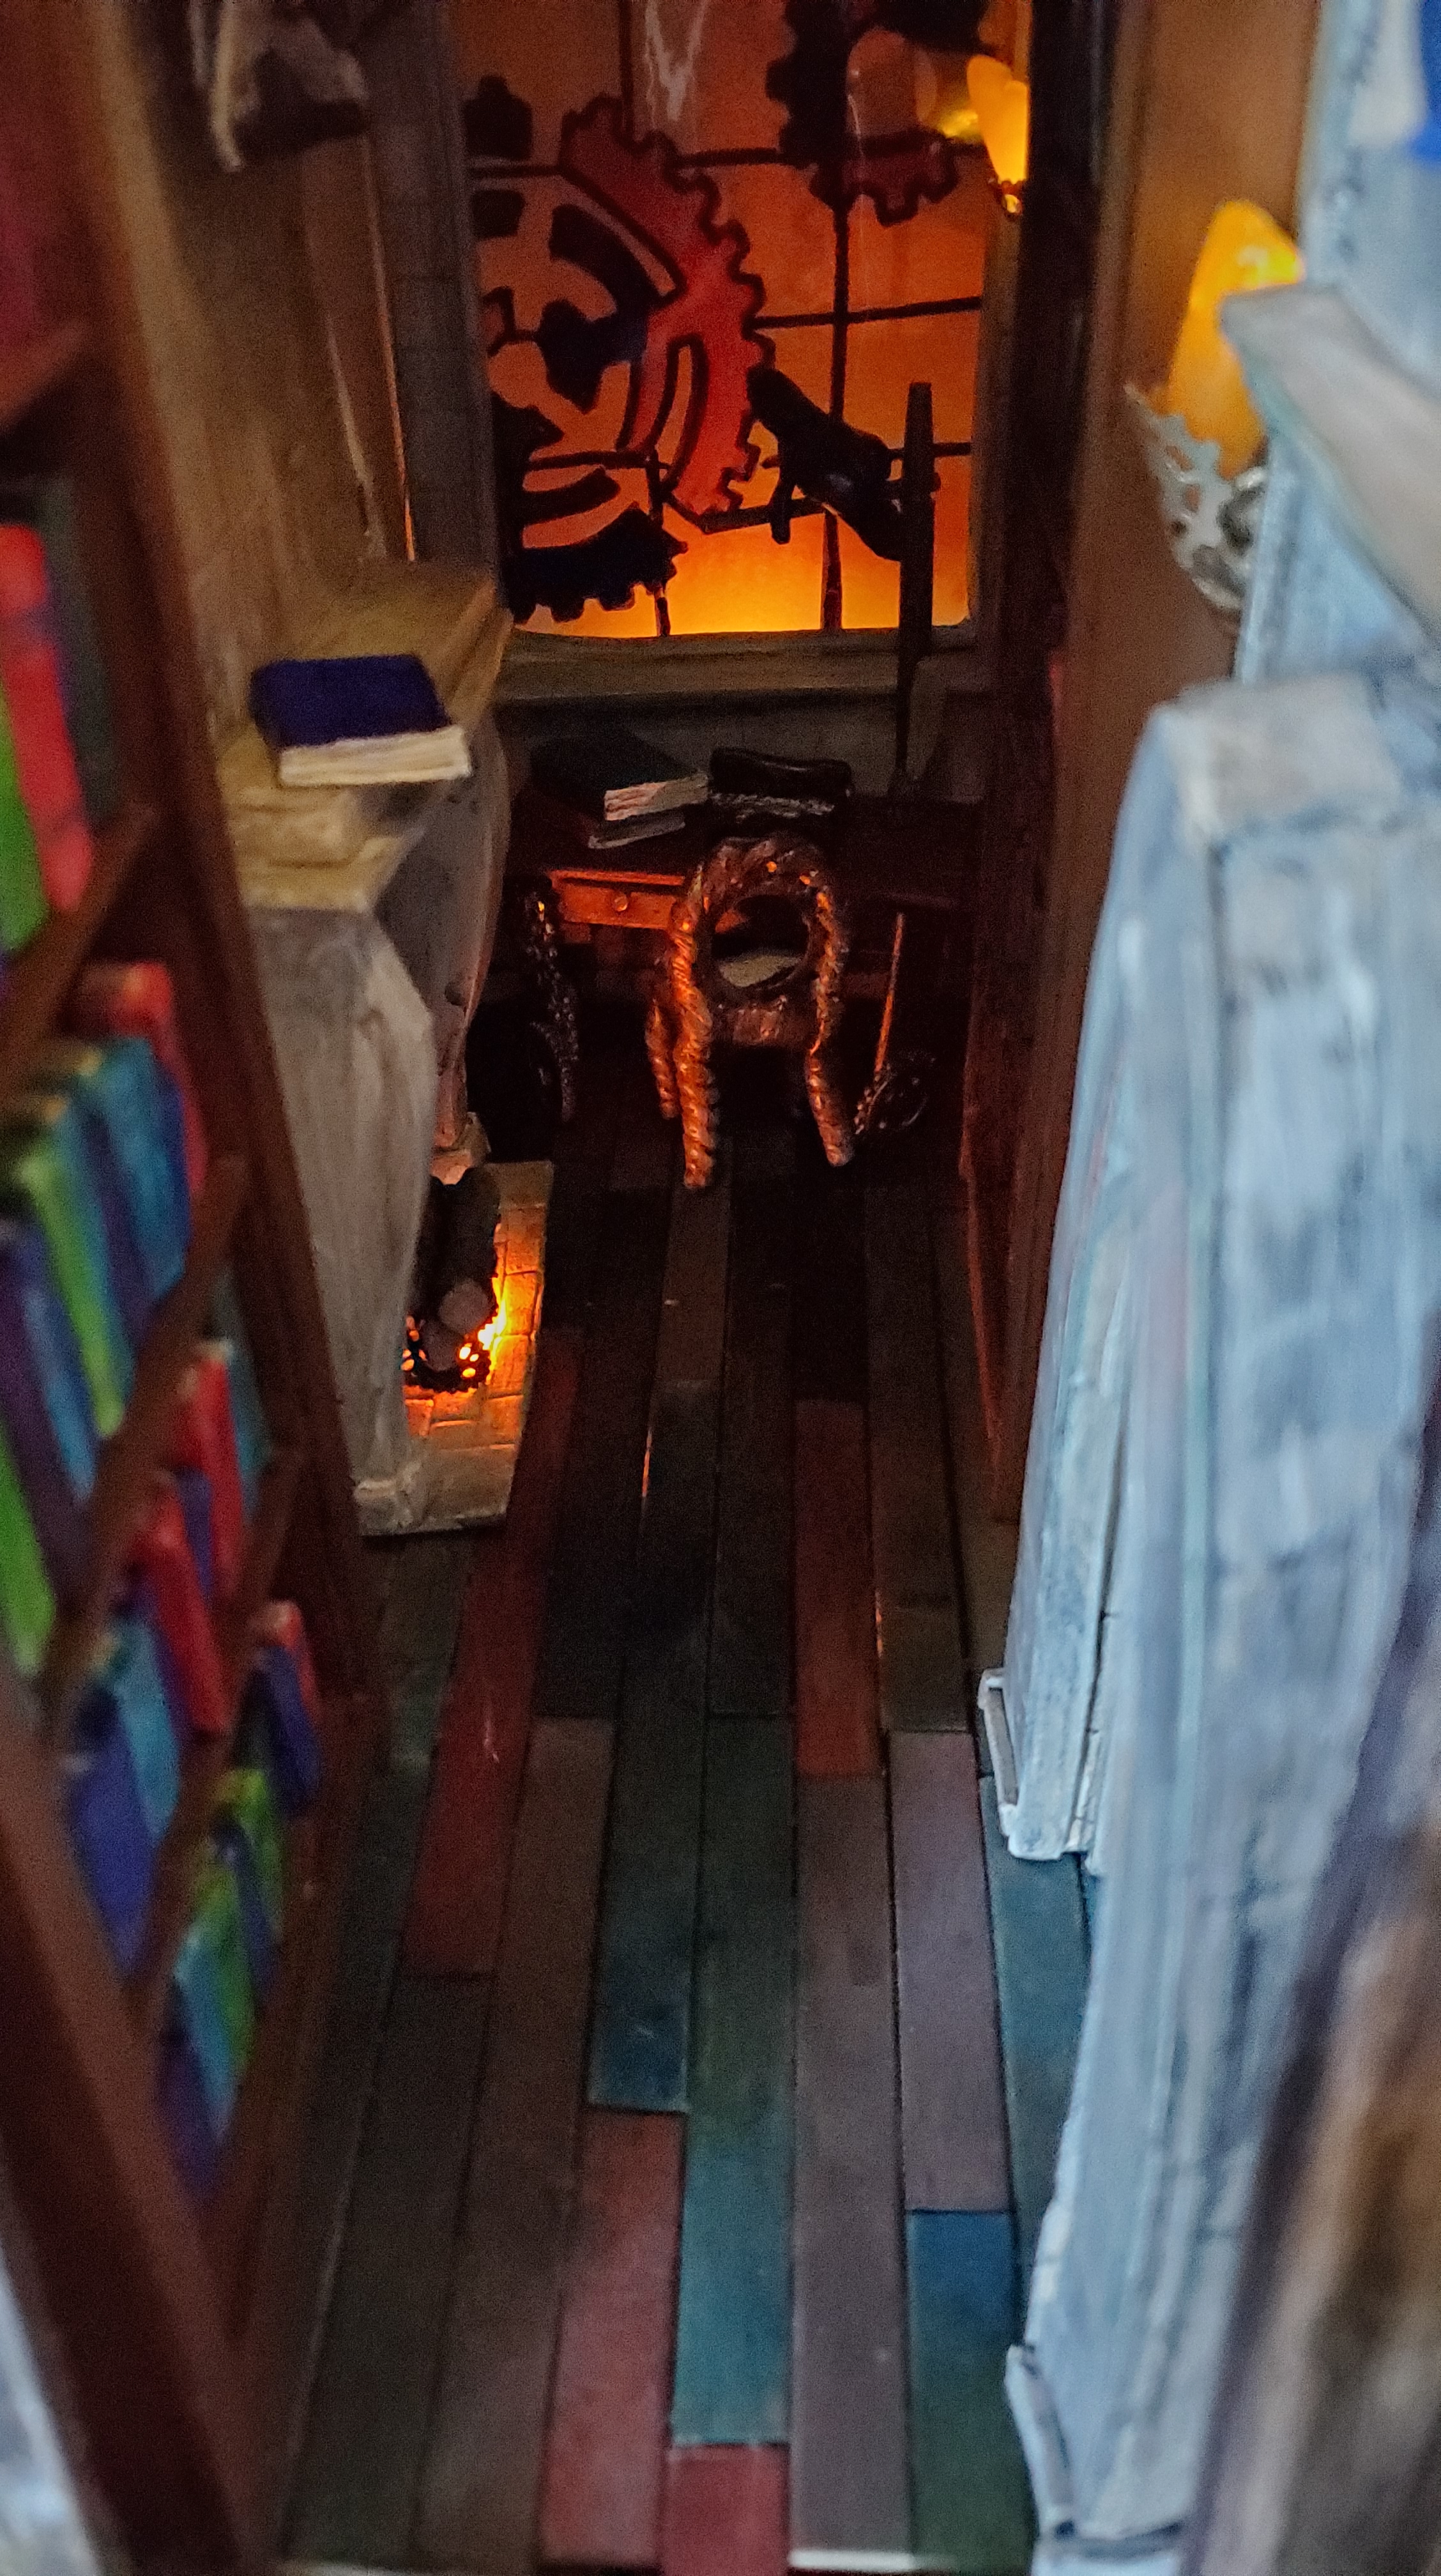
Next I made the fireplace in basically the same way I made the arch, minus the foam core. The fireplace is all thick and thin crafting foam. I didn’t need the top to be really strong because it was going to be glued to the wall. Later I added banners with fabric, wooden skewers, steampunk charms, and some of the gears I included in other places as well that I painted and folded in half to make brackets.
Bookshelves
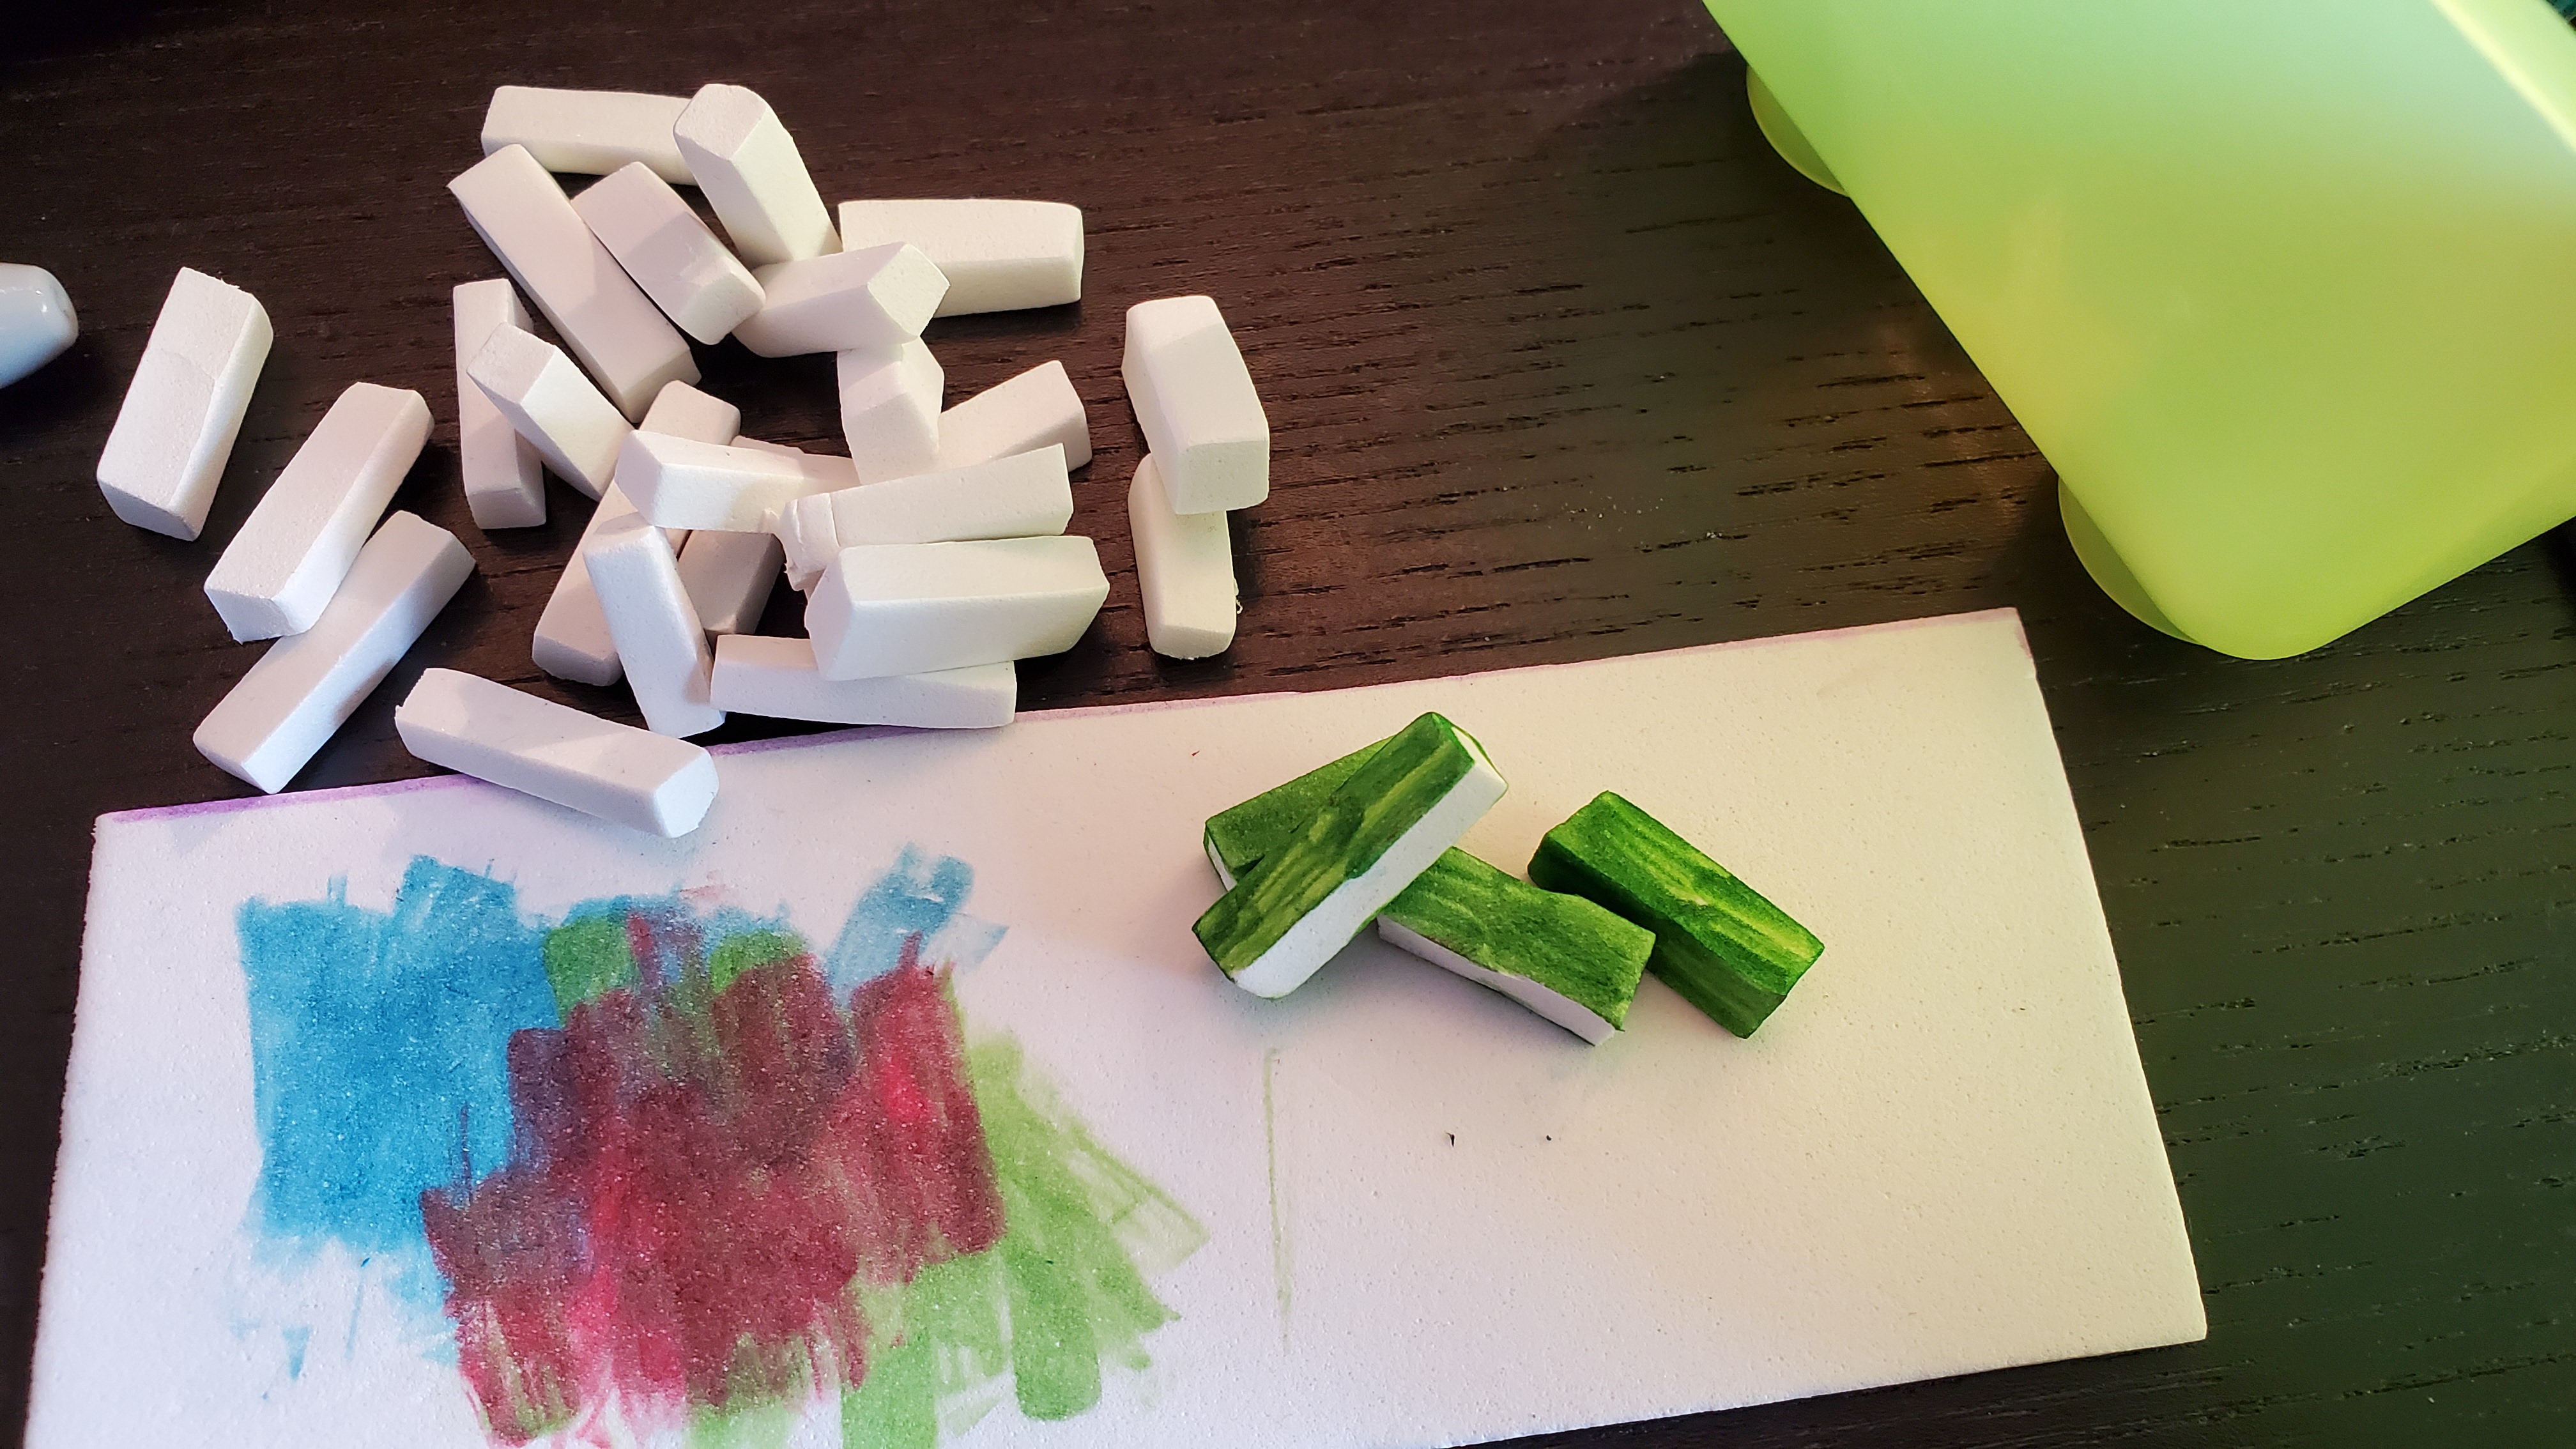
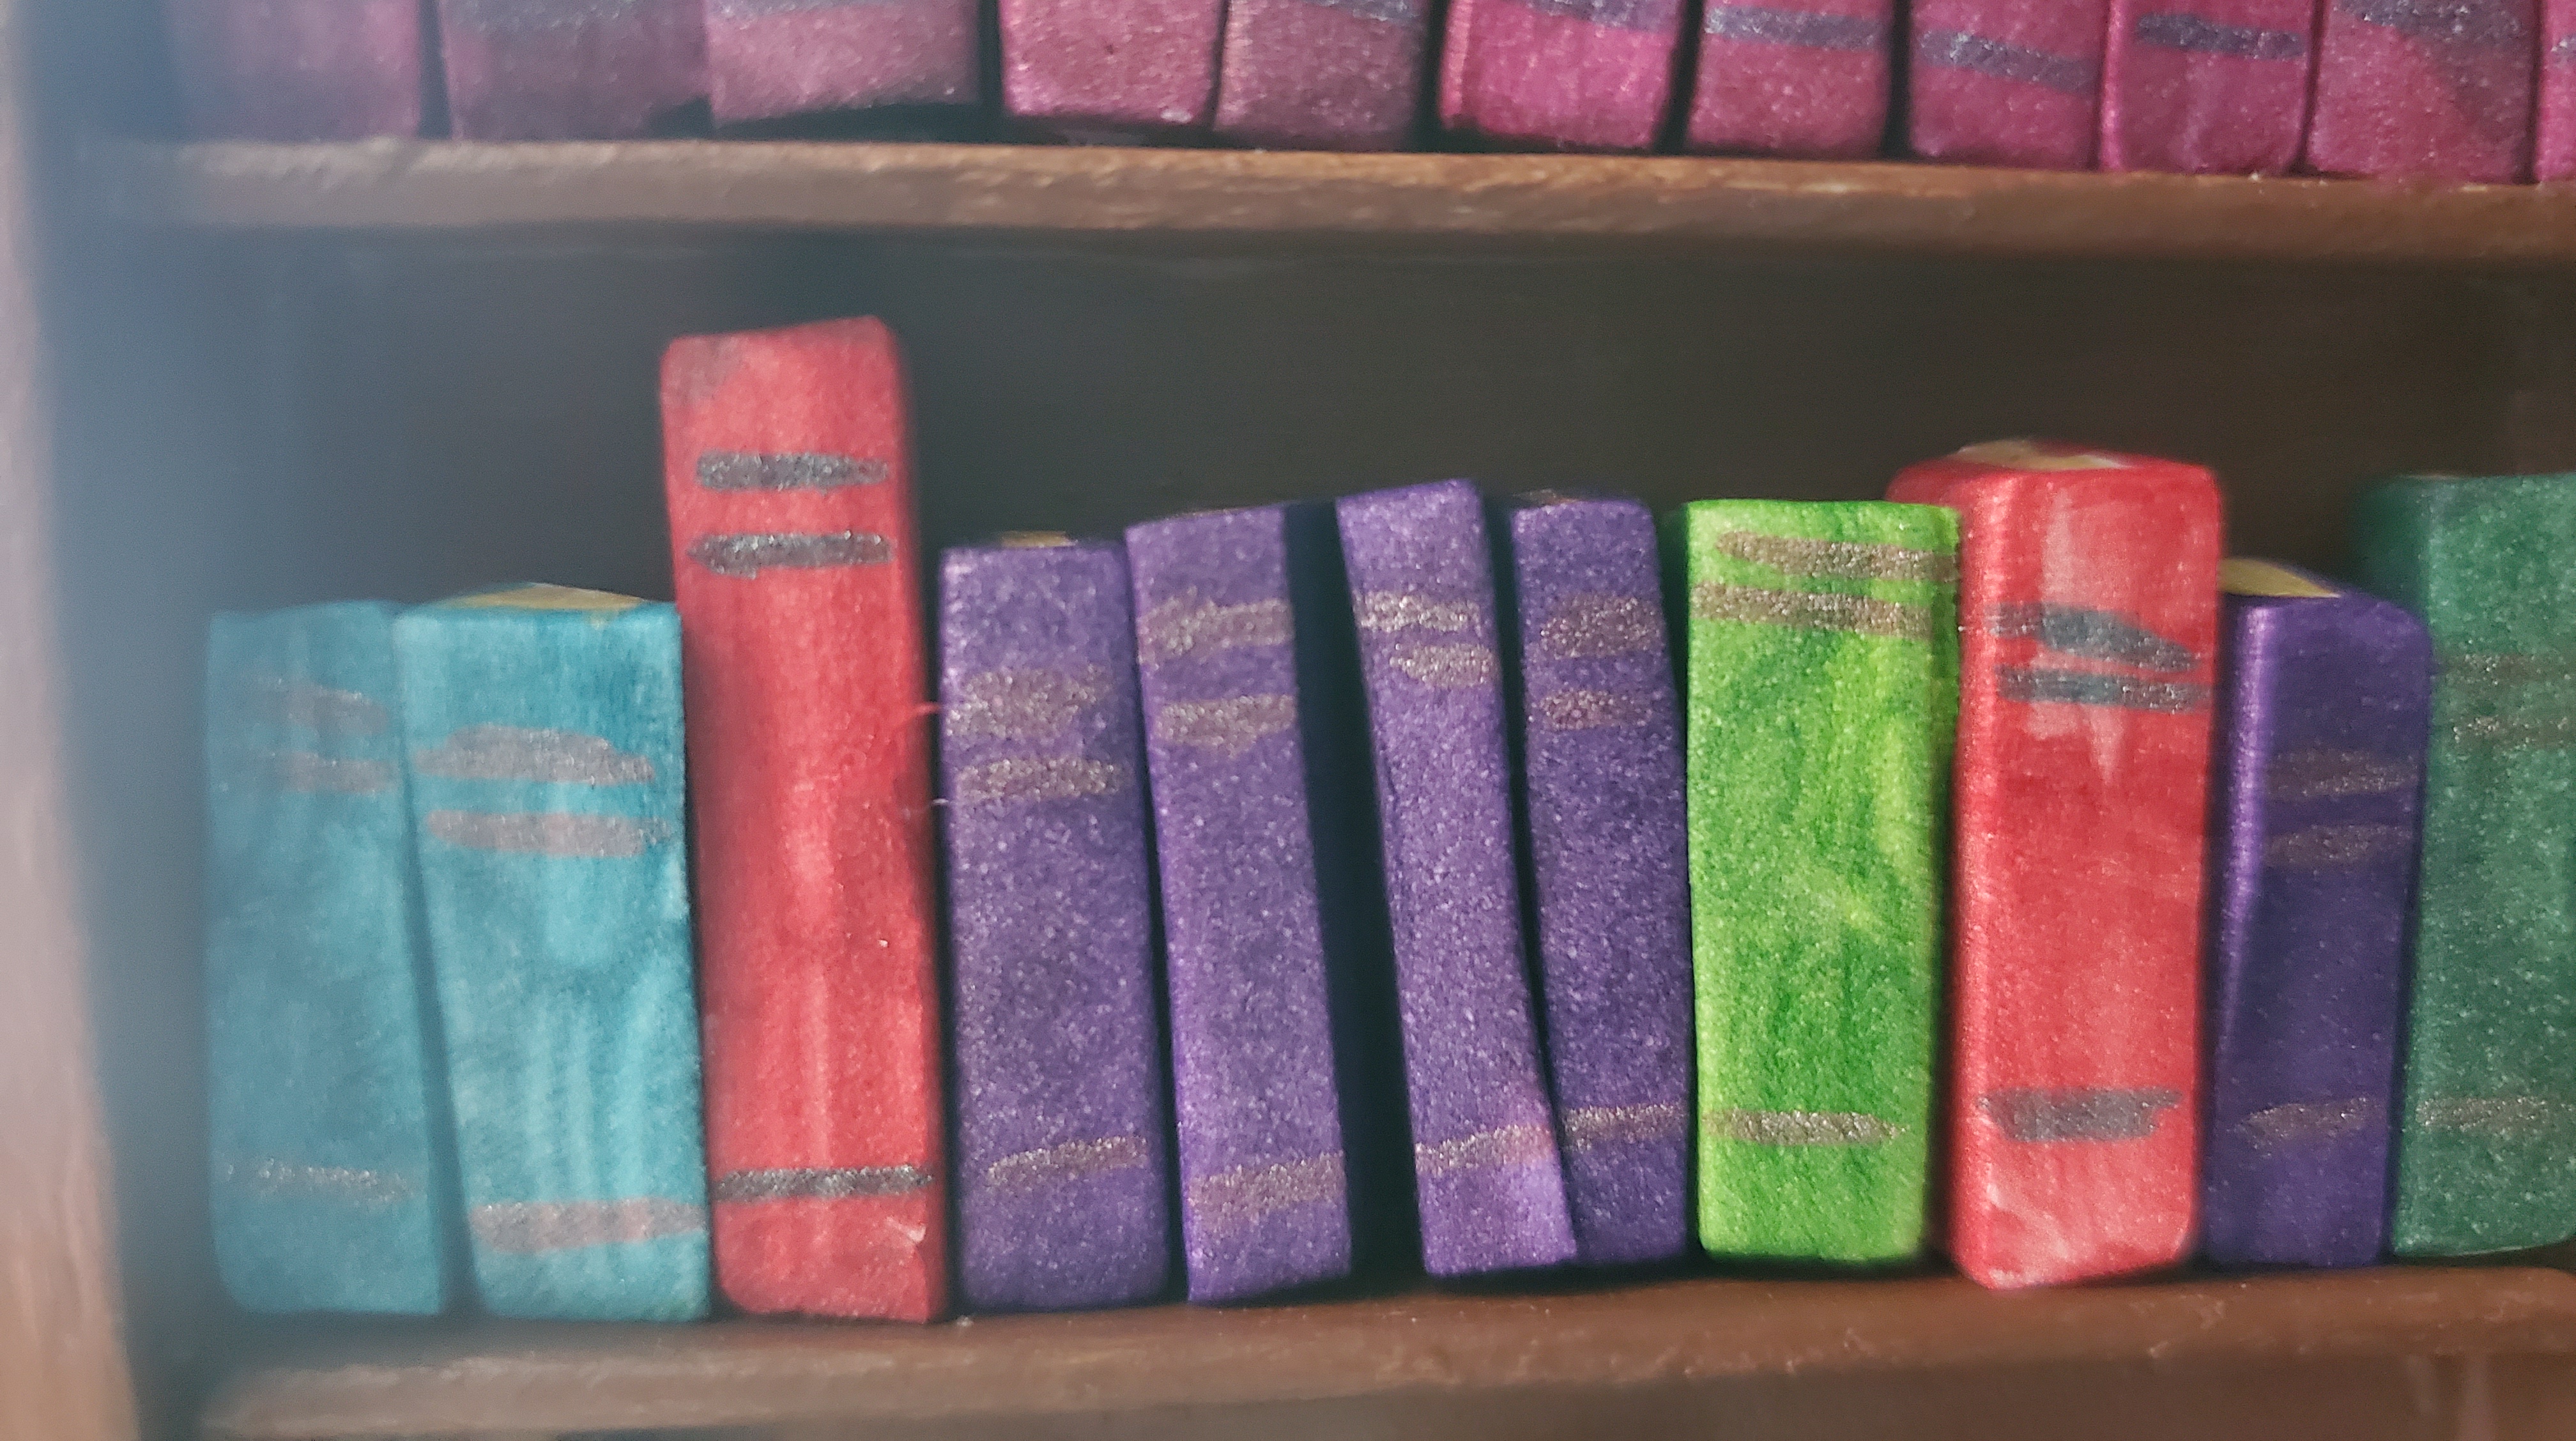
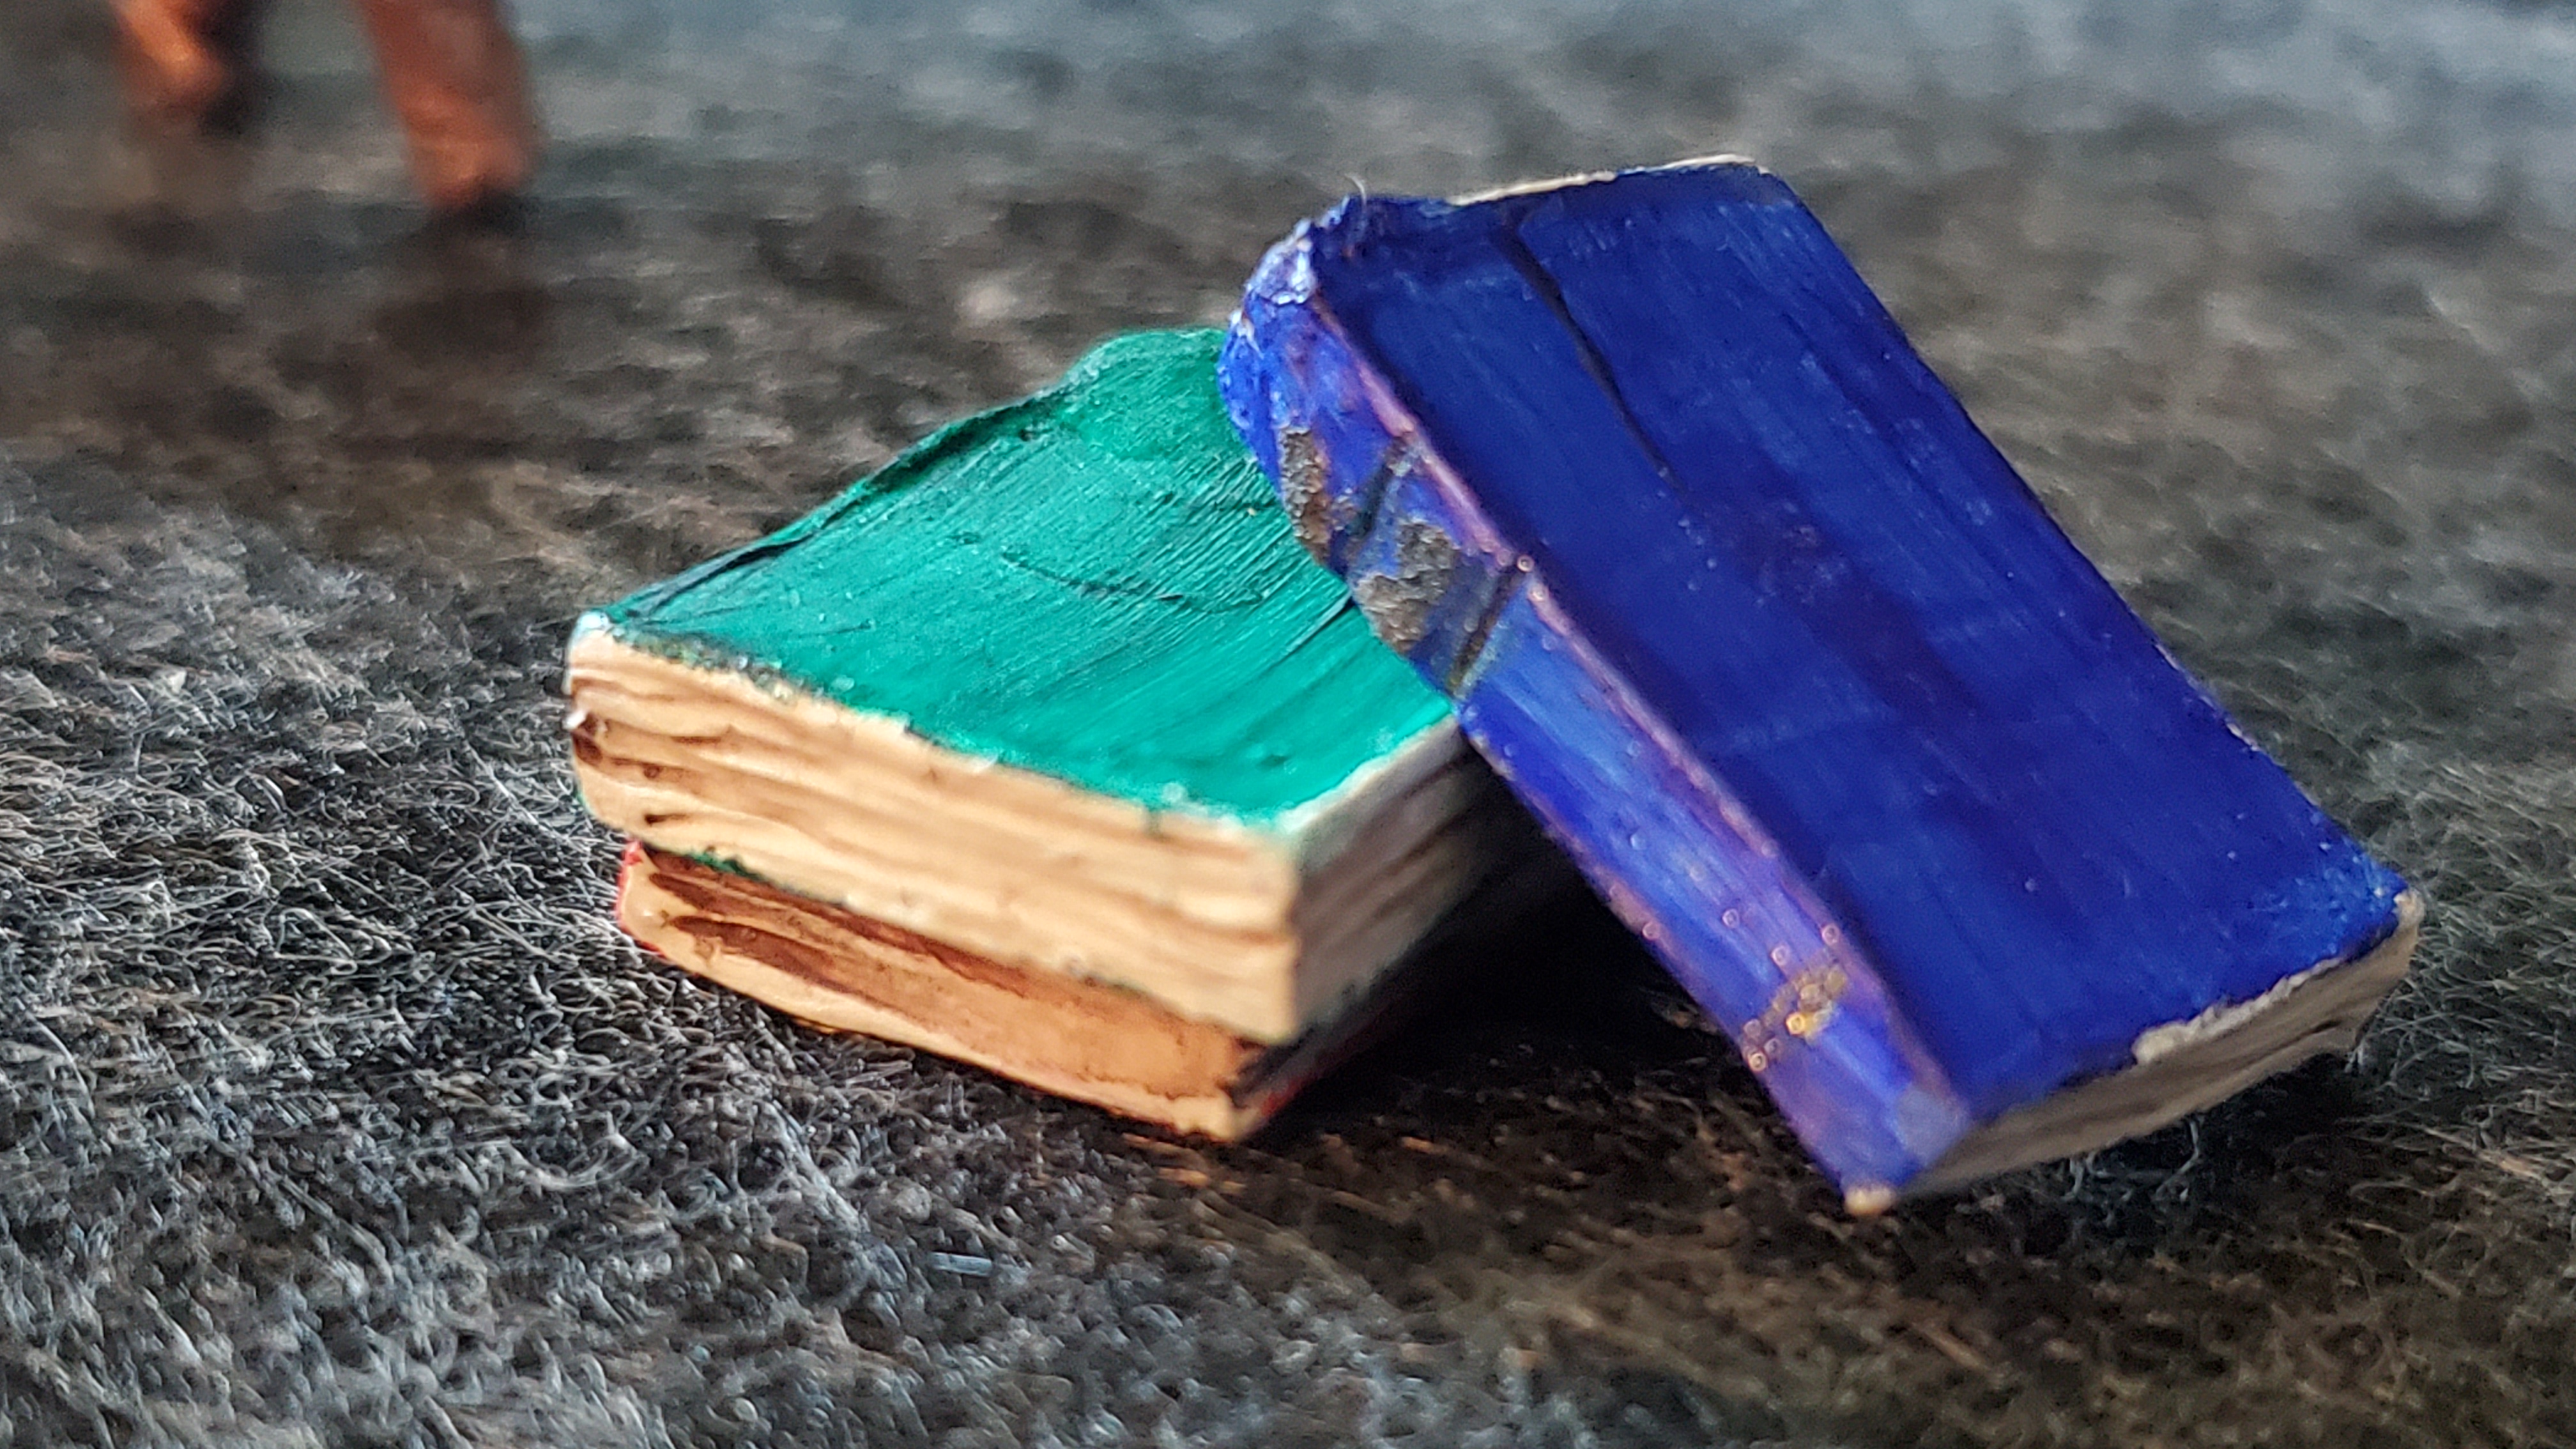
The bookshelves were made with thick and thin foam as well. The outside panels are made from the thick foam and the shelves and back are made from the thin. I painted them and aged them to look like wood. The books are made from individually cut pieces of the thick foam and coloured on 3 sides using sharpie markers. Then I used a combination of fine gold or black pen to make the lines across the back. I coloured the tops of the books (where the pages would be) with beige or gold marker.

Furniture and Accessories
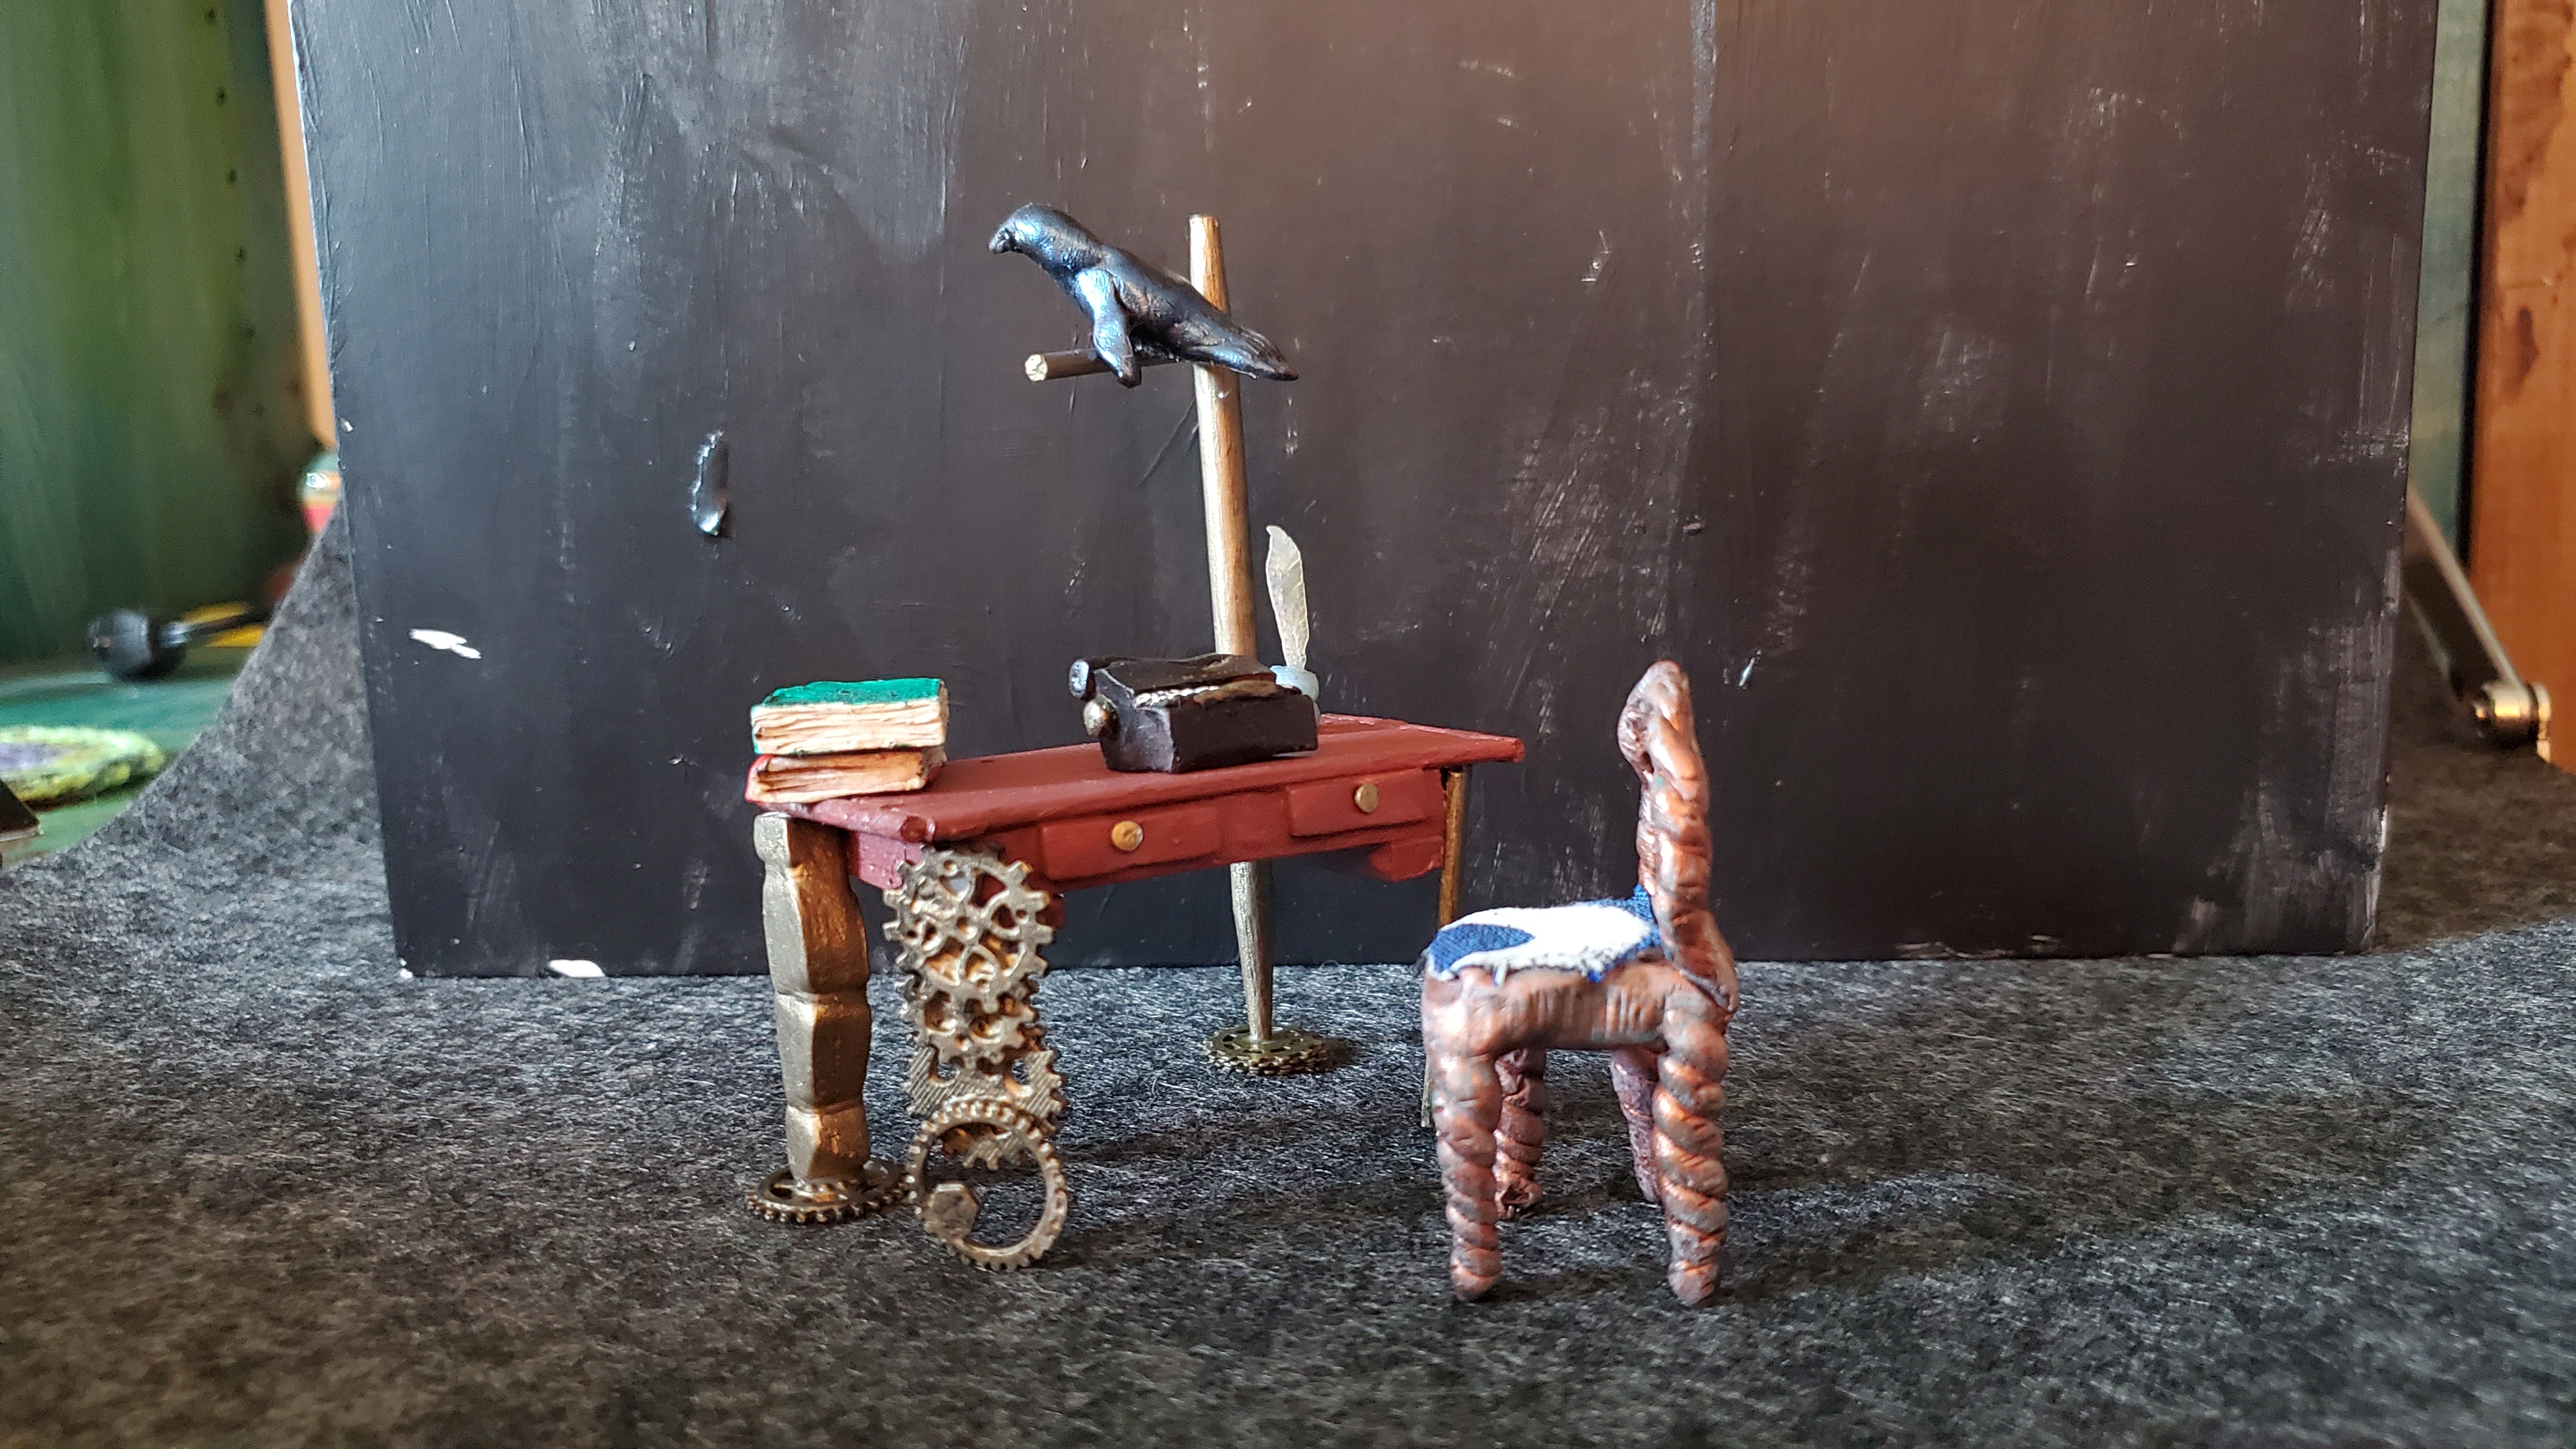
Most of the furniture, lighting fixtures, and accessories were made from polymer clay and the metal gears I got from Michaels in the jewellery department.
The chair is polymer clay with a metal gear piece in the back and fabric for the seat cover. The logs for the fireplace are polymer clay and the metal piece the are resting on is made from pieces from the gear package. The books that go on the desk and the fireplace mantle are polymer clay and paint. The desk is a combination of wood for the top, with legs made of foam, wood skewer, and metal gears. The crow, typewriter and inkwell are polymer clay.
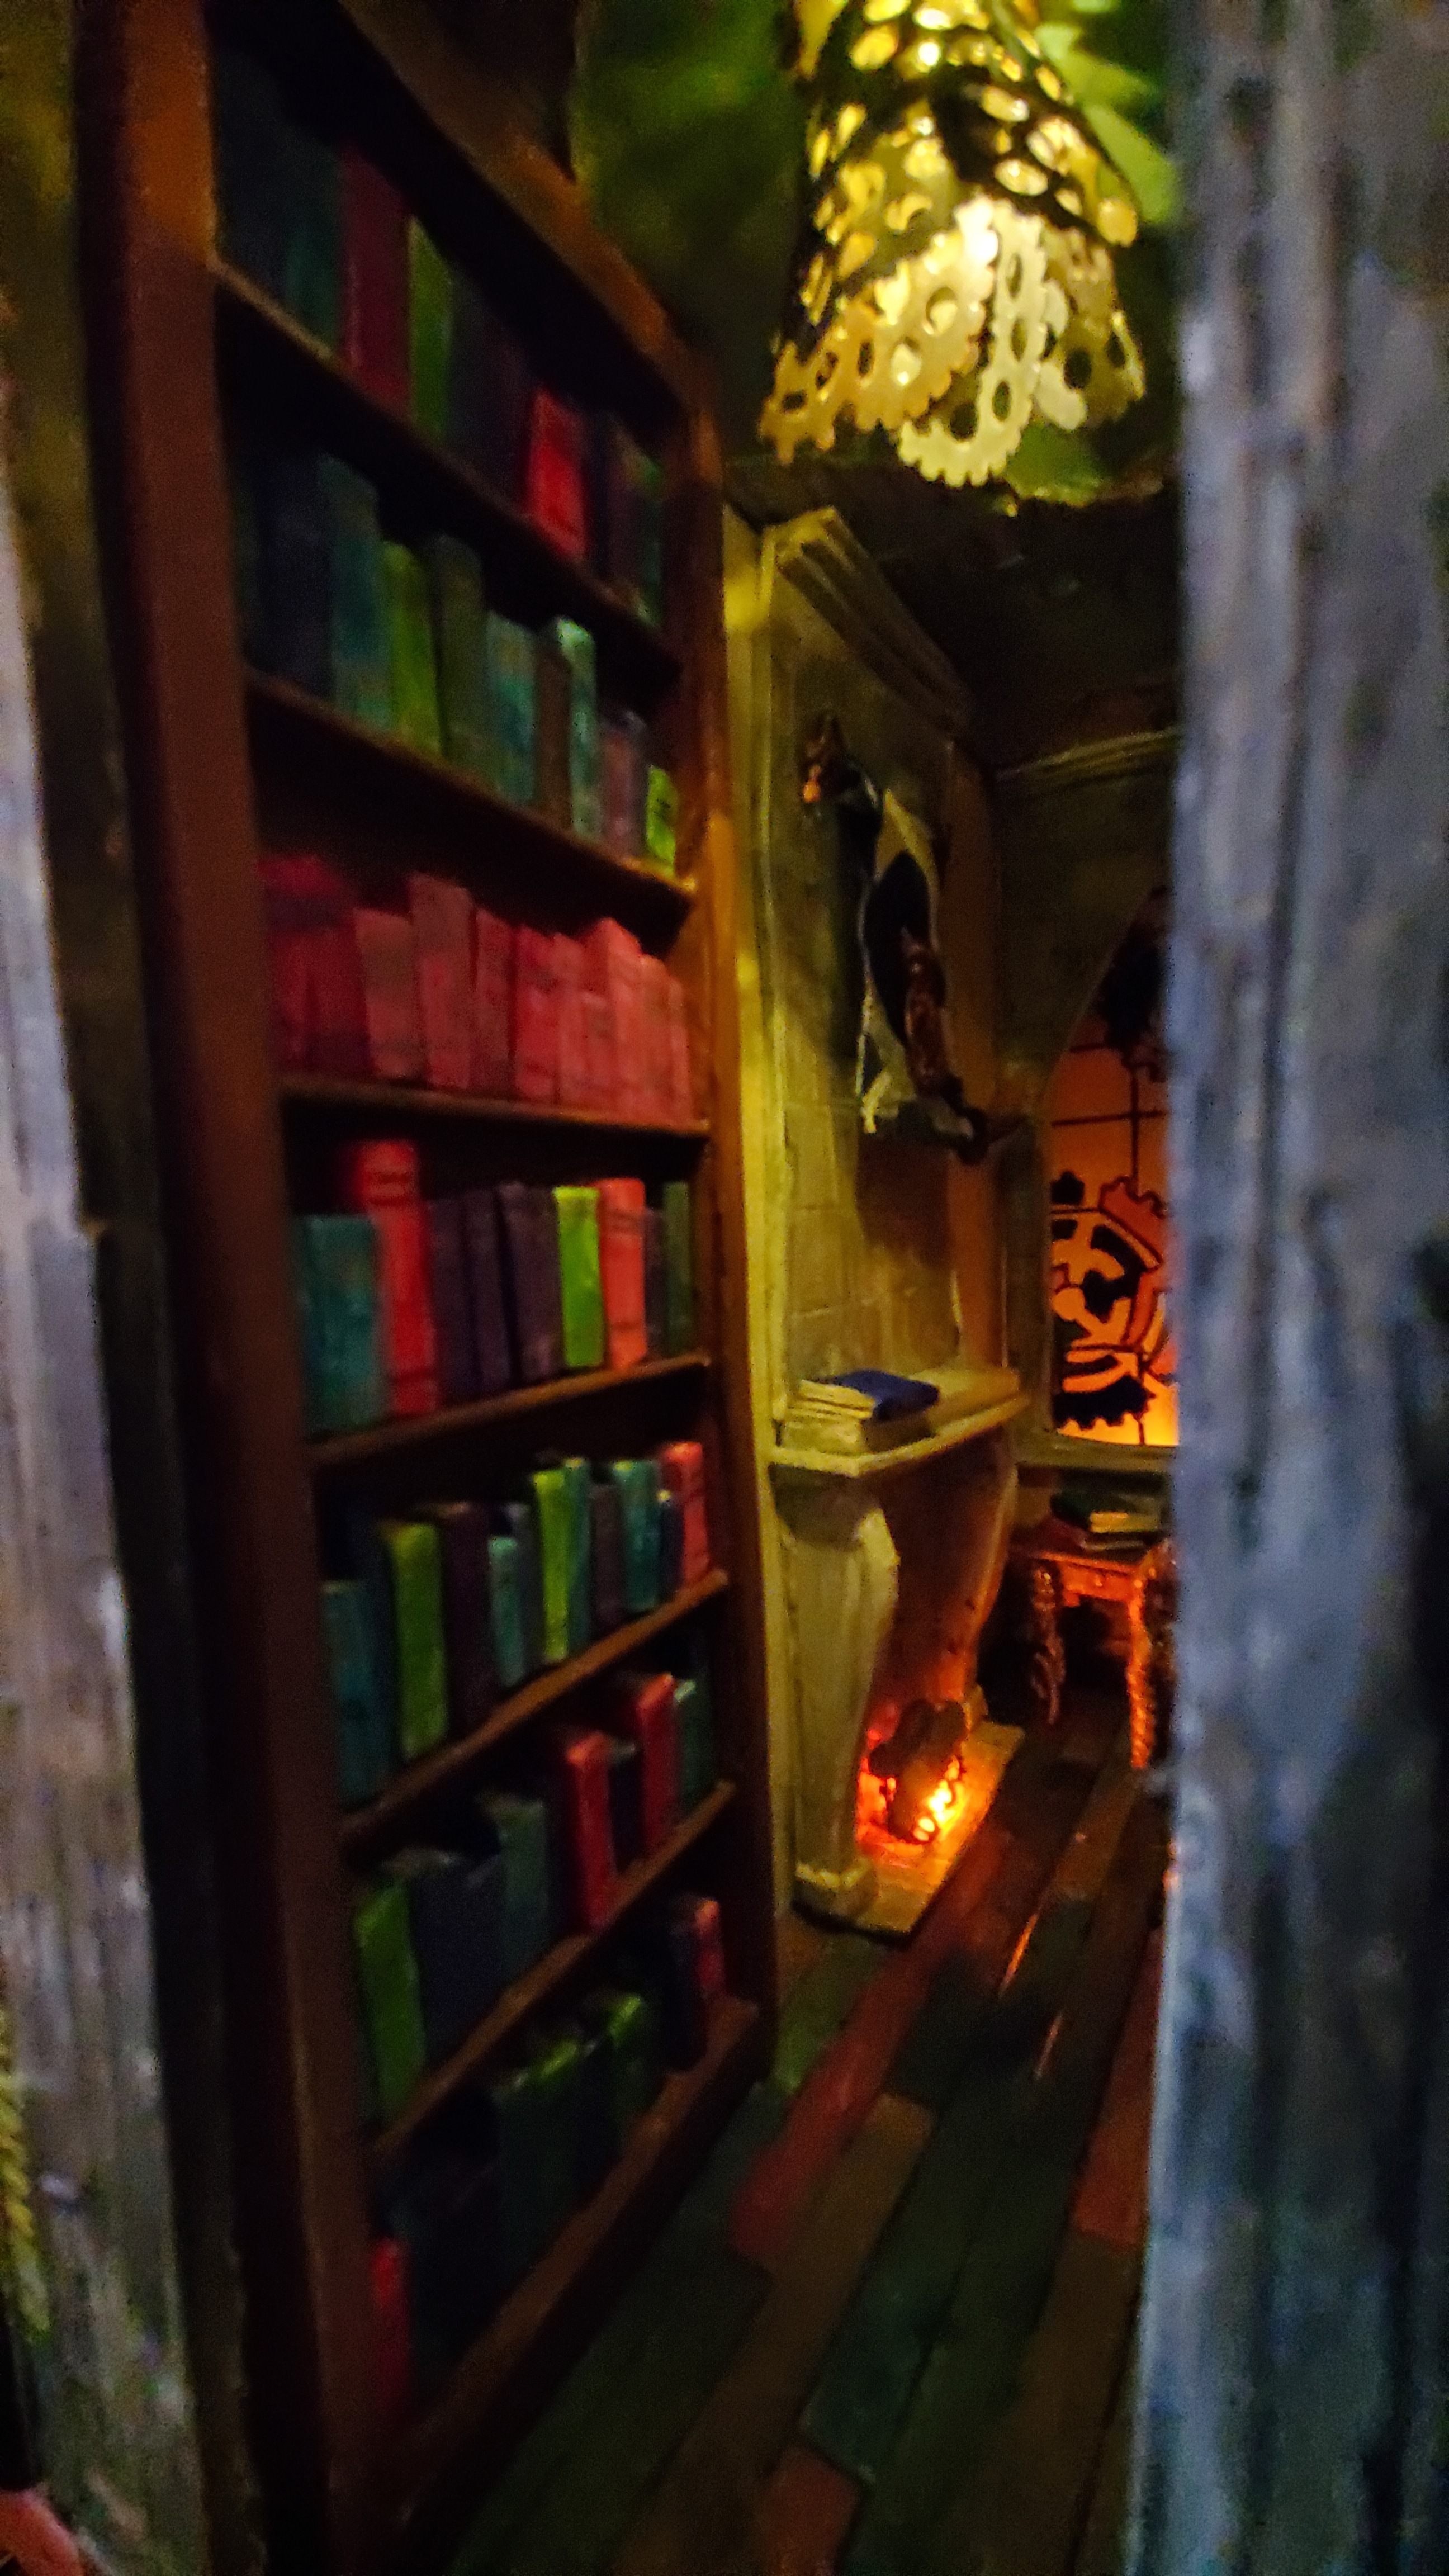
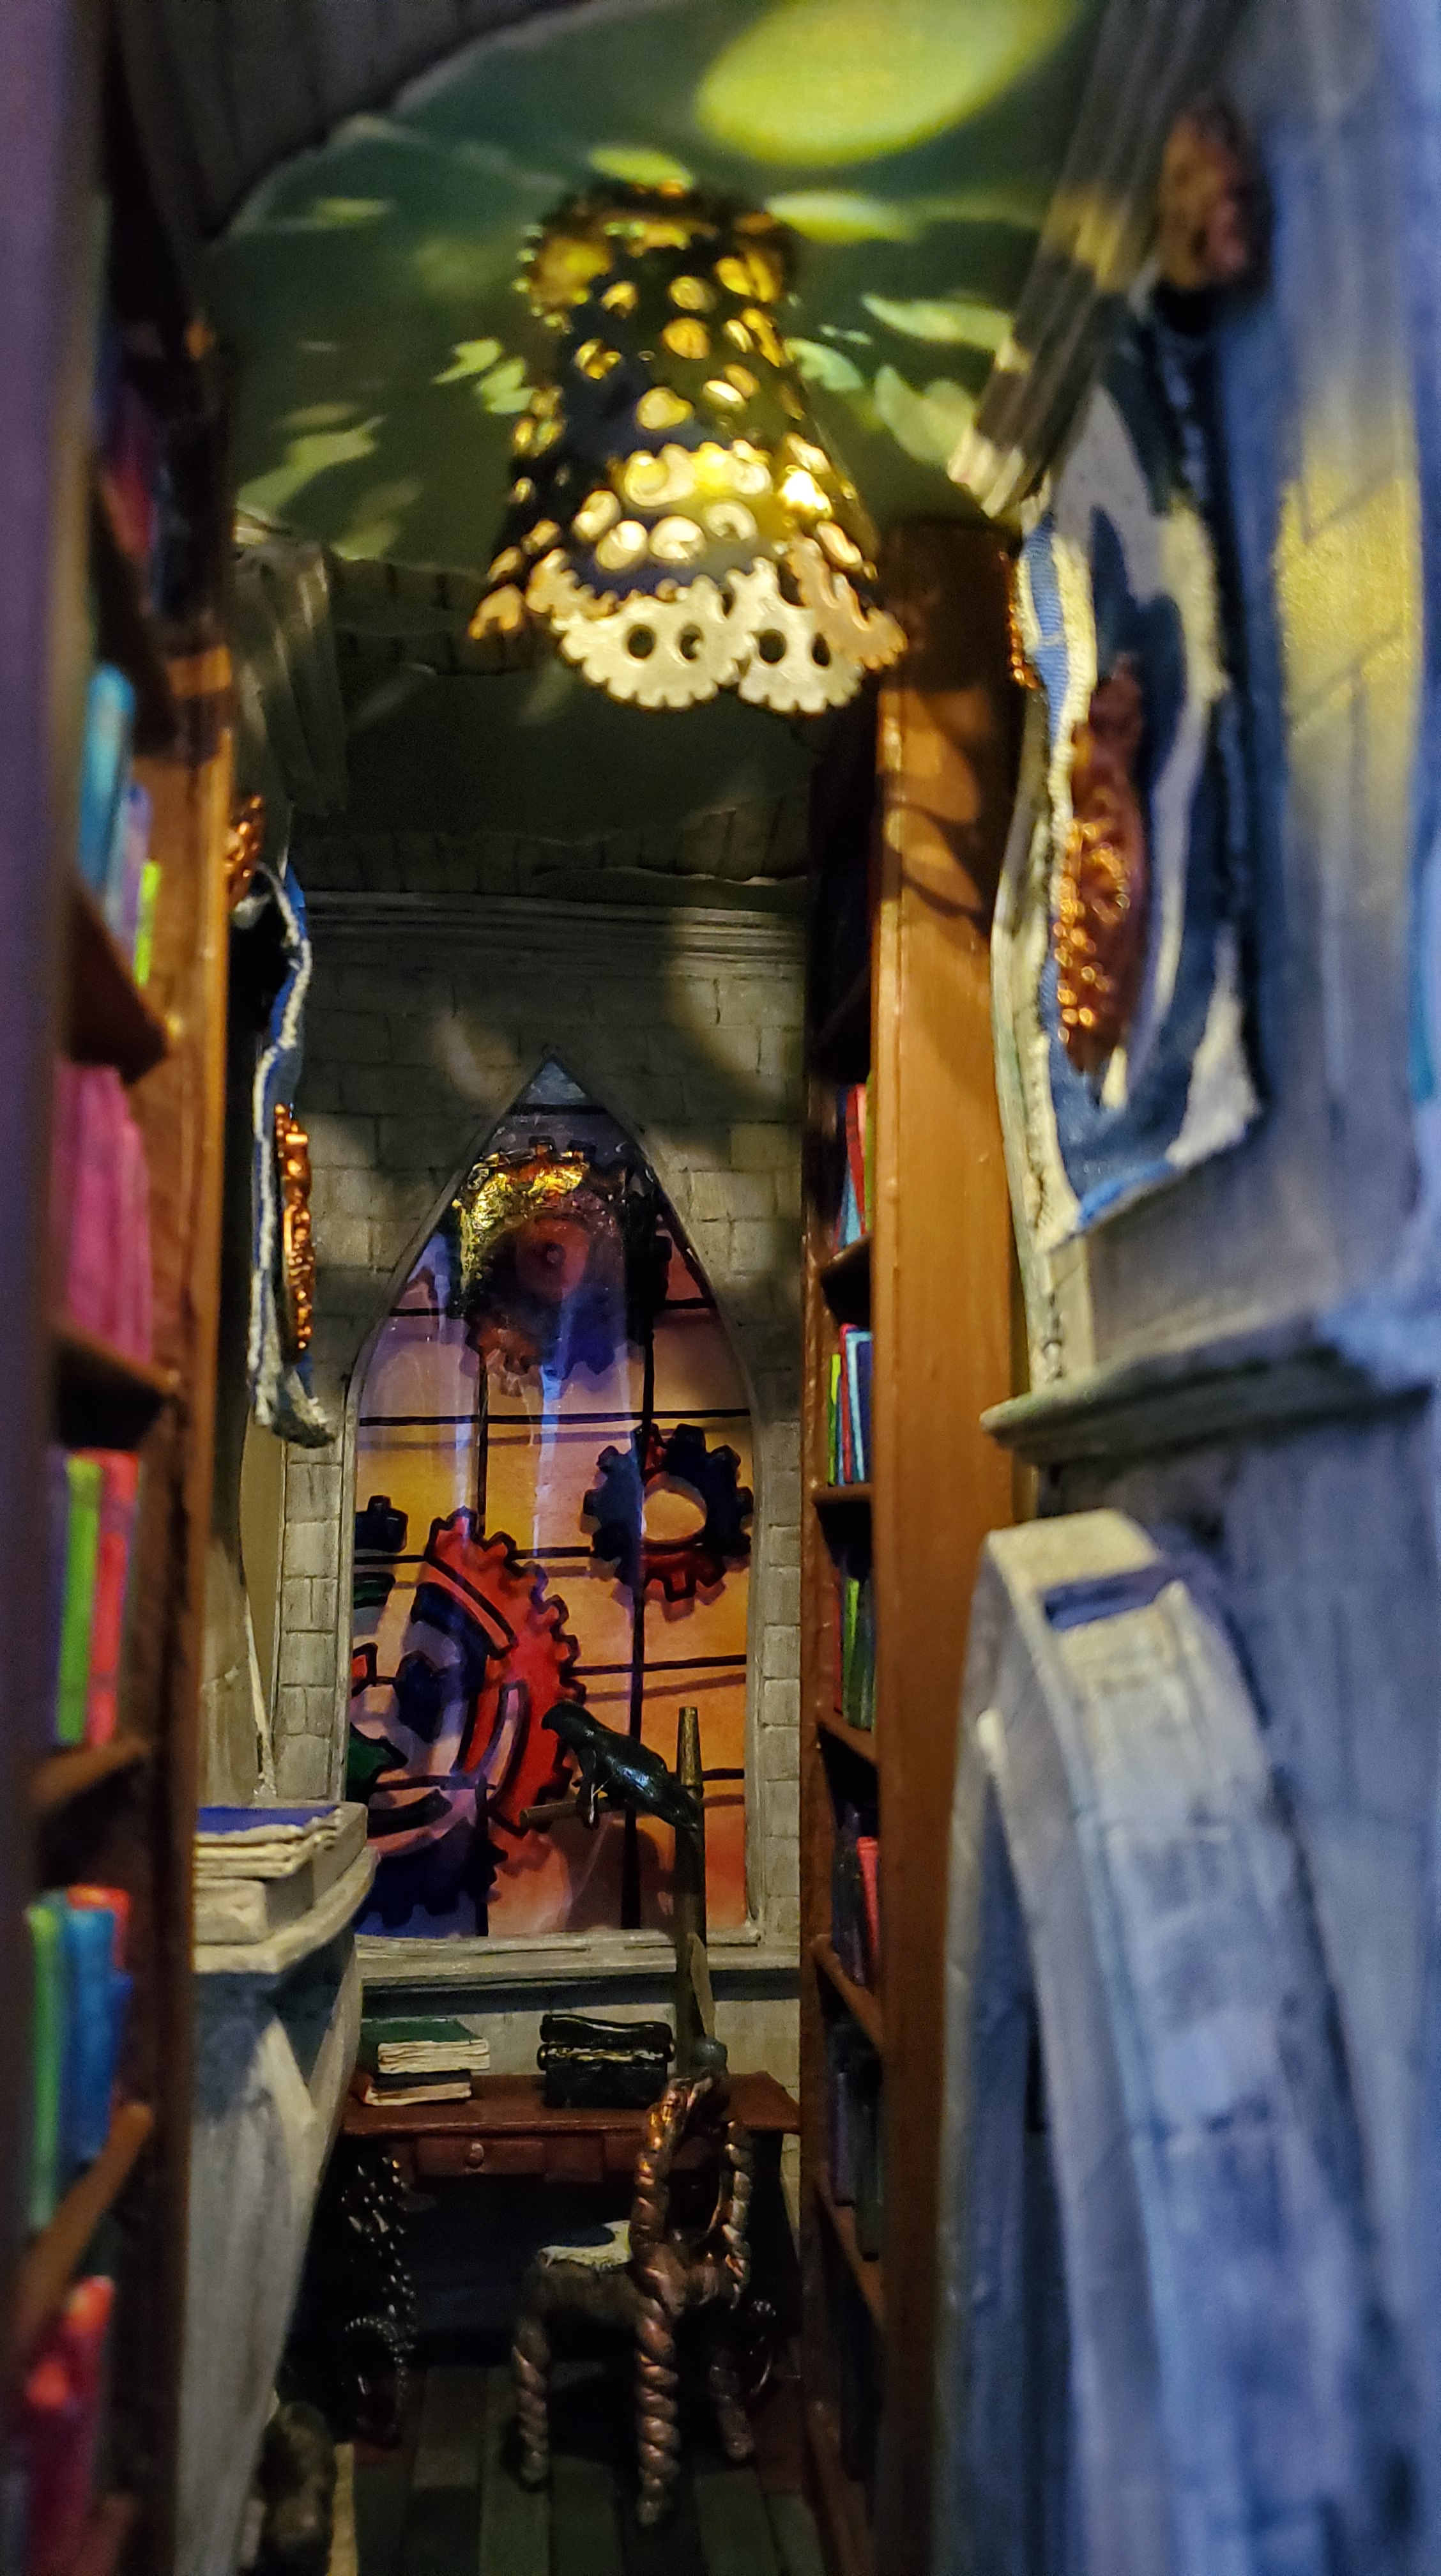
The light sconces on the wall are polymer clay with translucent polymer clay on the top (with a bit of orange ink added in) and gear parts. The main chandelier on top is made of curved gear pieces.


Stained glass window and view
The back window is made from vinyl from a fabric store. I tried other types of acetate but the colours looked dull on them. I used bright sharpie markers for the stained glass. The back wall is the cardboard I cut from the side of the box that I trimmed down a bit. I covered it with foam so I could have the same stone look as the arch and fireplace and added trim and a chair rail before using the stone painting technique again. Behind the window is a watercolour painting that is just layers of orange and yellow to try and make it look like a sunset.

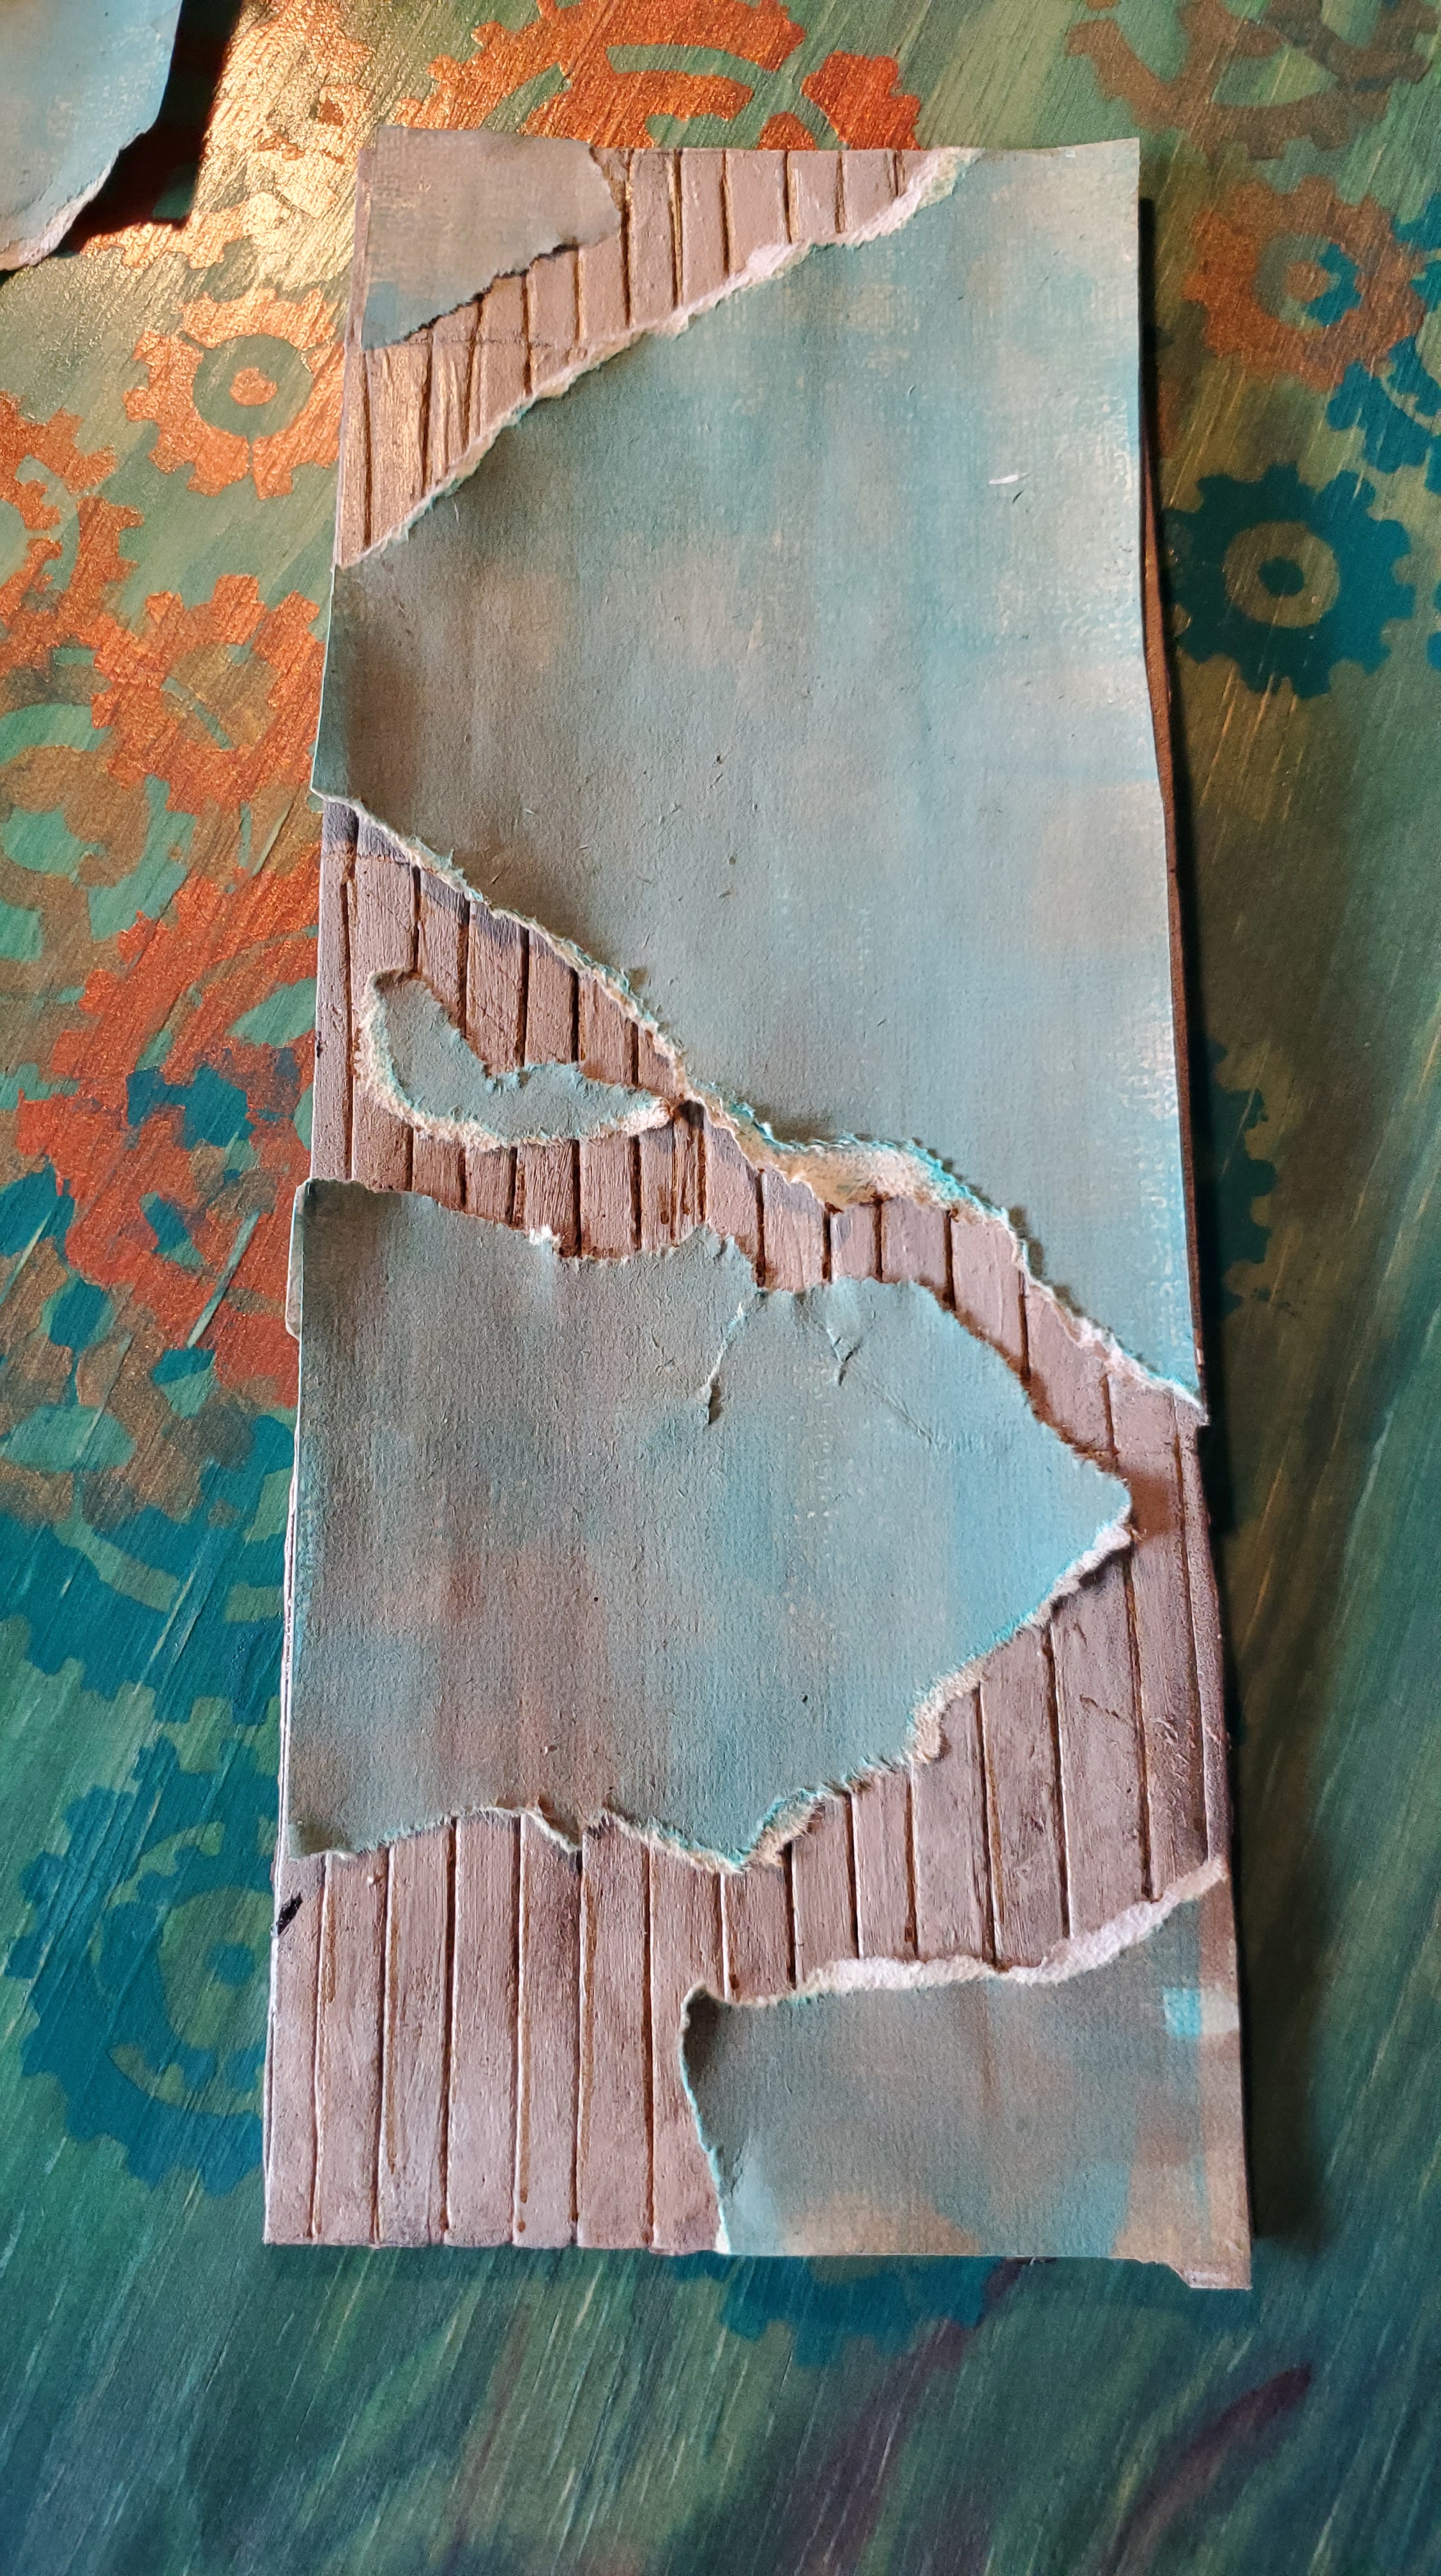
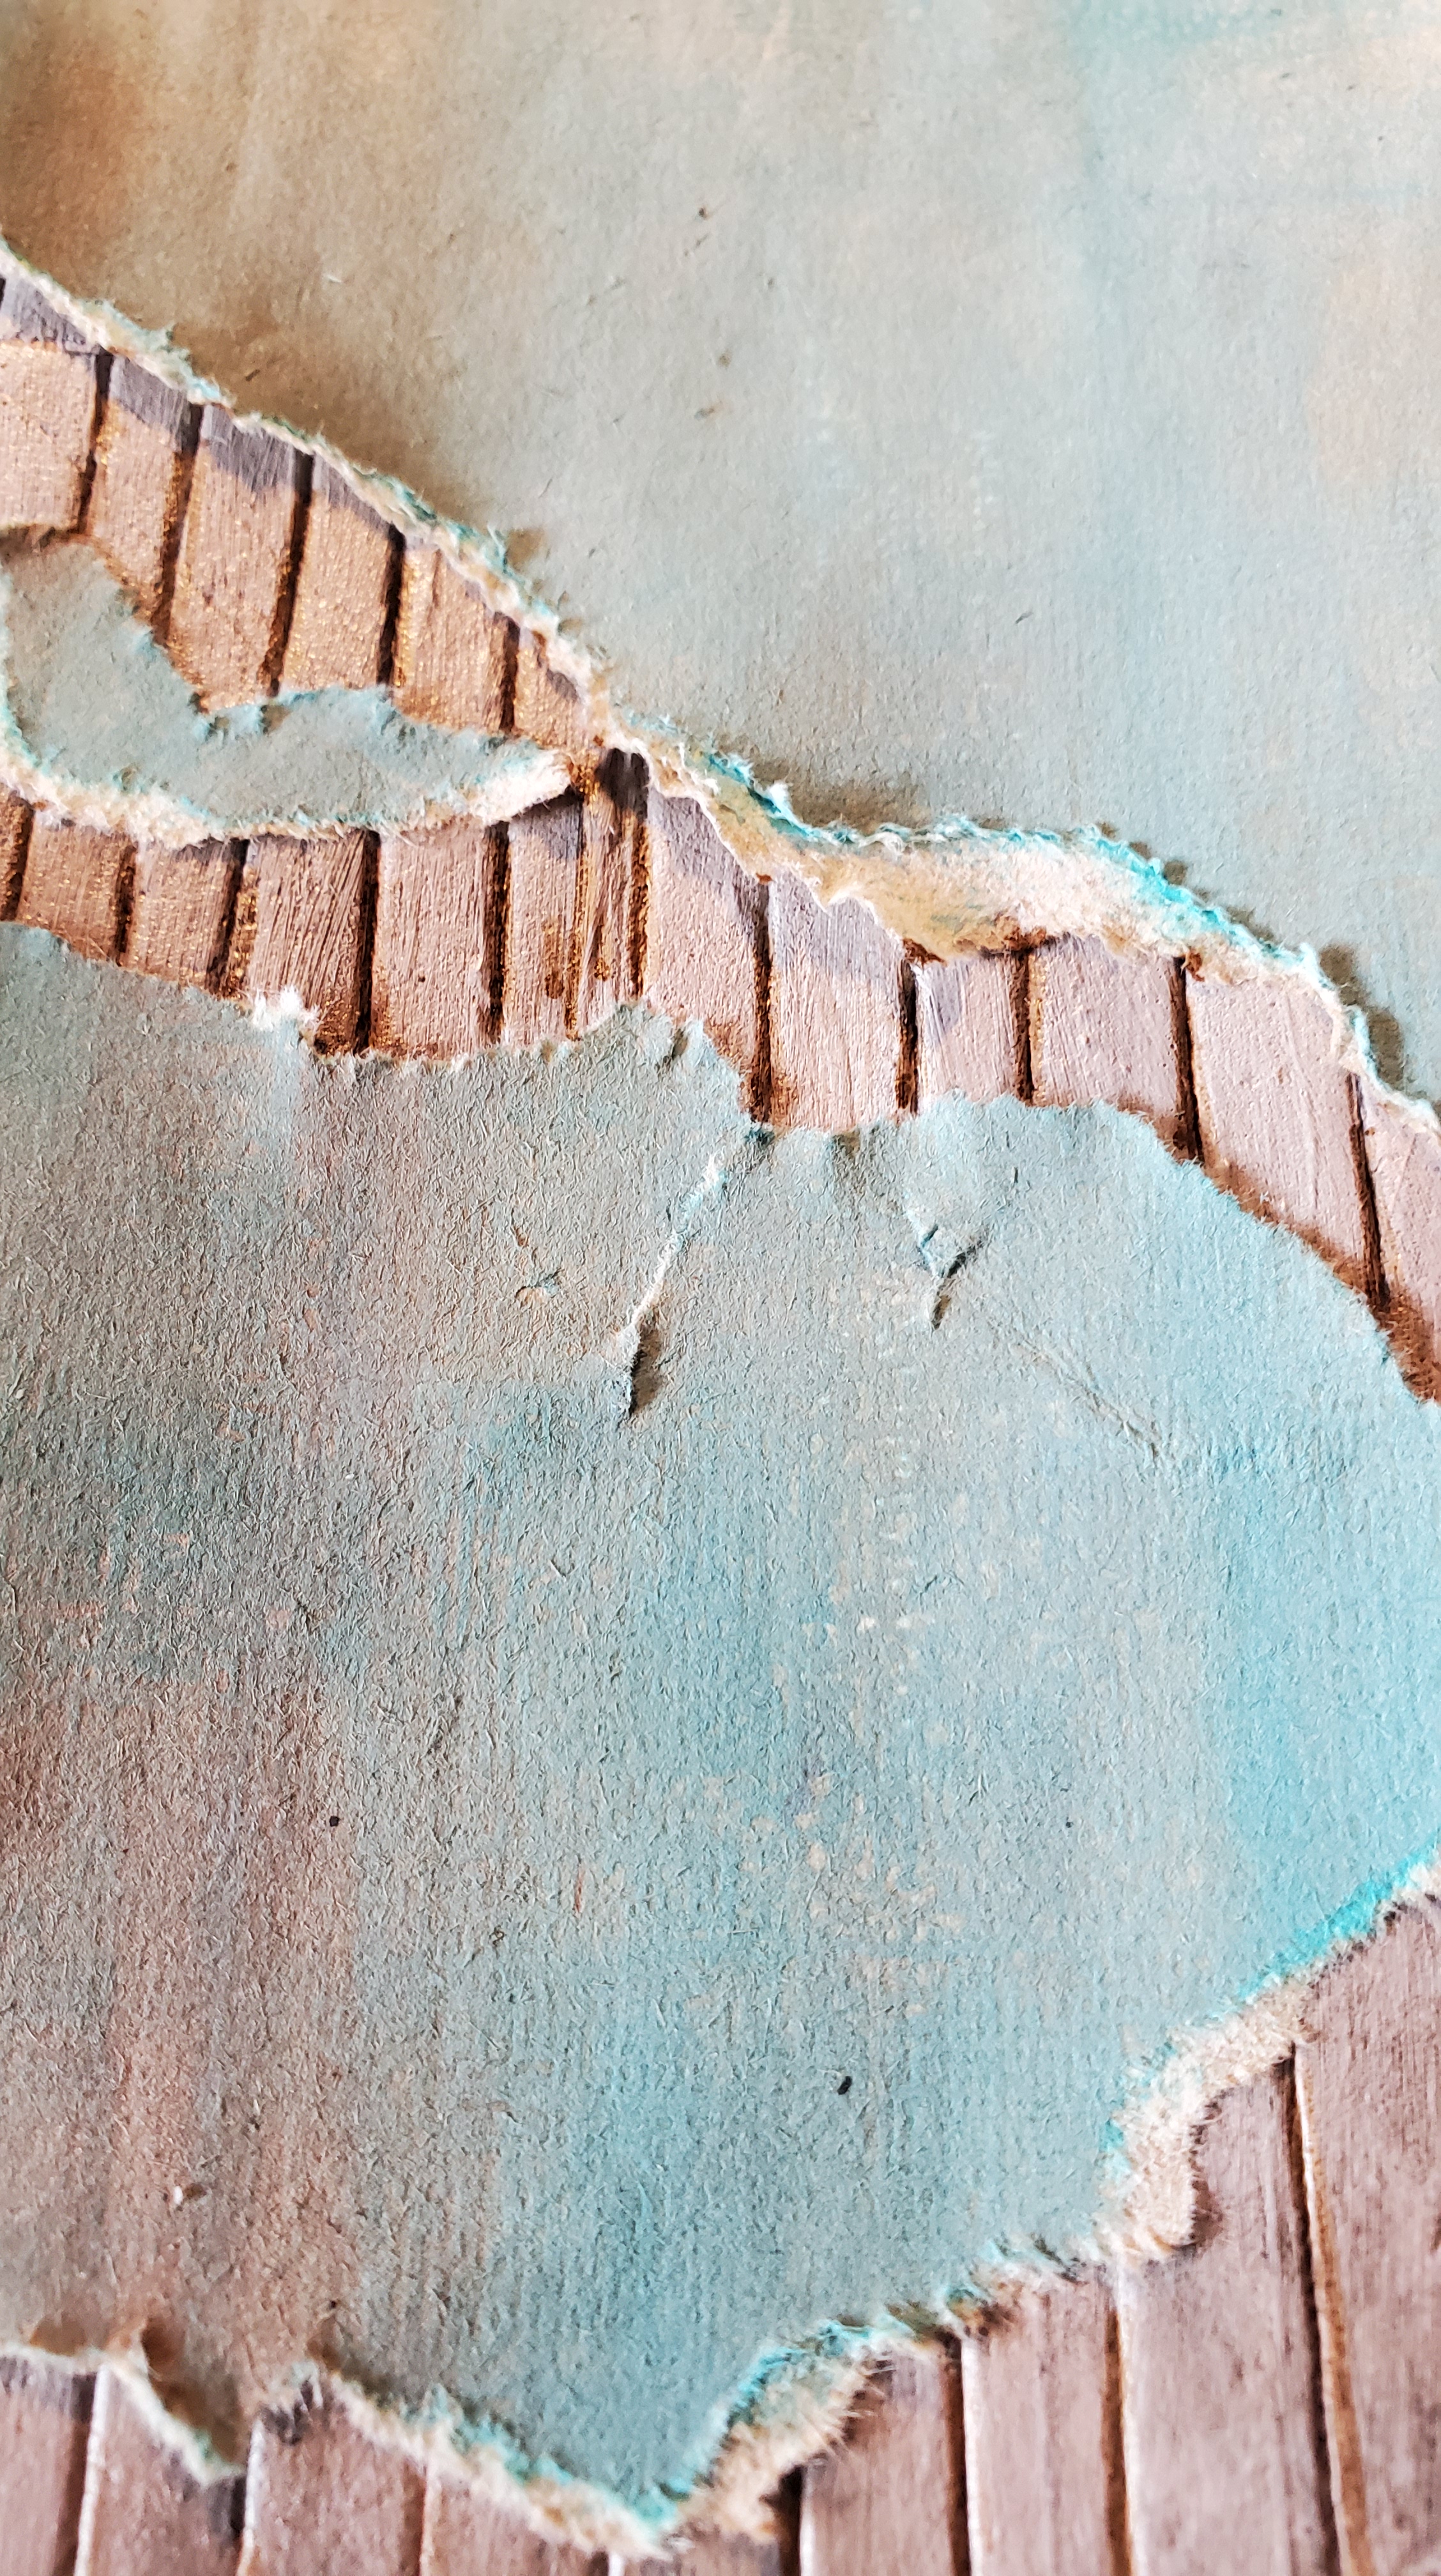
Ceiling
I wanted the ceiling to look a bit like it was falling apart and boards could be seen where the plaster had fallen. I used the thin foam again and dug really deeply with a pen to make deep wide grooves between the boards and roughed it up a lot with a ball of aluminum foil. I gave it a light wash of watered down brown paint. I then got watercolour paper and added layers of colour by taking distress ink pads and just rubbing the whole pad along the paper. I then dampened the paper and ripped it so it would show the edges. and then aged it. When I showed the picture on Instagram a friend told me she was sorry to see I was having ceiling troubles. Best compliment ever!

Walls
The walls were textured scrapbook paper that I rubbed a yellowish distress inkpad all over. I wanted them to look like old plaster.
Lights
The lights were the best and most frustrating part of this project and I learned a lot from them. The staff at Evan Designs are fantastic and really helpful. I’ll be making a large order soon for future projects. The nightmare with the US Postal Service this summer was very frustrating and it took a long time for the lights to arrive but that wasn’t the shipper’s fault – it was the shut down of the postal service.
The wires on the lights are very fine so the most important thing I learned is to not keep messing with them and connecting and disconnecting them. Just stop!
Now that I’ve had the lights I would do things a little differently. First, if I was going to keep opening the side of the box to work on it after placing the lights I wouldn’t put lights on that wall that moves. I had one wall sconce and the fireplace on that wall and they kept becoming disconnected, which kind of makes sense of you think ahead! If you do put lights on that wall then put them all on one switch.
The flickering lights all need to be on the same switch (or with other flickering lights – they can’t go with steady lights). When you put them all on one switch they will flicker at the same time. I would put them on a few different switches. It will mean a bit more expense and more switches to deal with but the randomness of the flickering would be nice.
I had 3 nano sized lights in the chandelier and they worked well. The fireplace that flickers is awesome and I used a small amount of silicone sealant to make a blob (spread it on a piece of glass and let it dry, then peel off) that wraps around them so they aren’t so bright.
I used a white nano sized light and an orange pico sized light in the back to light the sunset. I will be replacing the orange with a bigger one as it wasn’t big enough.
I started with only 2 switches in the back. One for the flickering lights and one for the steady lights. Doing it again I would use more switches based on the location of the light in the scene so I wasn’t stretching wires all over the place. The wires are glued in beneath the ceiling and behind the wallpaper and I’ll be removing them soon to redo my lighting.
The finished project
I love my book nook! There are definitely things I would do differently, like plan the lighting better and alter the layout a bit so it was easier to see things at the back, but overall I love it! I painted the outside black with acrylic paint that is already scratching off so I would definitely use some sort of scrapbook paper or something to cover the pattern on the box.
I made a front piece to glue on so the edges would be really clean and I would probably plan that better on the next one as well. I would also put some thought into scale early on. I realized I hadn’t done that and needed to know how big to make things so I created a little stick person who was the right size for this room, but it’s definitely not a standard scale. You can see my little stick person in some of the photos.
Other than that I am really pleased with my first attempt!


Next one(s) – the addiction continues
I have already started my next nook and I have plans for a couple of others as well as a condo building of rooms that pay homage to different murder mystery authors. I’m hoping this isn’t an indication of how long COVID is going to last.

Wow A lot work, I better get started🤭
You did a Wonderful job and your first! Just Wow. I think I better get started soon if I wanna be done by January as not to rush. Thank you again
LikeLiked by 1 person
You’ve got this! Just break it down into parts
LikeLike