Not too long ago I made a shirt with the image of labyrinth appliqued on the front. I’m not the best at sewing but I’ve been learning hand sewing techniques from the book Alabama Studio Sewing + Design by Natalie Chanin of the Alambama Chanin studio. This book and the studio promote handmade work using organic materials and slow, thoughtful craftsmanship.

This philosophy blends well with the reason I sew, knit, paint furniture, or even make risotto. I find I need to have creative projects to do with my hands when I’m writing, and even when I’m not writing. Working with my hands uses a different part of my mind and energy that takes the pressure off of the ‘writer’ part of my brain. I look at ideas like a big bag of gum balls or jellybeans. The red one in the middle is the one I need, the idea I’ve been searching for, the answer to a difficult plotting problem, or even a brand new project I haven’t even thought of yet.
The trick is, all of those gumballs or ideas get dumped into a funnel, or a gumball machine. In order to get to that red gumball, all the other ones, have to move through the funnel first. Sometimes they get jammed. Putting pressure on them only jams them further. By working on something with my hands, like sewing, knitting, or cooking, it takes the pressure off and they all move a little here and a little there, wiggling against each other and eventually unjamming and starting the flow again. Once the flow starts happening the red one comes through easily. If, however, I kept applying pressure to try and force them out, they just get more stuck. This is the best way I can describe the writing process in my head. I need projects to do with hands in order for other projects in my head to wiggle themselves free.
Now, back to my shirt.
I love labyrinths. As opposed to a maze which is filled with dead ends, a labyrinth has only one path to the centre, but it twists back and forth on itself so you can’t see the route you’ll take to the centre, you just have to trust you’ll get there if you just stay on the path. There are labyrinths around the world that people walk as a form of meditation. There is even a society, The Labyrinth Society, that teaches labyrinth walking and even how to build them. Kamloops has a labyrinth on the path between Riverside and Pioneer Parks.
The most famous labyrinth is the one in built in the thirteenth century in the cathedral in Chartres, France.
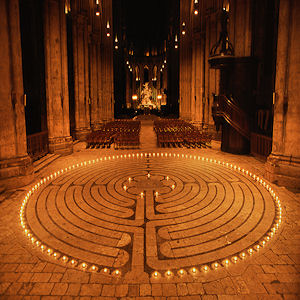
Chartres Labyrinth
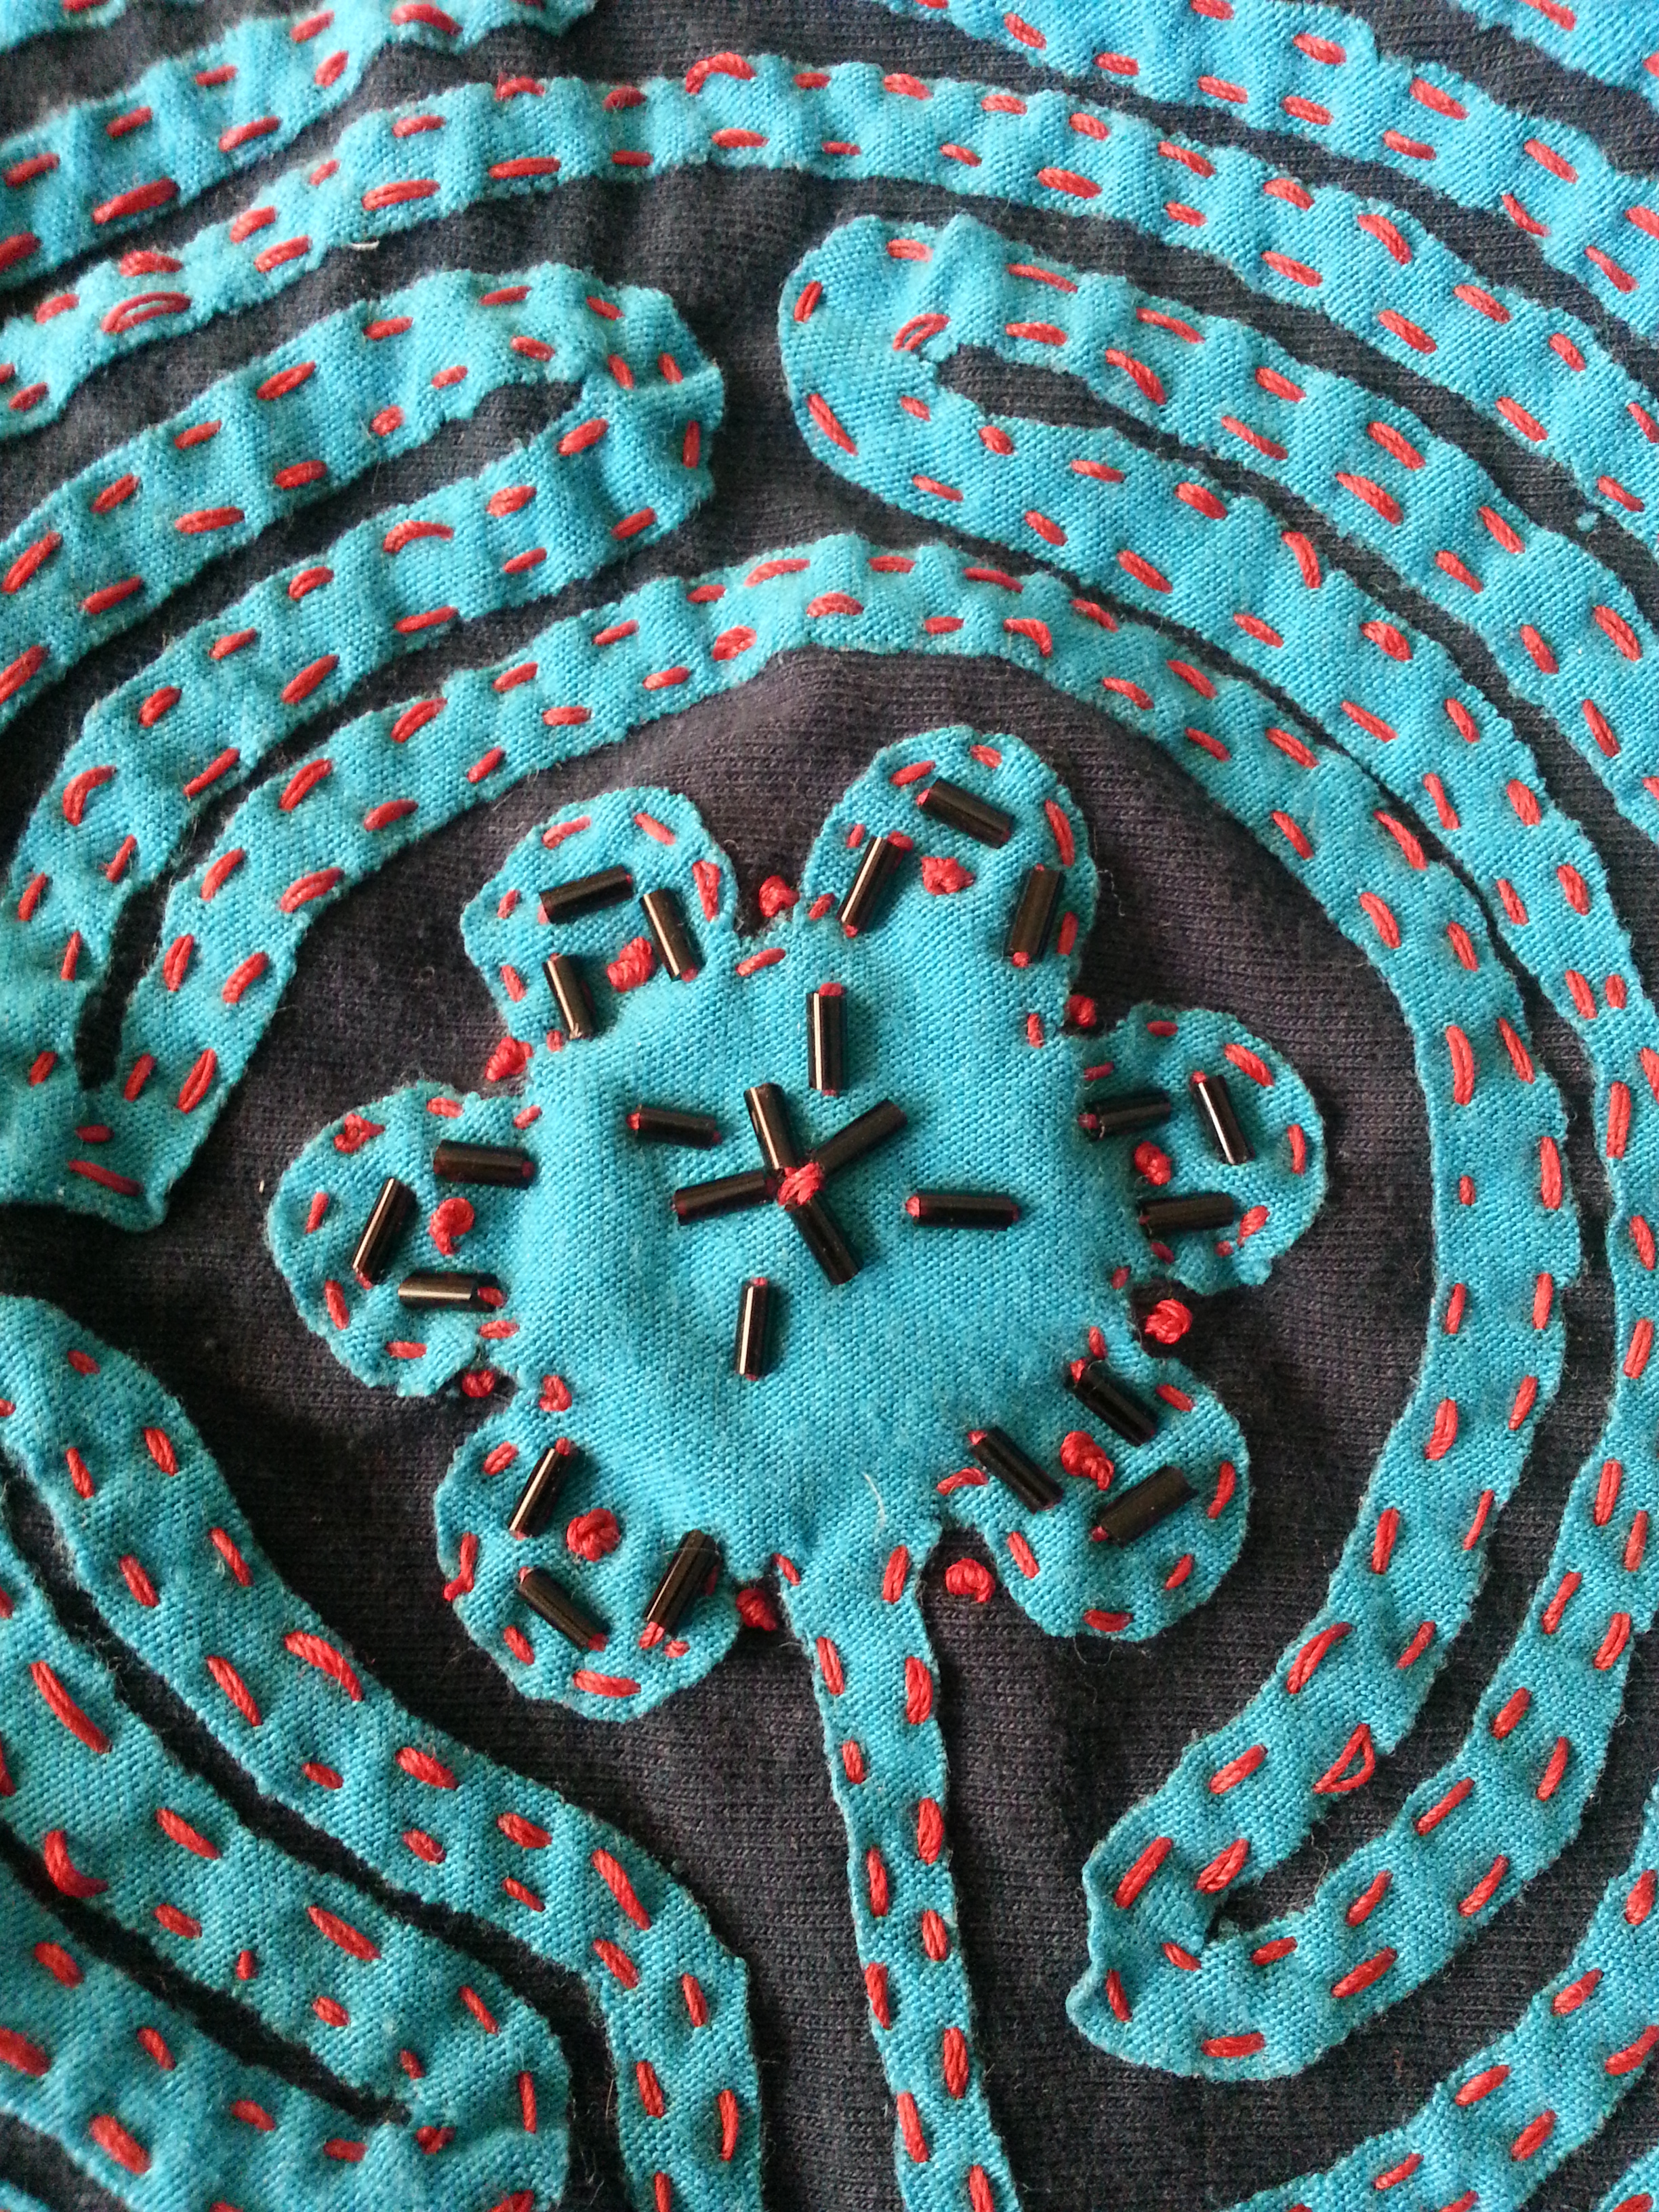
So I envisioned a navy blue sleeveless t-shirt with a turquoise labyrinth and red stitching on the front.
Although I’ve followed the Alabama Chanin instructions and done reverse applique a few times, where the image is underneath the front piece of fabric, this is the first time where I’ve done applique and placed the image on top of the front fabric.
Materials list:
1 m of navy jersey fabric
Small amount of turquoise fabric
Navy bugle beads
Approx. 4 spools or Coats Dual Duty Plus Craft and Button Thread (red)
Freezer paper for making shirt pattern
Plain paper for image
I started by making a pattern using a fitted stretch shirt I that I liked. I used one of my ski shirts.
I made the neck using the curve of a tank top I liked, and then adjusted the whole pattern to fit better as I went.
I printed the image of a Chartres Labyrinth from the Labyrinth Society Website and sized it so it fit the front of the shirt. The navy fabric I chose is standard jersey t-shirt material, but the turquoise is much thinner. If I was to do it again I would have attached some fusible interfacing to the back of it to make it stronger and easier to sew. Hindsight is wonderful! I did have a bit of a brain wave, though, and I used temporary spray adhesive and stuck the paper to the fabric so I could cut out the thin curvy line that loved to twist back and forth on itself with a bit more ease.
After I cut the image out it took quite a bit of effort to lay it flat on the shirt fabric. Once I got it there I used the spray adhesive again to stick the image to the shirt fabric. I started stitching the image down, peeling the paper away as I went.

Image adhered to the turquoise fabric and cut out with the paper left on.
Once I completed the stitching I added some decorative beading to the centre. I had planned to do a lot more but it seemed to be too much so I quit while I was ahead.

I planned to use red beads to make the markings that go around the outside of the labyrinth but I decided the beads I was going to use were a bit too big and they would have been out of proportion with the rest of the image. After some thought I looked back Alabama Studio Sewing +Design book and saw some of the embroidery techniques she was using. French knots popped out at me and they worked perfectly. As a bonus, I learned how to do a French knot!

Once the image was finished I sewed up the sides according to the instructions in the book. Chalking the seams was a very good idea because I can’t even walk a straight line, never mind sew one. I felled the seams as well which makes it look really nice, and it’s definitely not going to cause a wardrobe malfunction! Felling is when you take the seam (or the part where the two pieces come together and fold them back on the material and sew a second seam.

Next came the binding around the arms and neck. Yet another opportunity to learn something knew as I’d never done binding before and never done Cretan stitch. I had to look on Youtube to see how the stitch really worked because the diagrams weren’t working for me. This is the video I used. I also used the stitch in a later project and had to Youtube it again because obviously this stuff doesn’t come naturally to me.
I left the bottom seam unfinished because I think it looks nice and it’s not going to unravel.
Overall, I am pleased! In the process I worked on a screenplay and had a lovely balance of creative energy happening in both projects.

